
Keep three bench zones distinct
Three schematic bench zones show a supported hot tool with an outside cable route, a workpiece held on a protected surface with a pressing aid, and a separate undisturbed cooling piece.
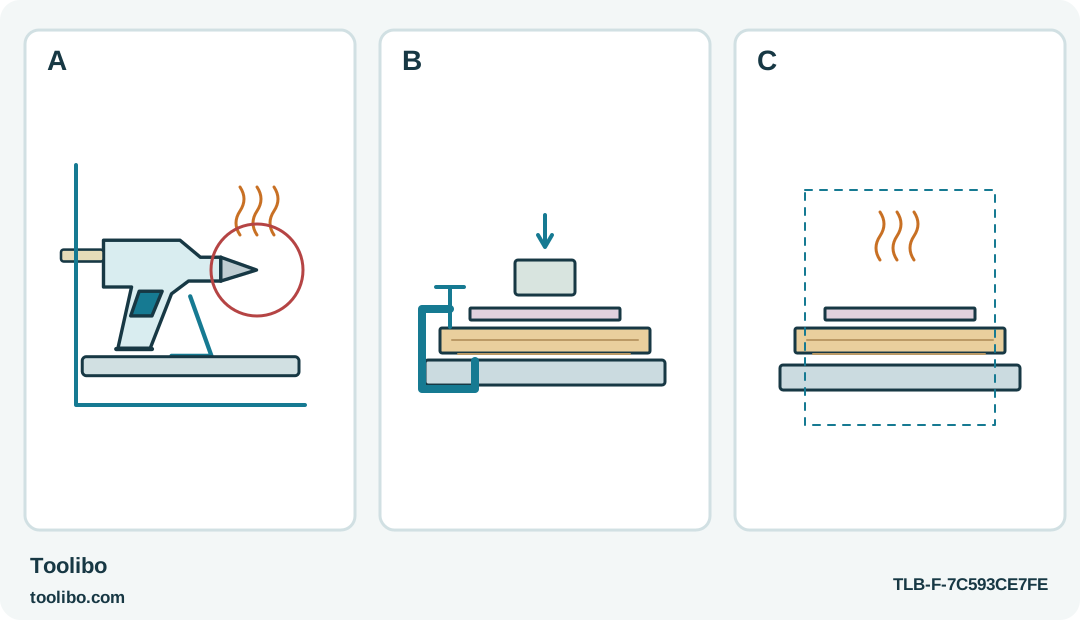
A · Hot-tool rest
Use the tool’s own stable support and keep loose material away from the nozzle.
B · Supported work
Plan the joint and pressing aid with hands clear of the hot adhesive.
C · Cooling area
Do not handle or store the newly glued object as though initial grip meant fully cool.
Original generic layout. Switching off is not instant cooling; the protected hot-tool zone remains in place until the tool is fully cool.
Plan the end before the first glue point
Most small glue projects have three temperatures on the same bench: cold pieces waiting to be joined, a hot tool and a newly glued object that may look finished before it is safe to handle. A useful layout keeps those stages separate. It should work when you are concentrating on the joint, not depend on remembering which unmarked spot contains a hot nozzle.
Choose a dry, stable indoor working area with enough room to place the complete project flat. Clear unrelated tools, packaging, drinks and loose paper. Keep people and pets away from the hot zone. If the only available surface is crowded or likely to be bumped, postpone the job or move it rather than balancing the gun on a convenient edge.
This setup applies to the identified compact glue systems discussed here, but the actual stand, power connection and shutdown method remain model-specific. A battery does not remove the burn hazard, and a disconnected plug does not mean the gun has already cooled.
Give the hot tool a reliable resting position
Set the cold gun on its designed support and check its stability before connecting power. A GluePen needs the safe resting arrangement specified for that pen; do not assume every slim body stands upright like a pistol-shaped gun. If a support is broken or missing, repair or replace it through the appropriate route before using the tool.
Protect the surface with a suitable heat-resistant arrangement. A heatproof silicone mat is specifically useful for the GluePen’s thin-material work. An ordinary plastic tray or a folded sheet of paper is not an equivalent thermal barrier. Leave clear space in front of the nozzle so that a drip cannot land on a cable, a hand tool or the next piece of craft material.
Place the supply lead, where present, so moving the project does not pull the gun from its support. Keep the connection accessible for normal disconnection without reaching across the hot nozzle. Do not create a loop that a chair, sleeve or passing person can catch.
Support the work instead of holding it behind the glue
Dry-fit the joint on the protected surface. Decide which hand will position the piece and where that hand will be while the adhesive is being applied. If the plan places fingertips behind thin paper, fabric or metal that may transmit heat, change the support arrangement.
Use a suitable cool pressing aid or fixture when needed, keeping it clear of the glue path and the tool. The fixture should hold alignment rather than squeeze a large hot bead towards the hand. Test the arrangement cold: can the piece be placed, supported and released without an awkward reach?
Keep a small scrap-testing area beside the project. This prevents the first uncertain squeeze from landing on a finished surface. It also gives you somewhere to check normal flow without lifting the gun over a valuable object. Do not let discarded samples accumulate under the support or around the nozzle.
Make pauses part of the workflow
Rehearse a simple sequence: apply the planned adhesive, return the gun to its safe position, place the part and let the joint settle. This makes the resting place part of every joint rather than a destination used only when the project is over.
During a pause, do not lay the gun on its side among materials or hold it while searching for the next component. Follow the exact tool’s instructions for longer interruptions. Automatic shutoff is a backup feature, not a reason to leave a hot tool unattended; some corded models, including the Dremel 930, continue heating while plugged in.
If the project changes, stop and restore the cold plan. For example, discovering that a piece needs trimming is a reason to park and safely shut down the glue tool before moving to the cutting task. Switching attention between a hot gun and another operation makes the bench harder to manage.
Keep the cooling zone intact until it is genuinely finished
When the final joint is made, use the specified off control or unplug the tool as required. The Dremel 930’s temperature selector is not an off switch, while the battery models have their own shutdown controls. Verify the correct action for the exact unit rather than relying on the absence of motor noise: glue guns do not announce their heat that way.
Leave the tool supported and the newly glued object undisturbed. Do not test the nozzle with a finger, place the gun in its case while warm or clear the protective mat too early. Keep the work out of reach until both tool and adhesive have cooled fully.
Inspect the completed joint only then, using the light handling appropriate to the object. Gather cold scraps, return identified sticks to their labelled storage and leave any inserted stick where the instructions require. A clean finish is not just a tidy surface; it is a bench with no hidden hot item waiting for the next person to touch it.
Models referenced