
Prepare, park and cool without crossing the hot zone
A small craft base and three prepared pieces occupy one area; a compact glue gun rests on its support in another, and a separate completed piece remains undisturbed.
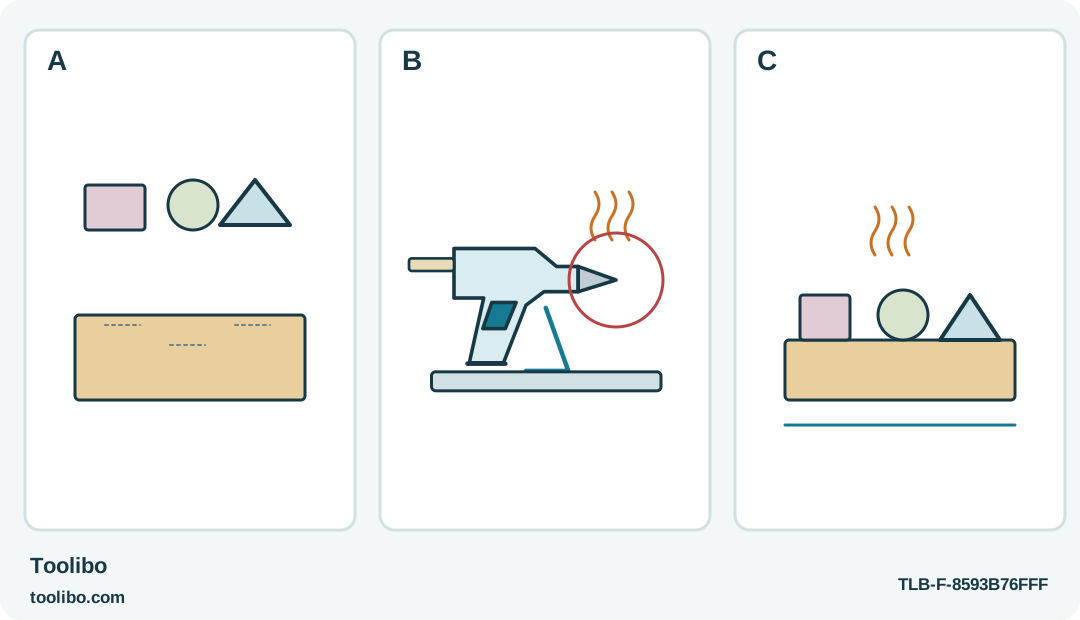
A · Prepared pieces
Cut and dry-fit the small batch before starting the heater.
B · Supported pause
Return the gun to its support rather than holding it during adjustments.
C · Cooling piece
Keep the freshly bonded object separate until it has cooled.
Generic bench arrangement, not the exact Einhell control layout. The hot-tool and cooling zones remain clear after the switch is turned off.
Prepare a job that fits a small cordless gun
A compact battery glue gun is convenient when a small craft assembly does not need a cable across the bench. That convenience is lost if the parts are still being measured while the tool is heating, or if a fading battery is treated as a reason to squeeze harder. A successful short session begins with a finished dry layout and ends with an intentionally switched-off, fully cooled tool.
This workflow covers the German TC-CG 3,6/1 Li identified as article 4522190 with the matching 11029 instructions. It is not a procedure for a similarly named replacement model or a different charger. The gun has an integrated battery and uses the specified compatible 7 mm sticks. It is a hot adhesive tool even though its body is small and cordless.
Choose a light, noncritical indoor craft task using materials and adhesive permitted by their instructions. For example, plan a few small decorative attachment points on a known dry craft base, not the repair of a shelf, a damaged electrical item or a cup. Test the actual material combination before starting the finished piece.
Arrange a cold rehearsal
Lay out the pieces on a protected, nonflammable work surface. Decide where each glue point belongs and how the part will be supported without fingers behind the hot glue. Thin fabric or paper is not a protective glove. If the piece cannot be placed and held safely, alter the design or choose another joining method before heating anything.
Give the gun’s support bar a clear parking area. Check that setting the tool down does not tip it towards the project or place the nozzle against loose material. Keep the path from application point to resting place short and unobstructed, so there is no need to pass the hot end across the other hand.
Rehearse one joint without adhesive. Pick up the piece, align it, put it down and check the visible result. This exposes awkward movements while they are easy to correct. Finish cutting and fitting before the heated session; changing tasks repeatedly encourages absent-minded contact with a tool that is still hot.
Charge first, then read the operating indication
Inspect the tool and its specified charger before charging. Use the supplied charger and the matching electrical supply, on a suitable nonflammable surface. Do not substitute an unverified power supply merely because its connector seems to fit. Keep charging conditions separate from the later heating session.
The indicator has different meanings during charging and operation. A red flash cannot be diagnosed without knowing which state the gun is in. If charging produces no indicator at all, the instructions identify a battery fault: stop and arrange service rather than opening the housing or repeatedly reconnecting it.
For operation, insert the correct stick as directed and hold the switch for approximately three seconds to start. Wait for the red heating indication to change to green before expecting normal application. This is a clearer readiness check than a guessed waiting time. If the expected sequence does not occur, do not try to force adhesive through a cold or faulted mechanism.
Work through a small batch without rushing
Start on matching scraps. Feed gently and evenly, join the pieces promptly and keep them in position while the adhesive sets. Treat the instructions’ approximate setting interval as part of the process, not a universal promise that any joint is ready for a load. Thickness, fit and the actual materials still matter.
When the sample has cooled and passed its appearance and light-handling checks, repeat the same modest application on the finished item. Put the gun on its support during pauses instead of holding it while adjusting the pieces. Work on one accessible joint at a time; a small session is easier to finish accurately than a large assembly that requires several parts to move together.
If flow weakens or the gun stops, release the trigger and read the indication in context. The protective low-battery shutdown is not an invitation to keep pressing the switch until another drop appears. Stop the session safely and follow the charging instructions. Forcing the trigger or extracting a melted stick is not a battery remedy.
Close the session with a useful record
Switch the gun off with the prescribed brief button press and leave it on its support to cool completely. Do not put it into a drawer, bag or charger area while the nozzle or adhesive is still hot. Keep the remaining stick in place and avoid work inside the tool; this model has no owner maintenance task that requires opening the housing.
Inspect the craft only after cooling. Look for lifted corners, distorted material or a bead that prevents the parts sitting as intended. If a trial failed, note the actual material and adhesive rather than recording only that “hot glue did not work.” That short record helps distinguish a poor joint design from a tool problem at the next session, without turning a household craft into a claimed strength test.
Models referenced