
Check a zero-bevel cut before adjusting the base · Diagram
A vertical blade crosses a level base, an L-shaped square checks the relationship, and a dashed leaning line shows a possible deviation.
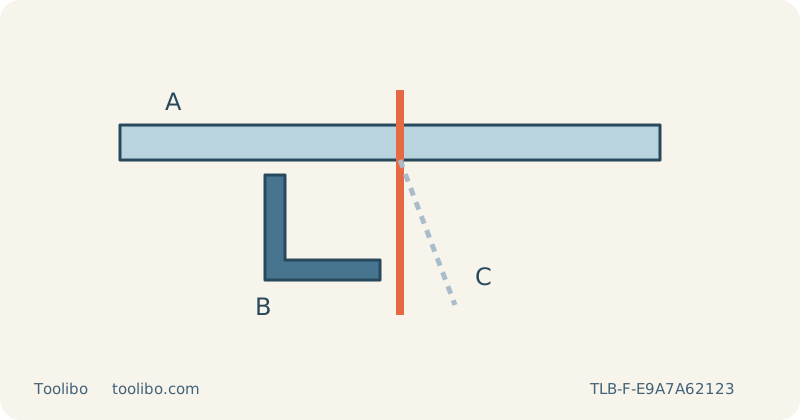
A
Clean the reference surface
B
Avoid resting on tooth tips
C
Confirm with an actual cut
Use a repeatable sample to separate fixed alignment from blade deflection.
Define square using the finished requirement
The zero mark on a jigsaw base is a setup reference, not proof that every cut will be perpendicular. Before changing the base angle, distinguish a fixed lean from blade deflection during cutting. Use a loose, clean, uncoated sample of the same wood and thickness as the intended part. Mark its reference face and feed direction so that the cut can be inspected consistently after the board is turned over.
A decorative edge and a close-fitting joint may have different acceptance requirements. Decide what the part must fit before testing, and keep enough waste allowance to avoid sacrificing the finished blank during diagnosis. This procedure checks external setup only. A bent base, damaged pivot or loose fastening that will not hold requires service, not a shim, modified screw or extra hand pressure during the cut.
Check the stopped assembly first
Switch off and remove the battery, or unplug the corded saw. Wait for the blade to cool. Inspect the base’s bearing surface for adhered chips or damage that could keep it from sitting flat. Remove accessible debris according to the manual without filing the sole or altering its shape. Check that the blade is straight, suitable for the material and installed fully, with the back correctly supported by its guide roller where required.
Use the base adjustment procedure belonging to the exact model. On the SKIL JS313101, the hex screw secures the foot; on the JS314901, the bevel lever performs that role. Seat the appropriate locating features and lock the base as instructed. Do not assume that the tightening method or the visible detent arrangement is interchangeable simply because both tools are from SKIL.
Make the measurement repeatable
With power still isolated, place a suitable square against a clean reference area of the base and the flat blade body where accessible. Do not rest the square on projecting teeth, which can mislead the reading. Never force the blade sideways to make it meet the square. This is an initial alignment check, not a replacement for a cut: the blade can move differently under load.
If the manual permits a zero-setting correction, make only that prescribed external adjustment and lock everything securely again. If it does not describe a user correction, do not invent one by loosening unrelated screws. Refit any permitted protective components for the intended cut, checking that an anti-splinter insert or cover is appropriate at zero bevel and does not interfere with the blade.
Cut without introducing another angle
Clamp the sample on a stable bench and support the waste independently at the correct height. Keep the entire moving blade clear below the board, and place clamps outside the base route. A twisted workpiece or a waste section pulling downward can change the cut even when the initial base alignment looks correct. Route the cable or extraction hose so it cannot tug the saw sideways.
Wear eye and hearing protection and suitable respiratory protection, with compatible extraction and ventilation. Support the base with the blade clear, start the saw, establish an appropriate speed and feed steadily into a simple straight cut. Keep the sole flat and avoid excessive forward or sideways pressure. Stop if the saw labours or the base lifts. Wait for a complete blade stop before withdrawing, setting down or inspecting; isolate power before further adjustment.
Repeat the fixed-reference check after locking
After the sample cut, isolate power and recheck the same clean base surface and flat blade body used before cutting. Confirm that the base fastening remains secure and that locating features have not moved. If the locked setting will not stay fixed, stop and obtain service rather than repeatedly tightening it between cuts. If it remains secure, repeat the sample with the same reference face and a sound blade. Agreement between the stopped check and repeated cut is more useful than the zero mark alone.
Record which reference face and blade produced the acceptable sample. Do not tilt the base away from zero merely to cancel a one-off deflection observed in thick wood; that compensation may make the next cut worse. If secure, correctly assembled parts cannot produce the required result, arrange service or use a more appropriate cutting method. Retest after changing blade, material thickness or bevel setting rather than treating one successful cut as a permanent calibration.
Models referenced