
Set a straightedge from the actual blade-to-base offset · Diagram
A straight guide stands beside a rectangular base; a double arrow spans the offset to a parallel cutting line.
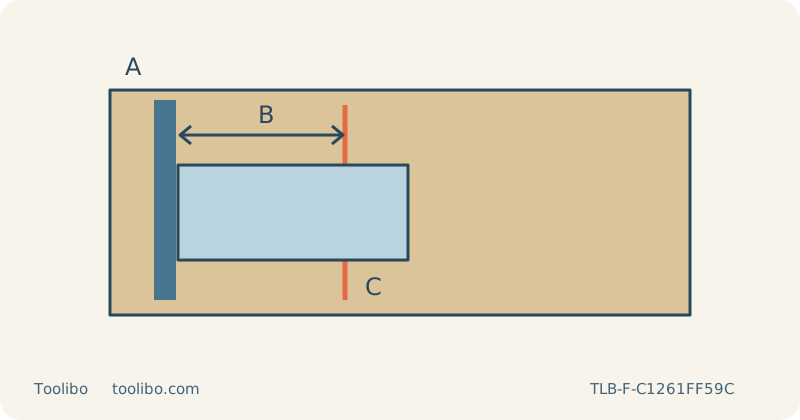
A
Use the same base edge
B
Prove the offset on scrap
C
Keep the kerf on the waste side
Use a matching sample to establish the guide position, kerf allowance and cut-face accuracy before cutting a household panel.
Begin with the required fit
A straightedge guides the base, not the blade itself. It can make a long layout easier to follow, but it cannot guarantee a square cut through thick wood. Use this procedure for a loose, identified, uncoated household panel whose edge can be checked and hand-finished. If the joint needs a precision fit that your sample cannot achieve, change the cutting method rather than applying more sideways pressure against the guide.
Choose a reference face and mark the finished line, then mark the waste side unmistakably. Decide whether the drawn line should remain after sawing. A pencil line has width, and the blade removes a kerf: placing the blade centre on the line is different from keeping the entire kerf outside it. Preserve a modest finishing allowance when the final edge must meet another part closely.
Measure the actual guiding relationship
Switch off and remove the battery, or unplug a corded saw, before fitting a blade or adjusting the base. Fit a compatible wood blade fully into its specified clamp, with the back correctly located in the guide roller, and verify retention. Secure the base at zero bevel. Measure from the chosen straight, usable base edge to the intended side of the blade kerf. Do not use the body housing as the reference or assume that the two base edges have identical offsets.
Transfer that approximate distance to matching scrap. Clamp a straight, rigid guide where the base can contact it without the motor housing or guard colliding. The guide must remain clear of the blade throughout the route. The first measurement only locates the trial: the test cut determines the practical offset with this blade, reference side and finishing allowance.
Build support around the whole route
Clamp the retained board to a stable work surface and support the waste independently so that it cannot fall, twist or close the kerf. Keep supports away from the complete blade stroke beneath the panel. The straightedge is not a substitute for workholding, and a hand holding its end is not a clamp. Check whether guide clamps obstruct the base before reaching the end of the cut.
With power still isolated, rehearse the route with the blade kept clear of obstacles. Arrange a cord or extraction hose behind the saw with enough freedom for the full travel. Reposition clamps now if necessary. If the route requires moving a clamp later, plan a full stop and power isolation at a supported point; do not attempt to slide it while the saw is running.
Cut a sample without forcing the fence
Wear eye and hearing protection and suitable respiratory protection, and use a compatible dust extraction arrangement with ventilation. Start with orbital action off when evaluating an exposed edge, then follow the blade and saw instructions for speed. Support the front of the base, hold the blade clear of the wood, start the saw and let it reach the selected speed before feeding forward.
Maintain gentle contact between the chosen base edge and the guide. Heavy lateral pressure can deflect the blade even while the base appears perfectly aligned. Keep the sole flat and advance at a rate the blade can manage. Stop if the base catches, the saw labours or the kerf begins to close. Switch off and wait for a complete stop before withdrawing the blade, setting the saw down or examining the cut; isolate power before adjustments.
Transfer a verified offset, not a hopeful measurement
Measure from the sample reference edge to the actual cut at both ends and through its middle. Check the cut face with a square as well as checking straightness from above. If the top line is parallel but the bottom wanders, moving the guide will not cure the underlying deflection. Review blade condition, thickness suitability and feed pressure before attempting another sample.
Once the sample is acceptable, record which base edge touched the guide and how much material remained for finishing. Transfer that proven arrangement to the final blank, recheck the waste side and confirm all support clearances again. A change of blade, bevel, reference face or panel thickness calls for another trial. Keep the tested scrap until the finished part fits; it provides a concrete reference if the second cut behaves differently.
Models referenced