
Keep thin plywood supported without hiding the blade route · Diagram
A thin sheet rests on two separate supports with the blade travelling through the open gap between them.
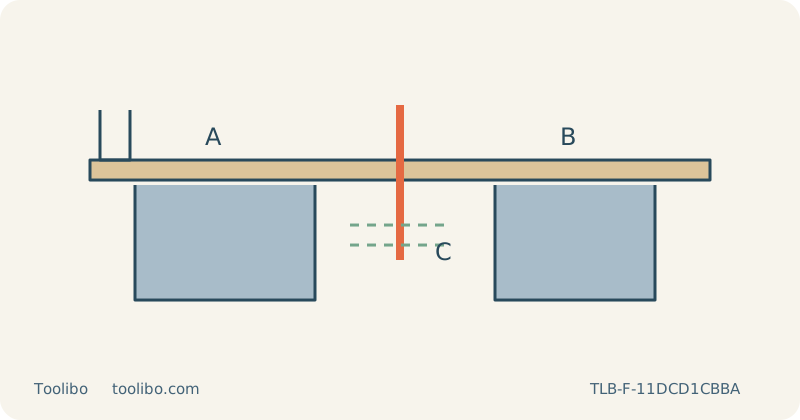
A
Clamp the retained panel
B
Support the waste independently
C
Keep the full stroke clear
Control panel vibration with planned support, secure workholding and a clear full blade stroke.
Diagnose movement before choosing a setting
Thin plywood can vibrate between supports even when the saw has enough power to cut it easily. That movement can spoil the surface and make the blade seem uncontrollable. The first question is therefore where the sheet is supported, not which speed number makes the cut faster. This guide concerns a loose, clean, uncoated panel with known composition, not installed furniture, wall linings or material with concealed fasteners.
Lay out the cut while the panel is stationary. Identify the retained piece and the waste, and consider how both will behave as the kerf grows. A large offcut may remain attached by a very narrow strip near the end. If that strip is expected to support the offcut’s weight, the cut can tear out or close on the blade before the intended exit.
Arrange close support without blocking the blade
Use a stable bench and clamp the retained panel without distorting it. Arrange support on both sides of the route, close enough to control flex but outside the entire blade path. The moving tip must clear everything underneath throughout its stroke. A support placed immediately below the line is not safe merely because the plywood is thin. Inspect the underside and trace the full route before connecting power.
Support the waste independently at the height of the retained piece. Do not lift it from below by hand, and do not place fingers where the blade might emerge. If the panel’s size prevents secure support with the available bench, move the job to a suitable work surface or choose a different method. Balancing a sheet across furniture and hoping its own weight holds it down is not a substitute for a support plan.
Select and install a blade for the actual assembly
Switch off and remove the battery, or unplug a corded tool, before blade or base changes. Use a blade specified for plywood of this thickness and compatible with the exact clamp. Seat it completely, locate its back in the guide roller where required, and check retention. Keep the base securely at zero bevel for the initial test. A long blade is not automatically an improvement: excess unsupported length can make guidance harder.
If considering a sacrificial backing board, first confirm that the combined thickness is within the blade and saw’s permitted application. Clamp the layers so they cannot slide, support both retained and waste portions, and keep the complete blade stroke clear below the backing too. Do not add a backing layer that hides an uninspected support or makes the blade too short. Test this arrangement rather than assuming every backing material produces a cleaner surface.
Use the sample to separate vibration from splintering
Wear eye and hearing protection and appropriate respiratory protection. Arrange compatible extraction and ventilation, keeping the hose clear of the route. Start a representative sample with low or zero orbital action as appropriate to the blade instructions. Rest the front of the base on the work, keep the blade clear, start and establish speed before advancing. Keep the base flat rather than pressing hard enough to bend the panel.
Watch for visible sheet movement, not only the pencil line. If the board begins fluttering or the base loses contact, stop instead of compensating with more hand pressure. Switch off and wait for the blade to stop fully before lifting or withdrawing it. Isolate power before moving supports. Once movement is controlled, assess both faces for splintering and adjust blade choice or face orientation using another sample.
Finish the separation deliberately
Near the end, continue feeding without reaching for the loose waste. Its support should already be carrying it without pushing against the blade. Stop if it sags into the kerf or the final fibres begin tearing outside the intended line. After a complete stop and power isolation, revise the support and decide whether hand finishing is more suitable for the remaining connection.
Inspect the finished edge against the intended fit and remove sharp fibres with the panel secured. A smooth-looking upper face does not prove that the underside stayed intact. Keep the successful support spacing, blade identity and reference face with the sample for repeated parts. Retest when panel size or thickness changes, because a larger sheet can flex differently even when its printed material description is the same.
Models referenced