
Expose the surface first
Stop using the model’s proper sequence, wait for the pad to stop and isolate the supply. Remove loose dust with a method appropriate to the material and next finish. Do not blow fine dust around the room. Dust filling a shallow groove can hide a scratch; a loose streak of dust can also look like one.
Do not improvise a solvent wipe to create a wet preview. Any permitted preview or cleaning liquid depends on the finish system. Unknown coatings or suspected hazardous material need assessment before ordinary sanding or cleanup.
Inspect one board systematically
- Leave the work securely supported and restrained. Put the stopped sander out of the viewing area. Look over the center, ends, joints and edges for uneven color or reflection.
- View across the surface from one side with light coming from the side. Adjust the lamp or layout safely rather than bending into an unstable stance.
- Move to another side or change the light direction and inspect the same area again. Scratches that blend into the first lighting direction may become visible.
- Record the position on a sketch or photograph and note the current grit. Do not introduce an untested marking material onto the final surface.
- Finish the whole inspection before deciding what to sand next.
The diagram contrasts overhead and side-light viewing; it does not specify a calibrated lighting angle. Keep lamps away from dust hazards and combustible material, and keep stands and leads clear of tool and walking paths. If glare hides the surface, change position rather than adding brightness.
Match the next action to the mark
Coarse scratches spread across the board, with finer current-stage scratches between them, mean that a smooth feel alone is not enough to advance. Check the previous stage’s target and work evenly. If the current abrasive cannot remove the older marks effectively, reconsider the grit stage rather than dwelling on the most visible point.
A new isolated deep line on an otherwise even surface calls for a disconnected inspection of the abrasive and pad: look for a hard particle, loading, damage or trapped debris. Continuing with the same faulty disc can spread the problem. Correct the cause and verify the result on a safe sample or controlled area.
A changed reflection at an edge or depression beside a joint may be a geometry problem, not a request for finer paper. Compare it with the intended flatness or edge profile. Stop removing material if dimensions or veneer thickness are at risk. Appearance suggests a check; it does not prove a single cause.
Decide whether to proceed
After cleaning, look for an even current-stage scratch pattern from different directions, with older coarse scratches resolved and no new edge or joint damage. The next grit or finish preparation still depends on the chosen finishing system, not on making the wood as shiny as possible under a lamp.
Keep a satisfactory sample or stage record. Reassess the target when wood, abrasive range, pad or finish changes rather than transferring the feel of the previous job to this one.
Compare overhead and side-light views
Two boards show a lamp above and a lamp to the side; eye symbols and dashed sight lines show different viewing directions.
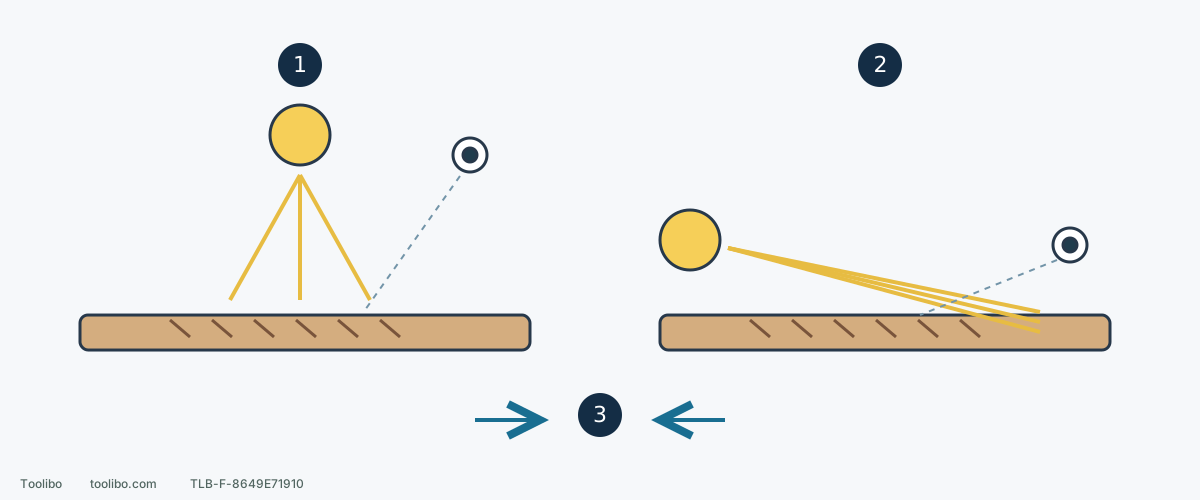
1. Start with the overall surface
After dust removal, inspect the center, ends, joints and edges under the main work light.
2. Look across the surface
Side lighting can reveal scratches that blend into an overhead view; avoid glare and unstable posture.
3. Change direction before deciding
Check from another side. Widespread old scratches and a new isolated deep line call for different next steps.
An inspection arrangement, not a required lamp angle or brightness. Stop and isolate the tool before moving the setup.
Models referenced