
2648 box: separate, open, clean and refit
A box separates from the tool, its tabbed lid lifts, a pleated filter releases dust into a container, and the closed box reconnects with vents up.
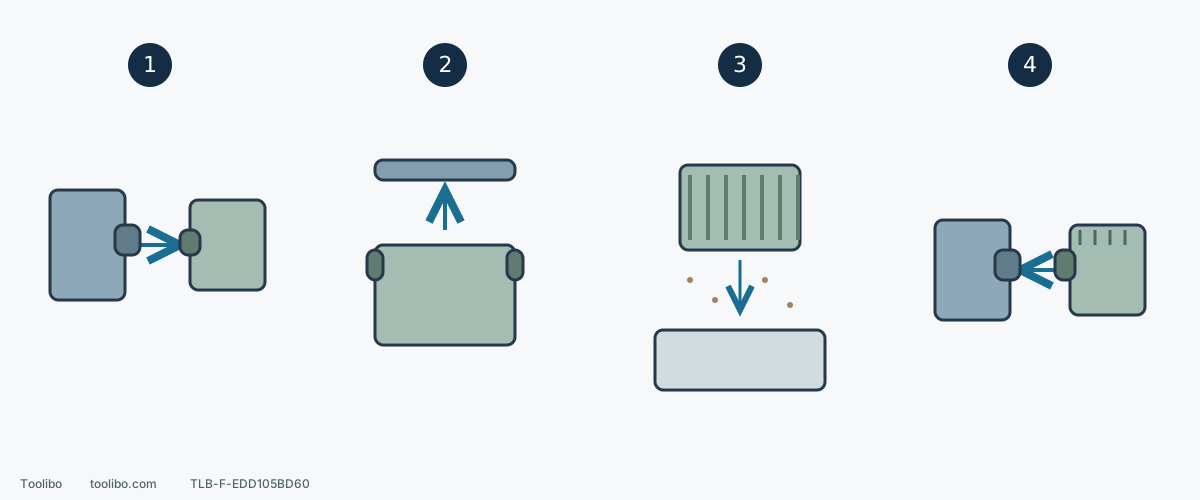
1. Pull the whole box away
Hold tool and box firmly, not a thin lid or distant hose.
2. Release the lid tabs
Open the removed box for controlled emptying; do not open a collector while attached to a powered tool.
3. Empty and tap the filter
No water or compressed air on the 2648 filter. RYOBI bags use their own shake-out procedure, not this box-lid arrangement.
4. Close, vents up, push firmly
Confirm lid retention and complete connection before restoring battery with OFF selected for a controlled trial.
Schematic 2648 box sequence, not a shared lid design for RYOBI bags. All steps follow shutdown and battery removal on stable equipment; dust handling remains material-specific.
Schedule emptying before an odor reminds you
This covers the Milwaukee 2648-20 box and RYOBI PCL401/PCL406 bags. Identify dust and its safe handling first; unknown paint residue is not ordinary sawdust. Smoke or continuing abnormal heat from tool, battery or collector means move away and seek appropriate emergency help, not approach to open the collector.
- 2648-20: empty at no more than half full. Its polyurethane/linseed-oil and similar coating-dust warning also specifies every 10–15 minutes during sanding and following coating-maker guidance. Empty and clean thoroughly at completion and before storage.
- PCL401: no more than half full; the coating-dust warning specifies every 10–15 minutes; empty completely at completion and before storage.
- PCL406: no more than half full, frequent emptying during work, and complete emptying at completion/storage. Do not invent the other models’ 10–15-minute interval for this one.
These are not alternatives. Half full occurring first means stop first; even a small amount is emptied at completion. Ten to fifteen minutes is not a guaranteed safe window or permission to wait for a burning smell. Reduced collection or leakage also requires a stop and check.
First: stop by model, then remove battery
PCL401 lifts before switch-off, then waits for all motion to stop before battery removal. PCL406 switches off and stops completely on the work before lifting and removing the battery. For 2648 use its applicable shutdown procedure, wait for stopped motion and remove the pack without borrowing a RYOBI lift sequence.
For stable equipment without abnormal heat, support tool and collector for controlled handling. Use a dust-appropriate receiving container, keep openings away from the face and avoid dispersing dust through the work area. Material-specific protection and ventilation still apply; a fitting connector or half-full bag does not establish comprehensive dust protection.
Second: remove the complete collector before opening it
2648 box: hold tool and box firmly and pull apart. Do not pull a hose or thin lid instead of holding the box. Release lid tabs, empty dust and tap the filter clean. No water or compressed air on the filter. A damaged or unrecoverable filter needs the correct replacement, not continued use.
PCL401/PCL406 bags: hold the tool and grip the rigid connection near the outlet to remove the complete assembly, not the distant fabric end. Empty and shake dust out using the bag/frame’s normal assembly relationship, then inspect fabric and joint. Another brand’s cleaning method does not authorize soaking or pressure blasting; use the specified shake-out method here.
If clearing seems to require wire through the tool outlet or an unknown internal blockage is visible, stop expanding the procedure. This is external collector care, not internal passage or motor service. Final disposal remains material-specific; do not mix self-heating coating residue into stored sawdust.
Third: refit the actual connection
For 2648, correctly assemble filter and lid, ensure the lid snaps secure, face box vents upward and push its chute firmly into the tool port. Use the specified extender when required for larger M18 packs; do not install the battery during this isolated arrangement check.
For PCL401/PCL406, restore bag to frame and push the complete assembly onto the outlet with a slight twist. No specific clockwise angle is prescribed here; do not force an imagined lock. Check seating, stability and untwisted fabric. A bare frame without its bag is not a completed collection setup.
Check every configuration for missing parts, damage, looseness or blockage. Rapid reblocking or continuing outlet leakage needs diagnosis, not extra sanding pressure. Without an external vacuum, restore the complete original collection assembly as required.
Finally: resume or store
Resume only after normal cleaning is complete, with no danger signs or unresolved leakage, blockage or damage. To resume, confirm OFF, install and verify retention of the compatible battery, then use that model’s sequence for a short controlled-scrap trial. Stop safely, wait and isolate again before checking collector retention and new leaks. A continuing abnormality does not justify repeated restarts.
For storage leave the battery removed and the collector empty, intact and appropriately stored. “Emptied once” is different from identifying the dust risk, completing cleaning and correctly assembling the system.
Models referenced