
Follow the visible leak to its component
A fabric split, lid gap and disconnected hose are different external faults; drawings show concepts, not exact part geometry.
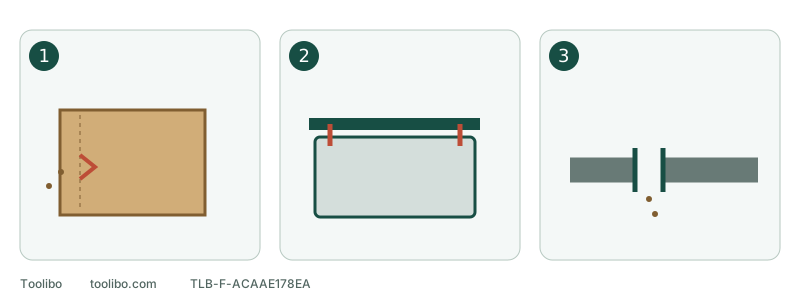
1. Bag breach
Replace the damaged compatible assembly, not a tape patch.
2. Lid not seated
Inspect intact latches and restore the specified closed position.
3. Connector gap
Verify approved parts and seating, then remove persistent hose pull.
A fabric split, lid gap and disconnected hose are different external faults; drawings show concepts, not exact part geometry.
Establish whether ordinary wood-dust handling applies
These external checks concern known, suitable ordinary dry wood dust. Unknown old finishes, suspected lead or asbestos, treated wood and unknown contents in a collection bag are not suitable for routine emptying by default. Stop for appropriate assessment rather than replacing a bag and continuing the original job.
Record a leak already observed; there is no need to restart to confirm it. Smoke, abnormal heat or developing danger is not ordinary leak maintenance: move away and respond safely first. Only with stable, safely accessible equipment should you switch off, wait for a complete stop and remove a normal battery; isolate an external extractor as its instructions require. Do not put your face near running joints to find a leak or blow dust out with compressed air.
Let the location determine the first action
Swipe or scroll horizontally to see all columns.
| Where dust already appeared | First action | Required completed state |
|---|---|---|
| Bag fabric or seam | Inspect tears, wear and component identity while isolated | An intact bag assembly suitable for the model, not patched damage |
| Dust-box lid perimeter | Handle contents appropriately, then inspect lid, latches and mating faces | Lid seated and locked, intact latches, no debris preventing closure |
| Tool port to bag or box | Verify component and orientation; refit by that model’s method | Specified seating without hand support or forcing a mismatched connector |
| Hose connection | Verify adapter, hose end and locking method | Intact secured interface and supported hose without continuous pull |
| Beneath the pad without an obvious breach | Check abrasive holes and the applicable collection path | Follow reduced-extraction checks rather than immediately blaming the bag |
Location orders the inspection; it does not diagnose the cause. A full bag may also be torn, so inspect integrity after emptying. A closed lid does not establish correct disc holes or extractor condition.
Milwaukee 2648-20: latch the lid and orient the box
Remove the battery, use the lid tabs to take it off and empty under controls appropriate to that dust. Inspect the lid and latches for cracks or deformation and clear debris preventing closure. Refit the lid until it snaps into place, not merely rests on the opening. Damaged covers or tabs require the correct replacement or service advice, not tape as restoration.
Slide the box chute into the sander port with box vents facing upward and push the components firmly together. Larger M18 packs require the specified extender for clearance; do not squeeze the box or reverse its orientation to make room. The specified replacement filter is 43-31-0105, not a universal number for the entire box or another model’s filter.
Do not clean this filter with water or compressed air. Follow its own maintenance method and the dust conditions rather than borrowing another extractor’s washable-filter rules. When no external vacuum is connected, refit the required dust box; do not sand with a bare outlet.
RYOBI PCL406: inspect the bag, then seat it correctly
With the battery removed, detach the bag assembly and inspect its fabric, seams and connector. A torn bag or damaged interface requires an exact compatible replacement or service advice. Do not perforate or glue-patch it, or borrow another sander’s bag merely because both use five-inch discs.
For an intact PCL406 assembly, push it onto the exhaust port with a slight twisting motion as specified. Do not invent a turning direction or force it with tools. Confirm proper seating and a normal connection. Persistent slipping or a cracked port means stop, not hold the bag on with one hand while working.
PCL406 calls for emptying at no more than half full and thorough emptying and cleaning after work and before storage. Coating dust can also self-ignite, requiring the coating maker’s handling instructions; that does not authorize treating unknown coatings as ordinary wood dust. Do not use this bag for metal sanding or switch to metal scrap as a leak test.
With a hose, check the pull as well as the connector
Confirm that the actual hose and adapter form an approved arrangement and secure them by the applicable mechanism. Do not tape a mismatched interface until it seems tight. Look for a hose caught around the bench or hanging heavily from the tool; reroute and support it appropriately. A correct joint under continuous sideways pull is not a completed setup.
If intact, correctly secured interfaces still give poor pickup, check disc-to-pad holes, externally accessible dust paths and the extractor’s bag and filter condition. Do not probe inside the housing or declare the fan defective. Leakage and inadequate flow are separate observations and may both need attention.
Check before and after restoration
Restoration also requires no danger signs or unresolved operating abnormalities; replacing a bag does not clear a smoke or heat problem. After all permitted external corrections or approved replacements, keep power isolated while checking abrasive, workholding, material and the complete collection arrangement. Confirm device switches are OFF, restore power and extraction according to the system, then follow the sander’s own start/stop sequence for a brief controlled check on suitable ordinary wood.
If unexpected dust escapes again, stop, wait for motion to cease and isolate power. Preserve leak location, model and component details for support instead of sanding while investigating. Even a visible improvement only describes what can be seen; it does not certify fine-dust exposure. Restore the specified arrangement and material-appropriate controls, not an invisible alternative exit for dust.
Models referenced