
Hot adhesive can reach the reverse face
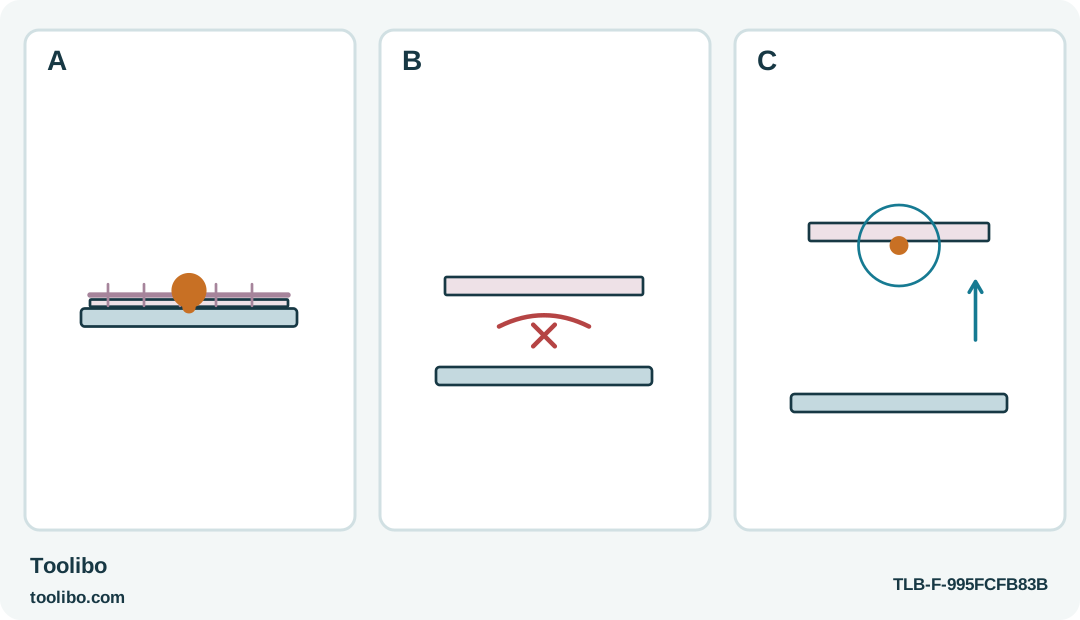
Adhesive passes through a woven section toward the mat, a crossed underside contact zone excludes fingers, and a cold lifted sample reveals its reverse face.
A
Open weave or thin paper can transmit glue and heat. Keep a heatproof silicone support beneath the complete work area.
B
Never support or press directly behind the fresh adhesive with fingers, even through thin fabric or paper.
C
Lift only the cooled sample to inspect both faces for penetration, staining and a raised lump before using the finished material.
The underside can receive hot adhesive even when the visible face appears easy to handle.
Put a barrier between the work and your hand
Thin paper and open-weave fabric can let molten adhesive reach the other side. The receiving face may look harmless while the glue passes through to a supporting finger. With a Bosch GluePen or Worx WX045L, place permeable material on a heat-resistant silicone mat rather than holding it in your palm. A small nozzle or a small bead does not remove the possibility of a burn.
Choose a flat, stable bench and clear enough space to move the tool directly to its resting position. Spread the material so no loose corner hangs over your lap. If the piece cannot lie flat, prepare a suitable support that keeps your hands outside the hot zone. Do not improvise by gripping the area behind the intended bead with a folded tissue or a thin cloth.
Decide what the attachment is for. A paper decoration or a dry display ribbon is within this guide’s limited scope. Clothing that will be worn or washed, protective items, food packaging and child-accessible decorations require a different suitability assessment. A neat-looking cold bond does not establish washability or safe contact with skin.
Use scraps to expose bleed-through before it matters
Select scraps of the actual paper or textile, including the same coating, weave and number of layers. A thick practice card will not reveal what happens to a thin tissue decoration. Put a second visible scrap beneath the test area if useful for seeing penetration, while keeping the heatproof mat underneath the complete trial.
- Confirm that the chosen adhesive is recommended for the exact gun and the material. Do not transfer sticks between the 7 mm GluePen and 11 mm WX045L systems.
- Set up and heat the tool according to its own manual, with the nozzle clear of the scraps.
- Apply a small amount to the supported material without pressing the hot nozzle into it.
- Join through cool accessible edges, then leave the trial undisturbed until the adhesive has cooled.
- Lift the cold sample and inspect the underside as well as the visible face.
Look for a wet-looking stain, a stiff raised area, glue reaching the support or distortion around the bead. Even when penetration does not create a burn, it can spoil the appearance or prevent the material from lying naturally. Reduce the amount or change the attachment layout only if the material remains undamaged and the adhesive system is otherwise suitable.
Control pressure without pressing on hot glue
For a paper embellishment on cardboard, place the cardboard on the protected bench and apply the adhesive to an accessible supported surface. Set the embellishment into position promptly, keeping fingers outside the bead area. Do not press directly over fresh glue through the thin paper. The tool should already be safely parked before you adjust the piece.
For a textile strip, rehearse how its edge will be positioned without stretching it. A stretched strip may pull away when released, and extra glue will make the resulting stiff ridge more conspicuous. Use a layout appropriate to the material and the exact adhesive rather than a large puddle intended to catch every fibre.
If glue emerges through the material, stop contact with that area and allow it to cool. Do not wipe it across the face, pinch off a hot string or lift the whole sheet while the adhesive underneath is still molten. A silicone mat protects the bench and helps provide a controlled work area; it is not permission to touch adhesive that has penetrated the material.
Separate a cosmetic failure from a tool fault
A stained decoration can indicate too much glue or unsuitable materials without meaning the gun is defective. Conversely, unexpected backflow, persistent feed resistance after proper heating or a damaged housing should not be treated as a craft-layout problem. Stop using the tool when its behavior is abnormal, and follow the service boundary rather than trying to force the application through.
Inspect the finished decoration only when fully cold. Check whether the material still lies flat and whether the attachment survives gentle ordinary display handling without an edge lifting. Do not conduct a forceful pull test on a valuable or fragile item. If the appearance is unacceptable, leave it unattached or use another method instead of adding a second layer to hide the mark.
Switch off or disconnect the exact tool as directed and let it cool completely in its designated resting position. Keep the mat and scraps in place until hot drips have hardened, then clear the bench without pulling a still-soft bond. Store the correct labeled consumables with the tool. Supporting the material, inspecting both sides and controlling contact are more important than trying to make the fastest possible tiny bond.
Models referenced