
Support, preheat in the stand and place one small part
Tongs position a small part over supported backing, a pen warms in its tray stand and a small finished stack leaves the underside clear.
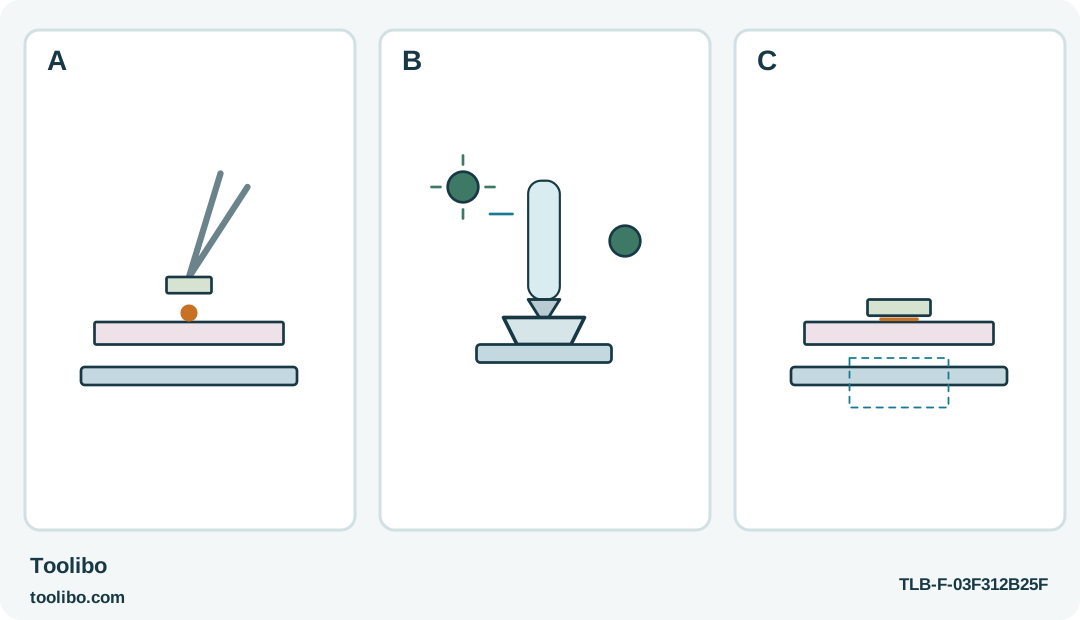
A
Rehearse a tiny decoration with suitable support or tongs, leaving fingers outside the receiving area and squeeze-out path.
B
After normal startup, place FVH56 in its drip-tray stand during warm-up. Wait for ready green and check flow; this stand is not a heating dock.
C
Dispense one small attachment, release the side tab, park the pen and place the decoration promptly; inspect only after cooling.
A narrow pen still needs supported tiny parts and its drip-tray stand during heating and pauses.
Give small parts a support before giving them glue
The Ryobi FVH56 precision glue pen can approach a small decorative part without the bulk of a larger gun, but the narrow shape does not make hot glue safe to hold between your fingers. Start with a dry indoor project such as attaching a small paper label to an already sound desk organizer. The attachment should carry no structural load and should remain away from food, electricity and children.
Lay the receiving surface flat on a heatproof silicone mat. If the decoration is small, use a suitable support or tongs so your hand is outside the glue path. Practice placing it without power or adhesive. You need a clear view of the contact area, a way to set the pen down and a way to align the decoration without touching the molten bead.
For an intricate arrangement, mark the intended position lightly on a hidden surface. Move spare pieces away from the working area so they cannot catch a drip. Choose one attachment to complete first instead of dispensing glue onto a row of tiny parts that will cool before you reach them.
Set up the actual FVH56 system
The US FVH56 instructions specify 0.28 inch (7.11 mm) mini glue sticks. Do not borrow the P306’s additional diameter allowance merely because both products are Ryobi. Select a compatible adhesive whose material and operating requirements suit the actual project; diameter alone does not establish that a clear or colored stick is appropriate.
Keep the pen off while loading the stick and installing the specified battery. The battery sits under a threaded compartment cover; secure that cover correctly before operation. If it will not fit normally, stop instead of forcing the threads. Charge the battery only according to its own instructions, not by assuming that the pen body has a charging connection.
- Place matching material scraps on the protected bench.
- Hold the power control for the specified three seconds to turn the pen on.
- Place the pen in its drip-tray stand while it heats. Watch for flashing green during heating and steady green when ready. The manual describes approximately thirty seconds of heating, but still check the actual flow.
- Make a small application to the supported scrap using a dispensing tab on either side of the pen.
The tab is a control, not a lever to overcome a cold or obstructed feed. If normal pressure does not produce usable glue after the proper setup and heating sequence, stop and reassess. Do not squeeze harder or push another stick against the first to force it through.
Apply a small amount and park the pen
Bring the nozzle close to the supported receiving surface while keeping it clear of the material itself. Dispense a modest amount; the goal is an attachment that stays hidden behind the decoration, not a hot pool that emerges around every edge. Learn the amount on scrap before approaching the finished organizer.
Release the dispensing tab and return the pen to its drip-tray stand. Unlike the P306 base, this stand is not a powered heating dock. It is the designated resting place for the hot pen. Keep it level and clear so the tool can be parked without balancing against scissors, a box rim or a loose sheet of paper.
Position the decoration promptly using its cool edges or the prepared holding method. Do not use a fingertip to smooth squeeze-out or press directly above a bead through thin paper. A glove does not make that an appropriate technique. If glue reaches an unintended area, stop handling the wet adhesive and let it cool before deciding whether the piece can be salvaged.
Repeat the process only after the first cooled trial looks acceptable. A visible stain, distorted coating or weak attachment is a reason to change the material or attachment method. More glue does not reliably cure a material mismatch.
End the session before precision becomes improvisation
Small-work sessions often deteriorate when the last pieces are awkwardly shaped. If a part cannot be supported or positioned outside the hot zone, leave it unglued rather than holding it closer to the nozzle. Redesigning the arrangement or using a suitable nonthermal attachment is a better outcome than completing every planned detail.
Turn the pen off when finished and leave it in the stand until completely cool. Keep other people away from the cooling area; the light going out does not remove stored heat. Follow the manual’s minimum thirty-minute storage interval and require complete cooling as well. Remove the battery only after cooling, and store the pen with its correct consumables identified.
Inspect the finished work cold and in ordinary display lighting. Check for lifted corners, transparent glue visible through paper, or a decoration that shifts under gentle normal handling. Reject a poor attachment rather than testing it by pulling hard near a fragile surface. The precision benefit comes from controlled access, support and a small trial—not from treating a smaller hot tool as harmless.
Models referenced