
Makita HP333DZ UAE: three modes and a separate torque ring decision map
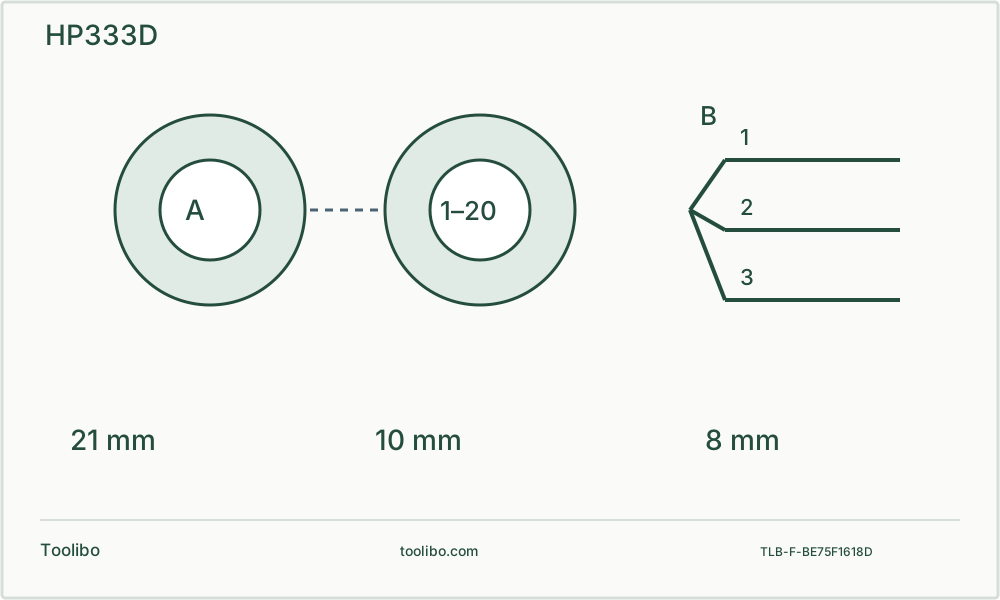
Two independent rings separate mode selection from positions 1–20; three branches and separate 21, 10 and 8 mm capacity labels show distinct task choices.
Two rings
Set action mode independently from screwdriving torque.
Three materials
Read the matching capacity row before fitting a bit.
Stop
Severe slowing, binding or abnormal controls require reassessment.
Two separate rings are drawn beside three task icons, showing numbered clutch control only on the screw path, with wood 21, steel 10 and masonry 8 mm separated in the lower capacity strip.
Identify this regional tool without copying every sales claim
The UAE listing is HP333DZ, a CXT tool-only package without battery or charger. The matching English operator manual is for HP333D, identified in the file as HP333D_ENEU_885671-228. It is not the DF333D driver drill and not an impact driver. Keep the sales suffix, tool nameplate and the manual’s model name together when checking a replacement or a kit.
The regional product summary calls the tool brushless, but the matched operator manual does not establish that claim. This guide therefore does not use motor type as a buying argument. Likewise, do not merge differing body-height figures from different pages into a claimed measured dimension. An identifiable conflict is better left out than turned into false precision.
Read the controls as separate decisions
HP333D has an action-mode ring and a torque-adjusting ring. Its three modes are screwdriving with clutch, rotary drilling and hammer drilling. The torque ring has 20 positions for screwdriving. Setting that ring to a small number does not give the same torque protection while another action mode is selected.
With the tool stopped, identify each pointer and symbol before handling a screw. For ordinary cabinet hardware, select screwdriving, choose a conservative clutch position and test on duplicate material. For a suitable wood pilot hole, change to rotary drilling. Do not leave hammering selected because a small pilot seems easy enough for the machine.
Check capacity and speed before fitting an accessory
Swipe or scroll horizontally to see all columns.
| Parameter | Matched manual value | Planning consequence |
|---|---|---|
| Wood / steel / masonry | 21 / 10 / 8 mm | Check the material-specific row, not only the shank |
| Gear 1 / gear 2 no-load speed | 0–450 / 0–1700 rpm | Select the range while stopped |
| Gear 1 / gear 2 impact rate | 0–6750 / 0–25,500 per minute | These are axial impacts, not extra rotary speed |
| Overall length | 193 mm | Include the fitted bit and battery when checking reach |
The 8 mm masonry entry is not a blanket approval for structural concrete, an unknown wall or every fixing. Bit suitability, substrate identification, services, dust controls and the fixing specification remain separate requirements. A 35 mm hinge cutter is also outside the listed 21 mm wood capacity, regardless of a reduced shank.
Rehearse the complete screw setup
Switch off and remove the battery before adjusting or fitting accessories. Inspect the chuck and bit, tighten the correct shank by hand and check retention. Secure representative wood so it cannot pivot. Check the pilot and screw length against the actual board thickness, with no hidden material in the path. Arrange eye, hearing and dust protection appropriate to the work.
Reinstall only a specified compatible battery and confirm the red seating indicator is no longer visible. Keep the bit aligned in the screw recess and begin slowly. Release as soon as the clutch acts, then inspect the screw rather than repeatedly forcing it deeper. If a recess is rounding or the board splits, stop and correct the setup. A different clutch number alone cannot repair a misplaced or undersized pilot.
Change work only after a complete stop
Move the speed selector fully to gear 1 or 2 while stopped; never leave it between positions. Set the action-mode ring positively at the required symbol. If a control does not move or locate normally, do not force it with pliers. Consult the exact manual’s mode-change instruction or obtain support; guessing which mechanism is loaded is not a repair method.
For a permitted rotary-drilling task, restrain the work and provide exit clearance. Feed along the axis and reduce pressure near breakthrough. If the drill slows severely, release and reassess the load rather than holding it near stall. When changing the bit, stop, isolate and allow hot parts to become safe before touching them.
Keep hammer work and fault response within limits
Hammer mode requires a suitable masonry bit and a known, assessed task. Unexpected resistance, binding or an encounter with hidden material means stop. Do not use this guide to choose structural anchors or approve silica-bearing dust exposure. The presence of a hammer symbol is not evidence of a suitable extraction system or a safe wall location.
Protection stops call for removing the cause and allowing normal recovery, not defeating the battery system. The manual calls for a 15 minute tool rest after continuous work exhausts a battery before continuing with a fresh pack. That rest does not override an earlier need to stop for heat, damage or abnormal behaviour.
After isolation, clean the exterior and inspect ventilation and accessory retention. Repeated faults, damaged casing, abnormal sound or a control that will not engage need qualified service. Provide HP333D, the regional package identity, the battery identifier and the mode used. Never open a battery or handle a smoking, leaking or dangerously hot pack as an ordinary troubleshooting step.
Models referenced