
Weak suction checks
Three panels isolate a blocked nozzle, a leaking hose cuff, and a loaded bag/filter as different locations along one numbered airflow route.
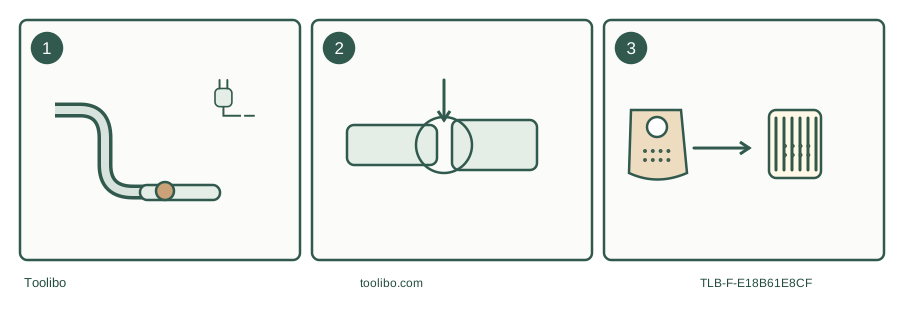
Path
Check nozzle, tubes and hose first while isolated.
Seal
Inspect hose joints, head rim and drain cap.
Filter
Restore the correct bag and filter state.
Model-specific decision path; isolate power before opening or changing the collection system.
Describe the failure before taking anything apart
Record whether pickup declined gradually, stopped suddenly after a large item, or changed during water collection. Note whether the motor still runs, whether its pitch changed and whether anything leaves the exhaust. Those observations separate an ordinary restriction from a full-tank float event or a more serious fault. Smoke, burning smell, electrical damage, liquid at electrical parts or dust escaping from the exhaust ends this routine immediately.
This diagnostic path assumes known ordinary permitted debris or clean water. If the machine may contain hazardous or unidentified material, do not open it for routine inspection. The exact model manual remains the authority for owner-accessible parts. Do not open the motor housing or bypass a protective device to continue cleaning.
Switch off and follow the physical path
Unplug safely before disconnecting the nozzle, wand or hose. Start at the surface end because it is easy to inspect and may hold the obstruction that began the problem. Look into accessible openings without reaching into a powered machine. Remove only known ordinary material by a suitable non-damaging method; do not jab sharp metal through a flexible hose or force an unseen object toward the motor.
Inspect the wand joints and hose for splits, collapsed sections or a loose cuff. Check that the hose is connected to the suction inlet, not a blower outlet. Refit each matching connector by its intended action. A large air leak can reduce useful pickup even though the motor still sounds strong.
Compare the likely causes
Swipe or scroll horizontally to see all columns.
| Observation | Check while disconnected | Appropriate next action |
|---|---|---|
| Sudden loss after a bulky object | Nozzle, wand and hose obstruction | Remove accessible blockage without damage |
| Gradual decline on dry debris | Bag condition and filter loading | Replace bag or maintain filter as specified |
| Hose looks cracked or joint is loose | Cuff, latch, seal and hose wall | Reseat or replace the approved damaged part |
| Water pickup stops and pitch rises | Full tank or float closure | Follow full-tank emptying procedure |
| Normal path but poor pickup persists | Correct assembly and model instructions | Stop owner checks and contact service |
Kärcher WD 4 manual 59510240 lists blocked accessories, hose or tubes; a full bag; a dirty filter; and a damaged filter as causes of declining suction. Shop-Vac’s official troubleshooting page additionally highlights loose hose connections, a full tank and holes in the hose. These are diagnostic possibilities, not proof of the cause in a particular machine.
Check the collection space without creating another problem
Open the tank only after isolation. Replace an overfull or damaged dry bag rather than compressing it. Confirm that any required main filter is present, correct and dry for dry work. A wet filter left after water pickup may rapidly collect a dense layer of debris. Clean or replace it according to its own instructions and let washable media dry completely.
Inspect the head seating, rim and drain cap if fitted. Remove ordinary debris from accessible sealing surfaces without scraping them. Refit all latches normally. Do not add sealant, tape over air passages or tighten a distorted part with an improvised clamp. If a body or seal is damaged, the correct remedy is an approved replacement or service advice.
Make a limited return-to-work check
After correcting one visible issue, restore the complete correct assembly and resume a small part of the intended permitted task. Do not run with the filter removed, the lid open or the hose deliberately sealed against your hand. Do not introduce flour or construction dust as a test material.
Observe whether the original symptom has changed. If pickup returns, continue attending the machine and note what caused the restriction so the next maintenance interval can respond to real conditions. If the problem remains, switch off again rather than repeatedly cycling power in the hope that a blockage disappears.
Know when the owner-level path is finished
Stop when the accessible collection path is clear, the right intact filter and bag are fitted, the tank is correctly closed and poor performance persists. Provide service with the model, filter part number, previous task and the checks completed. A damaged motor, internal leak or control fault cannot be established from sound alone.
This approach is deliberately different from a performance test. It locates visible maintenance issues without claiming an airflow measurement or a motor diagnosis. The endpoint is restored normal collection of the permitted task, or a clear service handover without unsafe disassembly.