
Filter cleaning
Three panels show gentle approved rinse with crossed-out brush, a separated dry filter inspection, and a seal seating correctly on its base.
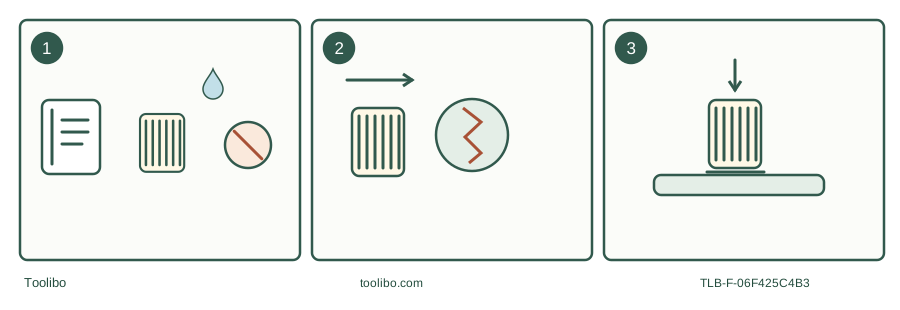
Match
Choose the cleaning method for this filter.
Inspect
Dry fully and look for holes or seal damage.
Seat
Engage the correct holder and sealing surface.
Model-specific decision path; isolate power before opening or changing the collection system.
Identify both the vacuum and the replacement filter
The original manual explains the factory filter, but the part currently fitted may have been replaced. Read its part number and care instructions before using water or a brush. A filter sold for a similar tank size may have different media or seals. If the part cannot be identified, obtain the correct replacement information instead of experimenting with cleaning methods.
This workflow is limited to routine permitted debris. Do not shake, brush or wash a filter that may contain silica, asbestos, lead dust, biological contamination or other hazardous material as an ordinary household task. The required handling, containment and disposal decision comes first. A mask or outdoor location does not make an unknown contaminated filter a routine maintenance item.
Stop and prepare a contained work area
Switch off and unplug before releasing the filter holder or head. Let abnormal heat subside, and keep the electrical head in a dry stable place. Arrange the appropriate waste receptacle before removing the filter so loose ordinary debris does not fall across a living space. Avoid creating a visible dust cloud; do not use the vacuum’s blower or compressed air to clean the media.
Inspect the holder, gasket and filter before cleaning. Look for a split seam, hole, softened end cap or deformation that prevents proper seating. Cleaning cannot restore a torn barrier or a failed seal. Replace an approved damaged part rather than patching the media with tape or glue.
Follow one documented method at a time
Kärcher WD 4 manual 59510240 uses a removable filter box. It describes emptying that box and, if needed, removing the flat pleated filter for running-water cleaning. It expressly says not to rub or brush that filter and to let it dry completely before reuse. A generic internet instruction to scrub every pleated filter would conflict with this example.
RIDGID HD12000 manual SP7160 (04/24) gives a different Qwik Lock removal and seating method. Its water-cleaning instructions warn against water pressure strong enough to damage the filter and require inspection for tears or small holes afterward. Do not transfer the WD 4 box-release mechanism to it, or assume that a different replacement filter has exactly the same retention detail.
Swipe or scroll horizontally to see all columns.
| Finding | Sensible next action | Avoid |
|---|---|---|
| Ordinary loose debris, intact filter | Use its approved gentle cleaning method | Air blasting or aggressive scraping |
| Washable filter needs rinsing | Use the specified water method | Pressure washer, unapproved chemicals |
| Hole, split seal or distorted holder | Replace the affected approved part | Tape, glue or harder clamping |
| Clean but still damp | Continue safe drying | Dry pickup to “finish drying it” |
Dry by condition, not appearance alone
Let the washable part dry completely in an appropriate place before dry collection and storage. Keep it away from children, pets and contaminants while drying. Do not use an oven, flame, heat gun or improvised powered heating arrangement. Follow any part-specific drying guidance; there is no universal hour count that guarantees a thick pleated filter is ready in every climate.
Examine folds and end seals after drying. A filter can be clean yet permanently deformed, so check whether its normal shape and sealing surface are intact. If frequent jobs leave no drying time, keep a compatible approved spare rather than treating a damp filter as good enough. Store that spare clean and protected, not loose among sharp accessories.
Refit the seal as carefully as the media
For the documented HD12000, the rubber gasket at the bottom must seat around the cage base and the integrated filter plate must engage the stud. Its manual warns that incorrect seating can let debris bypass the filter. The cage and float remain in place. For the WD 4, restore the filter in its box and reinstall the box correctly according to its own instructions.
Check that no bag edge or loose debris interferes with closing the head. Resume only the intended ordinary task, with normal filtration present, and stop if dust escapes or suction remains abnormal. Do not remove the filter for a powered comparison test. Record whether the filter was cleaned or replaced and keep its part number; that makes the next maintenance decision faster without inventing a fixed replacement interval.