
Empty and clean tank
Three panels show an isolated head on a dry shelf, tank liquid draining into a lower vessel before lifting, and clean tank rim with dry components reassembled.
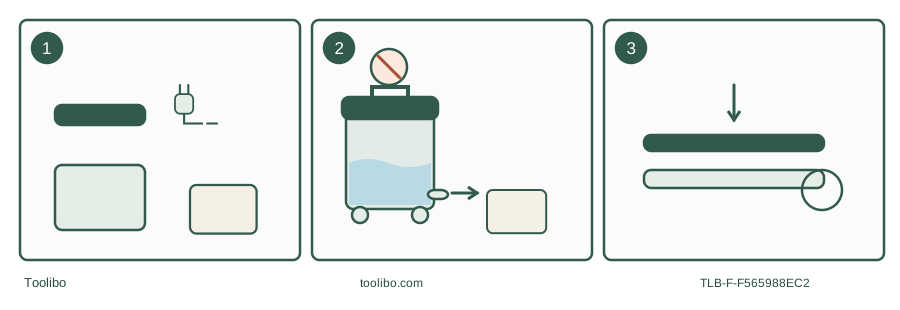
Prepare
Identify contents and set the receiving vessel.
Reduce
Drain or empty safely before lifting a heavy load.
Restore
Dry permitted parts and check rim, cap and latches.
Model-specific decision path; isolate power before opening or changing the collection system.
Know what you are about to empty
This routine covers a tank containing known ordinary permitted dry debris or clean water. If contents may include hazardous dust, sewage, chemicals, sharp fragments or unknown material, do not open the tank for routine household cleaning. Decide how that material must be handled first. A vacuum tank is a container, not a treatment system that makes every collected substance harmless.
Choose an appropriate waste receptacle or permitted drain for the actual contents. Do not assume that anything liquid belongs in a storm drain, garden or household sink. Keep dry debris out of a liquid drain. Place the receptacle close enough to control the transfer without carrying an unnecessarily heavy tank across steps or through living spaces.
Stop, isolate and reduce the load
Switch the vacuum off and unplug from a dry safe position before opening or draining. Disconnect accessories as the exact manual requires and arrange the hose so residual water cannot run onto the plug. Place the electrical head on a stable dry surface, with its vulnerable underside protected from impact and contamination.
RIDGID HD12000 manual SP7160 (04/24) provides a drain for liquid emptying and warns against lifting a vacuum that is heavy with liquid or debris. Its practical direction is to drain or remove enough contents to make lifting manageable. The purpose is load reduction; it is not an instruction to handle unknown sharp or hazardous contents by hand.
Pick the route the actual tank provides
Swipe or scroll horizontally to see all columns.
| Collection state | Appropriate owner-level route | Watch for |
|---|---|---|
| Dry debris in an approved bag | Remove and dispose of the bag by its collar | Full bag tearing or dust release |
| Loose known ordinary dry debris | Controlled transfer to the suitable receptacle | Dust clouds and hidden sharp items |
| Known clean water, drain fitted | Use the drain as the manual directs | Uncontrolled flow, missing cap or seal |
| Known clean water, no drain | Remove head and pour manageable load | Weight, grip and splashing |
The Kärcher WD 4 manual 59510240 ends operation by switching off, unplugging, removing the head and emptying the container. Do not drill a drain hole into a tank that lacks one. On any drain-equipped model, have the receiving vessel ready before loosening the cap, and refit the cap correctly before the next use.
Keep rinsing away from electrical parts
The documented WD 4 care instructions permit rinsing the container and accessories with water as necessary, followed by drying. That permission is not an instruction to hose the assembled machine or motor head. Remove the permitted collection parts first, and keep the cable, switch and electrical housing out of the washing route.
Use only a cleaning product and method permitted for the actual component. Do not combine cleaners, add unapproved disinfectants or use a pressure washer to save time. A strong fragrance does not prove the tank is clean, and a water rinse does not establish disinfection. For routine clean-water use, the useful endpoint is visible residue removed and the allowed parts completely dry.
Inspect surfaces that affect the next job
Look around the tank rim, inlet and drain cap for debris that could prevent a normal fit. Check the body and latches for cracks and the accessible seals for damage. Clean rather than grind or scrape the sealing surfaces. If the head must be forced down, stop and find the obstruction instead of using the latches as clamps.
Inspect the hose and nozzle separately for remaining water or stuck routine debris. Clean them only by their approved method. Leave washable components in a safe place to dry, while protecting the motor head from water and preventing children or pets from disturbing the parts. Do not operate the motor as an improvised drying appliance.
Reassemble for a named next mode
If returning to dry pickup, fit the correct fully dry filter and an approved bag where needed. If preparing for another clean-water task, follow the exact wet-filter configuration. Close the tank, engage latches, fit the drain cap if present and verify the hose route before connecting power again.
Record an unresolved problem rather than storing a cracked tank as if ready. Persistent leakage, damaged retention, electrical wetting or an unidentified previous load requires further advice. Emptying is complete when the contents have an appropriate destination and the machine’s condition and next mode are clear.