
Backflow ends the operating trial
Rear leakage circled on a generic gun, separate consumable/readiness checks and a limited supported sample distinguish fault from an ordinary setup check.
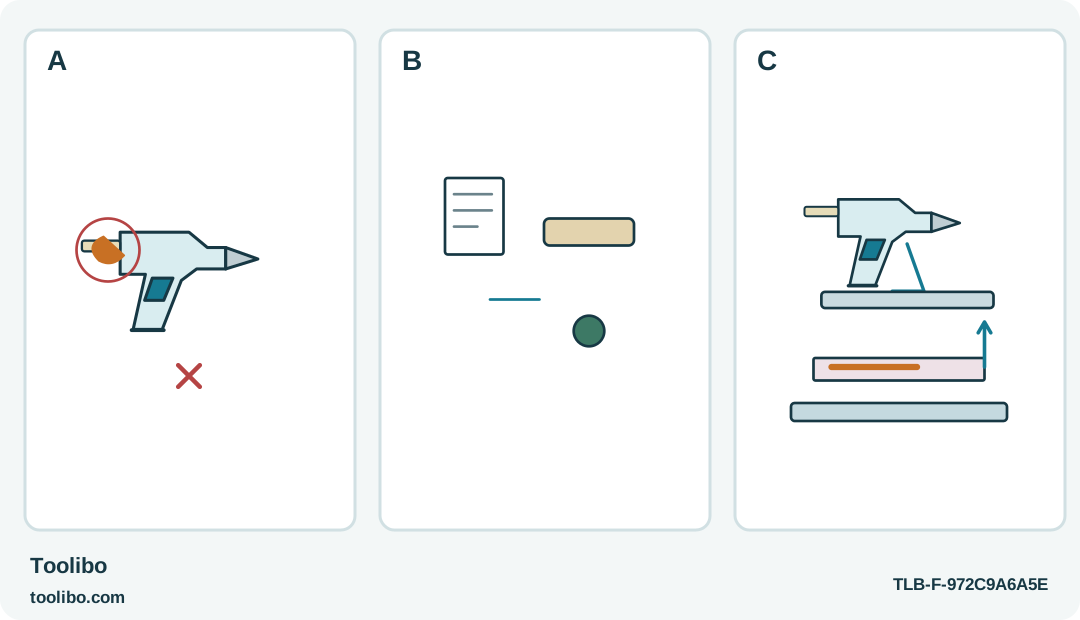
A
Release feed and stop if adhesive appears at the rear. Do not extract backward, purge by force or probe the nozzle.
B
Only with no backflow or damage, verify the exact recommended stick and normal green readiness before one gentle check.
C
Use a small supported scrap test, stopping on renewed resistance or leakage. Stable upright parking and service boundaries remain essential.
Readiness checks belong to a sound tool; visible backflow takes the gun out of that ordinary test sequence.
Stop pressing when the feed feels wrong
A trigger that becomes unusually hard invites a simple but unhelpful response: squeeze harder. On a hot glue gun, that can turn an uncertain feed problem into a mess around the rear of the tool. If adhesive is escaping backward or the trigger appears blocked, release it and stop the application rather than testing your grip strength.
This guide applies to the North American WORX WX045L and its matching instructions. It uses manufacturer-recommended 7/16-inch, or 11 mm, sticks and operates at approximately 392°F, or 200°C. The battery system is designated 20 V Max, with 18 V nominal voltage. Neither the stick diameter nor the battery label makes every superficially similar accessory compatible.
Keep the tool upright in its proper stable resting position on a suitable heat-resistant surface. Do not lay it on its side, point the nozzle upward or work overhead while investigating. Put the project aside where its fresh glue cannot contact skin, and allow a failed attachment to cool rather than holding it open by hand.
Separate normal warm-up from a fault
If there is no backflow or other sign of damage, consider whether the tool was actually ready. The normal start action is to hold the on/off switch for three seconds. The heating indicator is red during heating and turns green when the gun is ready. Do not use elapsed time alone to justify force against a still-cold feed.
A tool that has been switched off can retain enough heat to drip while no longer feeding normally. Dripping after use does not prove the gun is ready for another application. Follow the proper start and ready indication before making a small controlled test, and keep the nozzle away from skin throughout.
If the tool never reaches its normal ready state, stop. Repeated start attempts and extra trigger force will not establish the cause. Check only the permitted external battery and setup conditions; a persistent heating or electrical problem belongs with service, not with opening the housing.
Check what was loaded without extracting it backward
Read the adhesive packaging and compare it with the requirements for this exact tool. A stick that is too small can feed poorly or allow adhesive to escape toward the rear. The troubleshooting guidance also associates rear escape with an unsuitable low-melting formulation. A familiar colour or an approximate diameter is not enough to identify the adhesive.
For an otherwise sound tool with a known correct consumable, no output can simply mean the current stick is used up or a new stick has not been loaded normally into the feed. Add the correct stick through the intended rear opening and use the prescribed loading method. Do not push an improvised rod into the chamber.
If the installed stick is wrong or unidentified, do not pull it backward, drill it out or try to purge it by force. Stop and obtain the manufacturer’s safe remedy for that condition. Adding a correct stick behind the wrong one does not immediately replace the molten material already inside.
Make only a limited normal-flow check
A gentle flow test is appropriate only when there has been no backflow, the tool is undamaged, the adhesive is confirmed suitable and the ready indication is normal. Keep matching waste material supported on the bench and press the trigger slowly and uniformly. Observe whether adhesive exits normally from the nozzle without unusual resistance.
Stop immediately if the trigger blocks, adhesive appears at the rear or around the housing, or normal output does not return. Do not repeat the test at increasing pressure. Do not change the nozzle, probe the outlet with wire or use another heat source to soften a suspected obstruction.
Even successful flow does not validate an unknown adhesive for the finished task. Make a separate cooled material sample before returning to the decoration. The troubleshooting test establishes only that the normal feed appears to work with the identified consumable under the proper ready condition.
Leave repair to the appropriate service route
Switch off after the test and let the tool cool safely. Remove the compatible battery before any adjustment, servicing or maintenance, following the normal release procedure once handling can be done safely. Keep battery terminals away from loose metal objects and do not open the battery pack.
Record whether the symptom was resistance before readiness, no output with a spent stick, or actual backward leakage. Keep the adhesive packaging and note the exact tool model. Those details help service identify the problem without asking you to dismantle the feed mechanism or reproduce a hazardous leak.
A normal restart after adequate heating can resolve a simple warm-up mistake. Correct ordinary loading can resolve an exhausted stick. Backflow, repeated blockage or abnormal operation ends owner-level troubleshooting. The safe outcome may be a paused project and a serviced tool, not a forced bead of adhesive.
Models referenced