
A pause, low charge and charging are different conditions
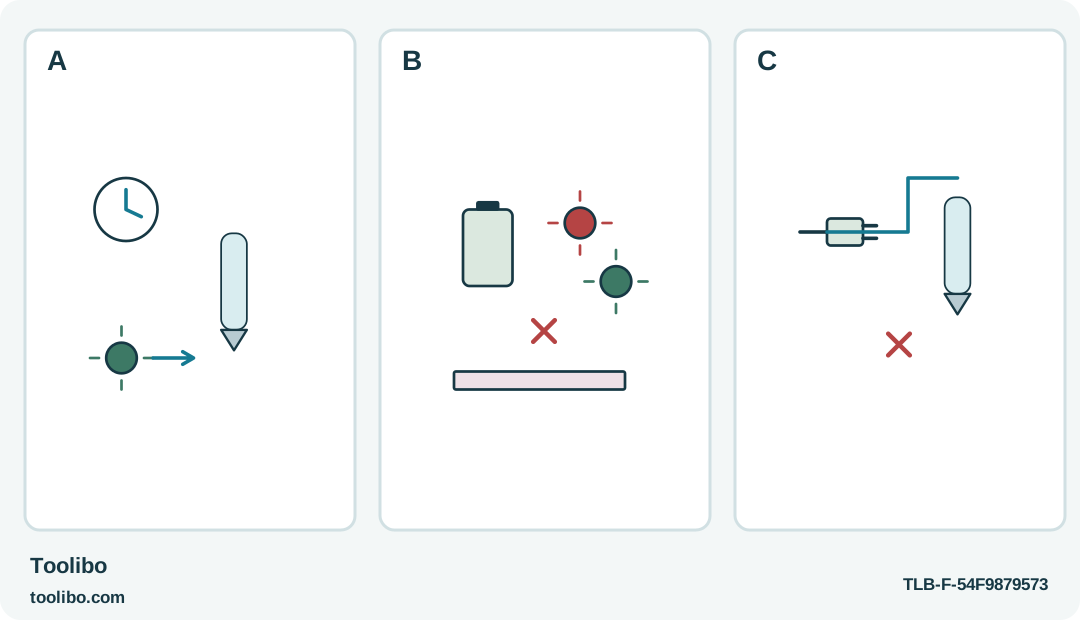
An inactivity clock and warm-up cue, separate battery-warning symbols and a cable-connected pen marked against use distinguish three interruptions.
A
After the documented inactivity timeout, restart normally and allow warm-up; do not dispense waste merely to prevent shutdown.
B
Low-battery indications call for a manageable stop and the exact charging procedure, not harder feed or a long new attachment.
C
Cable connected means charging only. Disconnect before operating, then check readiness and flow on fresh scrap.
An idle shutdown can call for reheating, whereas a charging connection prevents operation altogether.
Reconstruct what happened before it stopped
If a MobileGlue applicator stops dispensing after you spend several minutes arranging the next pieces, begin with the sequence of events. Was it operating normally before the pause? Is it now connected to a charging cable? Did the indicator show a low-battery warning during the previous work? Those observations lead to different actions, even though each situation can look like a tool that no longer feeds.
This guide covers the German-market STEINEL MobileGlue 1007 pistol and 1007-S pen with their integrated rechargeable batteries. Both use the specified 7 mm adhesive system at approximately 170°C. Do not test readiness by touching the nozzle or pressing the trigger harder. The tool can remain dangerously hot after heating stops.
Put the work aside on its support and keep the applicator in its prescribed safe resting position. Do not leave a partly joined item under tension while investigating. If the glue on the project has already cooled before the pieces met, treat that as a failed application rather than forcing the joint together while diagnosing the tool.
Identify the ordinary pause shutdown
The applicator switches off after about five minutes without trigger activity. Each normal use of the feed trigger starts that operating interval again. This is an inactivity feature, not an indication that the battery has necessarily run out and not a reason to keep dispensing unwanted glue just to keep the tool awake.
To restart after a pause, use the on/off button normally, holding it for approximately two seconds. The green indicator flashes during the warm-up period, around fifteen seconds under the stated conditions. Allow the tool to reach its ready state before attempting a small test deposit on a suitable waste surface.
If normal flow returns, resume only after preparing the next joint. Do not assume the adhesive left on the project remains workable because the applicator has restarted. Prepare a fresh appropriate attachment where necessary, and avoid repeatedly heating a delicate material just to rescue an interrupted sequence.
Recognize when charge is the limiting factor
During operation, alternating red and green flashes indicate that the remaining operating time is limited. They are not a full-charge confirmation. A single red flash is associated with a flat battery and the need to charge. Use the indicators together with the operating context rather than interpreting every flashing light as the same condition.
The stated approximate runtime is not a promise that a particular long joint can be completed. Heating demand, pauses and battery condition affect the practical session. When the low-charge warning appears, finish only a manageable attachment that can be completed safely, then stop. Do not start a sequence that requires continuous flow across several pieces.
If the tool gives an unexpected indication, repeatedly cuts out despite appropriate charging or becomes abnormally hot, stop using it. Do not open the housing, attempt to replace the integrated cells yourself or improvise a direct power connection. A charging or battery fault belongs with qualified service, not with a stronger squeeze on the feed.
Charge as a separate activity
The MobileGlue 1007 and 1007-S cannot be used while charging. Connecting a cable is therefore not a way to convert either tool into a corded glue gun. Plan a break or use another correctly prepared appropriate tool if the current task cannot wait; do not defeat the charging arrangement.
Use the supplied charging cable and the specified compatible USB charging setup. Charge within the stated ambient range of 0°C to 35°C, in a suitable dry location. Inspect accessible cable and connection surfaces before use. If a connector is damaged, wet or contaminated in a way that cannot be safely addressed externally, stop rather than pushing it into place.
Allow a charging session according to the tool’s instructions and indicator table. Do not use a remembered colour meaning from a different brand as the completion rule. Disconnect charging before the next operating test, then switch on normally and wait through warm-up. The integrated battery is not an owner-serviceable consumable to remove for this process.
Prevent the same interruption next time
Sort the pieces, mark alignment and prepare supports before switching on. Break the work into small complete sections so that a pause or low-charge warning does not leave a long bead cooling while you search for another component. Keep a suitable test surface nearby for checking flow after a restart.
Record the symptom if it recurs: whether it followed a five-minute pause, occurred during charging, or came with a battery warning. That account is more useful for service than repeatedly trying random button presses. Include the exact model, but do not dismantle the tool to gather further evidence.
A normal pause ends with a normal restart and usable flow. A depleted battery ends the session until appropriate charging is complete. Continued malfunction, damaged charging parts, smoke or unusual heating ends owner troubleshooting. Keeping those outcomes separate avoids both unnecessary force and unsafe attempts to work around the battery protection.
Models referenced