
Compare the whole placement and resting movement
Pen and pistol outlines have different clearance envelopes above an identical receiving area; a separate supported joint shows the shared placement requirement.
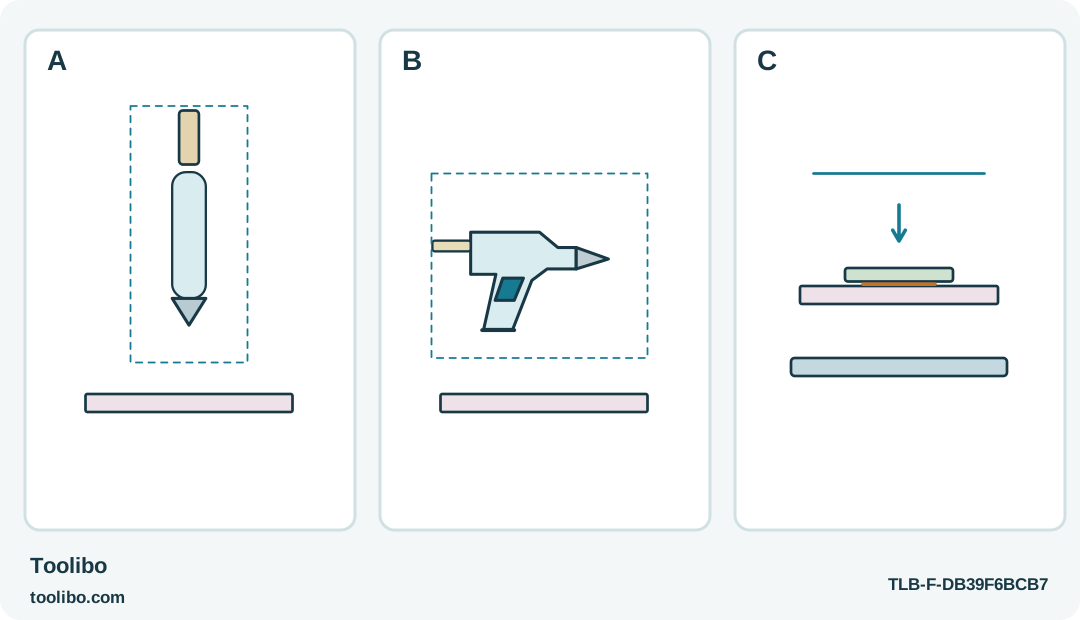
A
Rehearse the pen’s hand, viewing and rear-stick clearance while cold; do not press cold feed as a grip test.
B
Rehearse the pistol’s different envelope and its prescribed resting position. Neither shape establishes stronger bonding.
C
Choose the format that lets you apply, park and position a supported joint calmly. Both are the same nominal 170°C/7 mm class, not low-temperature alternatives.
The useful shape is the one that leaves room for the hand, rear stick and complete placement movement.
Put the joint on the table first
A pen-shaped glue applicator can look easier to aim, while a pistol-shaped one can look easier to hold. Neither impression tells you whether you can reach the joint, keep fingers out of the glue path and set the hot tool down safely. Start by arranging the actual household decoration at a comfortable working height.
This comparison covers the German-market STEINEL MobileGlue 1007-S pen and MobileGlue 1007 pistol. Both use an integrated rechargeable battery and a 7 mm hot-melt system operating at approximately 170°C. The change of shape is not a low-temperature option. Use the specified adhesive for the exact tool and intended materials, not merely any stick that fits.
Consider a small card-and-wood display or another dry indoor decoration that does not carry a load. If the joint is overhead, hidden behind an electrical fitting or needed to make a structure safe, rearrange or reject the task rather than selecting a narrower tool to reach it. Access is useful only when the application itself is appropriate.
Rehearse the reach while everything is cold
With the tool off and cool, hold it in the intended working position without dispensing anything. Check whether your hand blocks your view of the contact point. Move the supported workpiece to improve sight and reach instead of bending your wrist sharply or leaning over the nozzle path.
The elongated pen format and the taller pistol format occupy different space behind the tip. Look at the clearance available around the work, including the rear stick. A narrow approach can still fail if the inserted stick meets an obstacle or if your free hand has nowhere safe to stabilize the piece.
Do not press the cold feed mechanism repeatedly as a grip test. The purpose is to assess placement, not force unmelted adhesive through the tool. Ask whether you can support the work independently, bring the parts together promptly and return the applicator to its prescribed resting position without crossing the fresh joint.
Compare control on a representative sample
Charge the selected applicator using its specified charging arrangement before the session; these models cannot be used while charging. Disconnect it from charging, prepare matching scraps and switch it on with the prescribed button action. Allow the warm-up indication to finish before expecting normal flow.
Apply a modest amount to one side of the sample and promptly bring the pieces together. Observe the whole movement: approach, gentle feed, withdrawal, safe placement of the tool and joining of the parts. A shape that makes the first dot easy but leaves you struggling to rest the hot applicator is not a successful choice for that workspace.
Repeat a small sample only if needed to compare comfort or access. Do not judge by the largest bead produced or by how hard you can squeeze. The desired result is a controlled deposit with enough contact for this minor decorative task, not a contest between mechanisms. Keep the hot nozzle and glue away from skin with either shape.
Separate ergonomics from adhesive performance
Once the sample cools, inspect it for distortion, a thick visible gap and easy release from either surface. Those problems may come from material compatibility, adhesive selection or joining too late. They do not by themselves show that the pen or pistol body is inferior.
Both tools are in the same nominal temperature and stick-diameter class. That does not establish identical results under every condition, but it also supplies no basis for declaring one shape inherently stronger. Choose based on the procedure you can perform accurately and safely with the supported work in front of you.
For a long item, avoid assuming the battery-powered format gives unlimited time to cover the entire surface. Spot gluing may be more manageable on broad areas, and the parts still need to meet while the deposit is workable. Lay out the sequence before heating rather than using reach or grip comfort to compensate for poor preparation.
Plan pauses and the next session
These applicators switch off after about five minutes without feed-trigger activity. A pause to reposition several pieces can therefore require switching the tool back on and allowing it to become ready again. Do not diagnose the resulting resistance as a grip problem and squeeze harder against cooling adhesive.
Battery warning and charging are also separate from body shape. If remaining charge is low, stop at a completed small section rather than beginning a long attachment that depends on uninterrupted flow. Let the tool cool safely and recharge according to its instructions; do not try to keep working with the charging cable connected.
Choose the pen if its actual cold rehearsal and sample workflow give you better access and control, or the pistol if its arrangement suits your hand and bench better. Keep the conclusion specific to that task. The useful comparison ends with a comfortable, supported sequence and an acceptable cooled sample, not a universal winner based on silhouette.
Models referenced