
The same light means different things in different stages
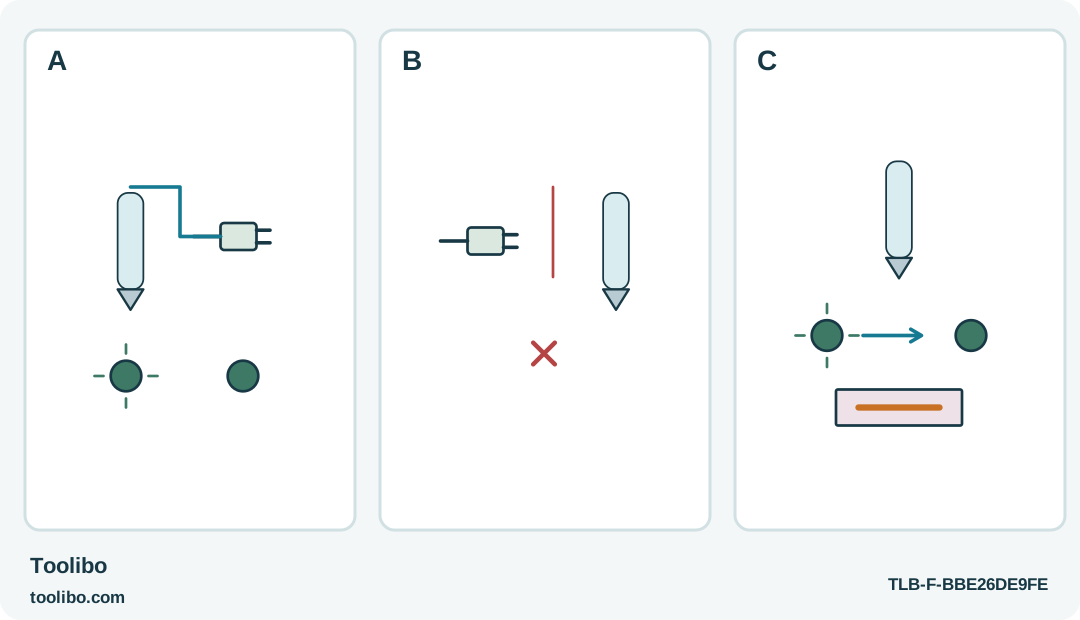
A connected pen with charging states, a visibly separated plug and a distinct warm-up-to-sample sequence separate charging from use.
A
In the charging stage, flashing green becomes steady green on completion; use the specified cable and supply.
B
Disconnect charging before operating. A cable-connected GluePen is not an operating corded applicator.
C
Begin a separate warm-up cycle, wait for steady readiness and make a small supported flow check. A dark light does not mean a cool nozzle.
A steady green light marks different events before and after the charging cable is removed.
Start by asking whether the cable is connected
A GluePen that will not dispense while attached to its charger may be behaving exactly as intended. This model cannot be used during charging. Before assuming a fault, separate the session into two stages: restoring battery charge with the prescribed power supply, then disconnecting and heating the pen for work. The LED has meaning within each stage, not as an isolated colour remembered from another tool.
Place the pen on a protected surface and switch it off before inspecting the charging arrangement. Keep the hot end away from the cable and your hands. If it has just been used, allow it to cool safely before a close inspection. This guide concerns the integrated-battery Bosch GluePen with its specified Micro-USB charging connection, not the removable-cell Gluey.
Do not open the pen or try to disconnect the internal battery. A damaged port, cable, body or power supply is a reason to stop using that item. Do not improvise a repair simply because the connector looks like one used by another household device.
Check the external charging path
Identify the power supply listed for the actual pen and use the correct charging cable. A connector’s shape alone does not establish an appropriate supply. Check the visible cable and plug for damage without bending the lead sharply or poking inside the socket with a metal object.
Keep the charging location dry, ventilated and within the specified ambient conditions. Make sure the lead will not be trapped under a tray or pulled by someone passing the bench. Moisture protection applies to the adaptor as well as to the pen. If the supply or connection behaves abnormally, disconnect it safely and stop.
Connect the prescribed cable and supply in the normal way. Do not keep pressing the feed trigger to see whether charging has made the pen work. Feeding is an operating task for the later, disconnected stage. A clear separation also prevents an attached cable from becoming an unexpected tether when you reach toward the project.
Observe charging before moving to heating
During charging, the indicator flashes green; at completed charging it becomes continuously green. Disconnect the supply after completion. A light that changes as expected is useful evidence about that charging cycle, but it is not a measurement of battery health or permission to ignore a damaged cable.
If the indicator does not behave normally, check only the safe external causes: the correct supply, secure ordinary connections and whether the power source is functioning. Do not repeatedly wiggle the socket or hold the plug at an angle to maintain contact. A connection that works only under pressure needs service attention.
Keep any diagnostic note specific. “Flashes green while connected, then steady green” is more useful than “the light looks fine.” Likewise, record whether no light appeared at all, rather than assuming that an unlit indicator always means the same fault.
Begin a separate operating cycle
With the charging cable disconnected, prepare the correct recommended stick and a supported scrap surface. Hold the on/off button until the green indication starts. The LED flashes during warm-up and becomes steady when the pen is ready to use. Only then try a controlled application with moderate trigger pressure.
This operating steady-green state tells you the pen has completed heating; it is not the same event as completed charging. If glue still does not flow evenly, check the consumable and feeding procedure rather than immediately reconnecting the charger. A wrong stick or an empty feed cannot be corrected by extra battery charge.
The pen also switches itself off after a period of inactivity. Check its state when returning to the bench instead of assuming it stayed hot. If the indicator shows that charge is needed, end the gluing attempt and follow the normal charging sequence rather than forcing the trigger on a cooling tool.
Know when observation should become a service request
Stop if the pen repeatedly fails to complete a normal charging or heating cycle with its correct external equipment. Record the exact model, supply markings and sequence of indications, together with whether the cable was connected at each point. Keep charging observations separate from feed symptoms.
Do not claim a repair merely because one later attempt happens to work. Intermittent connections, unusual heat, damaged insulation or unreliable switching warrant assessment. Finish a normal session by switching off deliberately, parking the pen safely and letting it cool completely before packing it away; a dark LED does not make the nozzle immediately cool.
Models referenced