
Opening, rail and fabric boundaries
Original schematic: Measure the actual window opening. Rail extensions are separate planning choices. Fabric drop begins at the supplier’s specified datum. Not to scale.
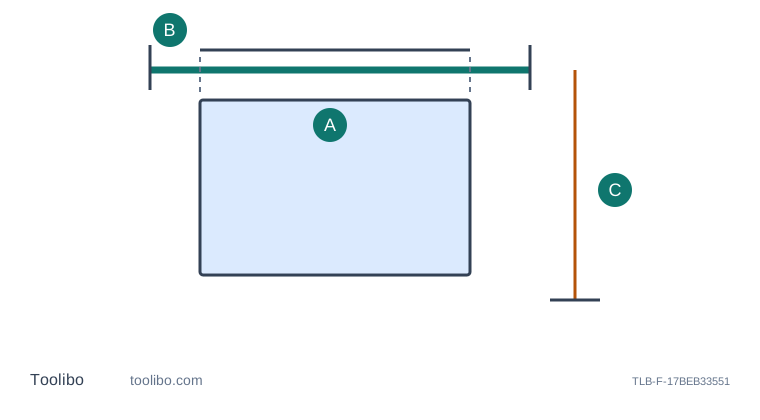
A
Measure the actual window opening
B
Rail extensions are separate planning choices
C
Fabric drop begins at the supplier’s specified datum
Conceptual geometry only, not to scale. The diagram does not establish installation clearances or reproduce a manufacturer control layout.
Decide which width the supplier is asking for
A window opening, the outside of its trim, the proposed rail and the finished curtain are different widths. A laser reading between two reveal faces answers only the first of those questions. Before measuring, read the rail or curtain supplier’s form and identify whether it asks for an opening size, a finished rail size or a fabric quantity. Do not enter the same number into every field because each field uses the word width.
Sketch a front view of the window and mark the opening, surrounding trim, adjacent walls and any obstruction. Note whether the proposed curtain will sit inside a recess or extend across the wall outside it. These arrangements have different boundaries. An inside-recess system may need the supplier’s exact deductions; an outside rail may need space for the curtain to stack clear of the glass. Neither allowance can be inferred from the meter alone.
Measure the available envelope, not just the opening
Check the opening width at the relevant heights and use a tape where short reveals or glass prevent a clean laser setup. For an outside rail, inspect the wall beyond both sides of the window. A nearby cupboard, sloping ceiling or adjoining wall can limit one side more than the other. A mathematically symmetrical rail may not have room for its end fittings or for the curtain to gather.
Consider a purely illustrative opening of 1.80 m with a proposed extension of 0.20 m on each side. The planning length is 2.20 m. This is arithmetic, not a recommended extension: the curtain heading, stack size, rail hardware and supplier’s instructions determine the real dimensions. Draw each extension separately. If the left side has less space, do not quietly move the whole rail without checking how that affects coverage and the intended appearance.
Keep mounting height and curtain drop separate
The rail’s position and the finished fabric drop also require distinct definitions. Ask where the supplier measures from: the rail, a hook position, a ring or another specified datum. Then identify the intended lower endpoint, such as above a sill or at a defined distance from the floor. The difference between those points is not automatically the fabric cutting length, because heading and finishing details may add or remove material.
Check the lower boundary at several positions if the floor or sill is uneven. Avoid measuring to a soft rug when the intended reference is the hard floor underneath. Keep any radiator, furniture or operating handle visible in the sketch. Follow the relevant product’s ventilation and use instructions rather than inventing a universal curtain clearance. Do not lean out of a window, climb on furniture or point a laser at someone holding a target to obtain the drop.
Turn a planning measurement into a clear order
Separate the worksheet into opening dimensions, available wall space, proposed hardware dimensions and supplier-specified finished fabric dimensions. Label a dimension as proposed if the hardware choice is not final. Curtain fullness is a product and appearance decision, not a second reading of the window. Multiplying the rail length by an assumed fullness factor without checking the curtain type can produce the wrong order even when the original distance is accurate.
Before approving an order, confirm whether end caps, finials or brackets are included in the stated hardware length. Confirm which deductions the supplier makes automatically so that you do not subtract them twice. For custom-made items, use the supplier’s required final measuring method and resolve any unevenness or obstruction before fabrication. Preserve the original opening measurements so a changed rail system can be evaluated without guessing what the first number meant.
This survey does not locate hidden cables, pipes or suitable fixing material. Decide the fixing method separately using appropriate information and qualified help where needed. Keep the beam away from eyes, people and optical instruments, and switch it off while moving between positions. A well-defined curtain plan describes the desired result and the space available; it is not permission to drill at a particular point.
Models referenced