
Cut a rounded open-edge notch in a loose drawer divider · Diagram
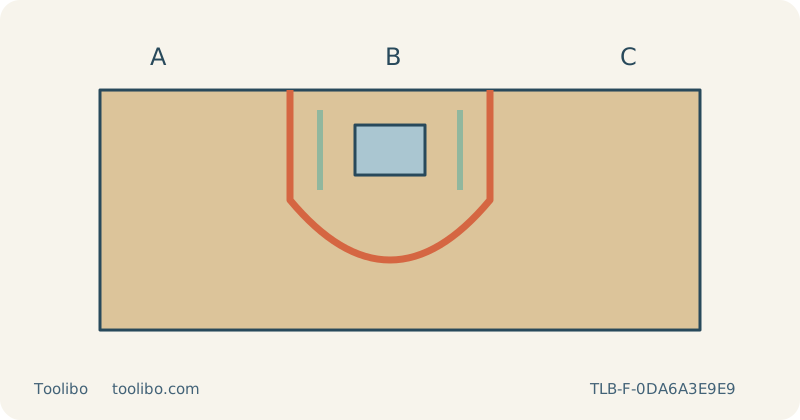
Two entries descend from a board edge into a rounded notch with a separate waste support.
A
Use separate approaches
B
Avoid a forced tight turn
C
Finish the rounded bottom
Two entries descend from a board edge into a rounded notch with a separate waste support.
Design an open notch in a loose divider
A loose wooden drawer divider can need a rounded open-edge notch to clear an existing feature or provide finger access. Remove the divider from the drawer before measuring and cutting. This project does not authorize cutting inside assembled furniture or around concealed fasteners. Use known, uncoated material and confirm that the notch will not remove a fixing point or make the divider unsuitable for its intended light-duty use.
Measure the feature that must pass through the notch, including the clearance needed after finishing. Draw the opening from an accessible edge, with a broad rounded inner end rather than a sharp corner the blade cannot turn. Mark the notch interior as waste and retain a sample of the mating feature or a simple gauge for the final fit check. Do not rely only on an approximate pencil width.
Prove the inner end on matching scrap
Use a scrap of the same material and thickness to test the tightest part of the route. Choose a blade whose shank, working length and curve capability match the exact saw and this geometry. Switch off and remove the battery or unplug the cord before fitting it. Insert it fully, locate the back in the guide roller where required and verify secure retention. Secure zero bevel and leave the guard intact.
A broad straight-cut blade may enter the two sides easily but resist the rounded end. If that happens in the sample, stop and choose a more appropriate blade or a broader shape. Do not force the blade sideways to connect two inaccurate cuts. A slight hand-finishing allowance is useful, but it cannot compensate for a notch that has already been cut beyond its required boundary.
Plan separate approaches and support the waste
Clamp the retained divider on a stable work surface and support the notch waste independently without putting a support in the blade’s route. Check the full stroke underneath, including near the rounded end. Thin divider stock can flex, so choose close, stable support while keeping the blade clear. Never place a hand below the notch to hold the centre or catch it as it becomes free.
You may find two planned approaches from the open edge easier than one continuous tight turn. Decide their meeting point before starting and ensure the final waste remains supported. Every change of approach, clamp or board orientation requires a full blade stop and power isolation. Keep the base supported during starting and stopping; do not balance it on a narrow unsupported strip just to avoid repositioning the work.
Cut on the waste side without chasing the line
Wear eye and hearing protection and suitable respiratory protection, with compatible dust control and ventilation. Route the hose or cord behind the saw so it does not pull the thin piece or enter the notch. Choose an appropriate speed and start with low or zero orbital action when the finished inner edge will be visible. A successful straight sample does not automatically validate the rounded part.
Rest the base securely, keep the blade clear, start and establish speed before entering from the edge. Feed steadily on the waste side of the line, leaving a little material for hand finishing. If the blade begins leaning, the divider vibrates or the waste moves, stop rather than increasing pressure. Do not extend the cut farther merely to make an awkward turn easier without checking whether that would change the intended opening.
Check fit only after the edge is safe to handle
Switch off and wait for the blade to stop completely before withdrawing it, setting down or removing the waste. Disconnect power before adjustments. With the divider clamped, smooth the inner edge and both faces, removing splinters before offering the part to a hand or a fragile mating surface. Check the notch with the measured feature or gauge without forcing it into place.
If it is slightly tight, use controlled hand finishing within the available allowance rather than another speculative powered pass. If the opening is too large or the remaining material has split, reassess the part instead of masking the defect with filler. Refit the divider only after confirming that it sits normally and no sharp edge can catch stored objects. Keep the template for repeats, but recheck actual thickness and grain on each new blank.
Models referenced