
Check the working state
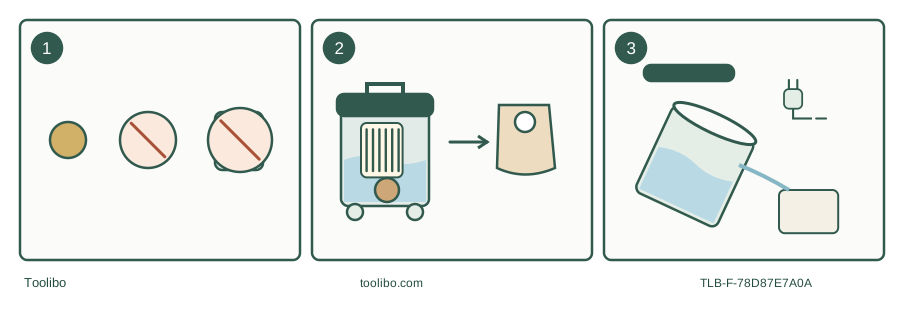
Base-model controls: Filter indicator present; no Push&Clean or tool socket on18451550.; Liquid setup: Bag out; wet-appropriate filter retained; float checked.; Emptying: Unplug; control hose residue; pour from rear/side, not front inlet.
Base-model controls
Filter indicator present; no Push&Clean or tool socket on18451550.
Liquid setup
Bag out; wet-appropriate filter retained; float checked.
Emptying
Unplug; control hose residue; pour from rear/side, not front inlet.
An original decision aid. Isolate power before opening, changing filters or emptying.
Read the suffix before following a family diagram
This guide is for Multi II 22 EU, product 18451550, with a 22-litre polypropylene tank. It is not Multi II 22 Inox, 22 T or a larger 30-litre variant. The exact manufacturer feature matrix lists a filter-clean indicator but no Push&Clean system and no power-tool socket for this base model. A shared family manual can show buttons and sockets that are absent here.
That distinction changes maintenance. When the indicator signals reduced suction, do not search for an imaginary cleaning button or improvise a way to imitate one. The signal calls for inspection and the appropriate cleaning or replacement routine. It does not measure dust safety and does not certify that the collected material is harmless.
Prepare the correct dry collection path
With power disconnected, inspect the matching filter and its seals. The product listing identifies the Multi II filter kit as 107417194; confirm current compatibility before purchase rather than fitting a Buddy II element by appearance. Install a suitable bag on the inlet connection for permitted dry collection, and make sure the bag collar is properly seated and the head fits the tank.
The 22-litre figure is gross container space, not an instruction to pack a bag or liquid load to that volume. Leave room for the filtration and float arrangement, and replace a filling bag before it strains or obstructs the inlet. Check the hose, handle, tubes and nozzle for blockage before starting a longer job. Select a stable position where the hose will not pull the machine around a door frame.
Treat the indicator as a diagnostic prompt
A dirty filter can reduce suction and trigger the indicator. Stop, unplug and check the complete external air path: nozzle, tubes, hose, bag and filter. A blocked nozzle and a loaded filter can feel similar at your hand. Do not remove filtration and run the motor to decide which is responsible.
For filter access, follow the retaining-plate procedure in the matched family instructions. Keep the filter and sealing faces clean, and seat the retaining plate squarely rather than forcing crossed threads or overtightening it. Replace a damaged or inadequately cleanable filter. If rinsing a suitable filter, allow it to dry fully before dry pickup. The motor head must not be washed or sprayed.
Set up liquids without leaving the bag inside
Switch off and unplug, remove the head and take out the dust bag. Empty dry debris from the tank. Fit and retain a filter suitable for wet suction, and check that the float works normally before closing the head. An empty bucket with a missing filter is not a correct wet configuration.
The manufacturer’s liquid routine removes the bag while keeping the appropriate filtration. Use the suitable nozzle and keep all electrical connections dry and away from the spill. This is a domestic collection task, not permission for continuous pumping or for entering a flooded space containing live electrical equipment. Unknown chemicals and foaming cleaning mixtures are not automatically acceptable because they are liquid.
Stop immediately if foam develops or liquid escapes. At a full-tank response or sudden loss of wet pickup, switch off yourself, unplug and empty; do not assume the motor has been electrically disconnected. Never defeat the float to gain capacity. Check any abnormal early stop before resuming work.
Empty without releasing the hose’s remaining water
Allow liquid in the hose to drain into the container while arranging the shutdown safely, then switch off and unplug before disconnecting and opening. Keep the loose hose end controlled. The manufacturer’s emptying instructions favour pouring over the rear or sides of the container so dirty water does not escape through the front hose connection.
Use a suitable disposal route for the actual collected liquid, and do not lift a load that is uncomfortable simply to reach an advertised capacity. Clean permitted non-electrical parts and dry the filter and tank before restoring a bag for dry work. Store accessories so they cannot fall and pull on the cable when the machine is moved.
Keep the material and service boundaries clear
The exact manufacturer matrix lists 200 mbar/20 kPa vacuum; that is pressure, not airflow. The current product description’s 1,200 W motor figure is electrical input, not a nozzle cleaning-speed result. Do not infer a performance ranking from either value or transfer a hose length from a different Multi II kit.
This household model is for non-hazardous dust and suitable non-flammable liquids. Do not collect harmful dust, hot ash or cigarettes, combustible or explosive dust, solvents, petrol, acids or alkalis. This guide does not authorize flour, cement, asbestos or lead work. Persistent indicator warnings after correct external checks, damaged cables or leaks into the head require service. Do not alter electrical, mechanical or thermal protection, or add a home-made tool socket.
Models referenced