
Check the working state
Tool mode: Dry bag and textile prefilter; confirm UK tool load before auto mode.; Wet mode: Bag and textile sleeve removed; cartridge retained; rubber lip fitted.; Drain and dry: Power disconnected; controlled drain; head and filter dry before dry work.
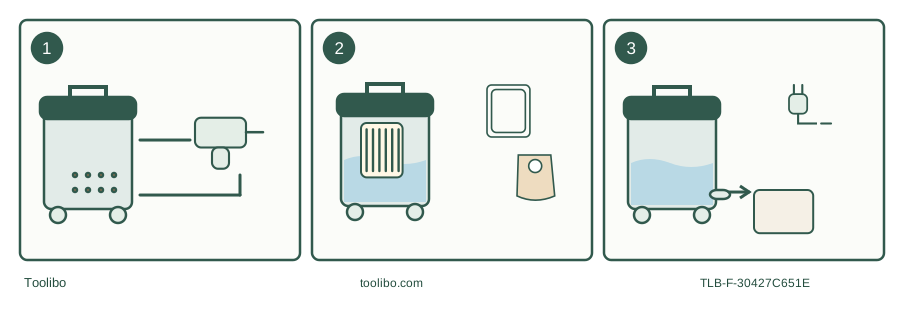
Tool mode
Dry bag and textile prefilter; confirm UK tool load before auto mode.
Wet mode
Bag and textile sleeve removed; cartridge retained; rubber lip fitted.
Drain and dry
Power disconnected; controlled drain; head and filter dry before dry work.
An original decision aid. Isolate power before opening, changing filters or emptying.
Three jobs, three checks
The UK AdvancedVac 20, order 06033D1270, combines ordinary suction, power-tool automatic start/stop and a liquid drain. These conveniences do not create one setup that suits every job. First identify the material, then choose the control mode, then check the filter arrangement. The shared manual also covers UniversalVac 15, which lacks the AdvancedVac’s drain and automatic tool-control features.
The 20-litre container is gross volume. The manual gives 13.5 litres net liquid volume and a 16.8-litre bag volume. Leave the space needed for airflow and the float rather than treating the external tank size as a safe water fill mark. The included 2.2 m antistatic hose reduces static discharge; it does not certify the machine for combustible powders or explosive atmospheres.
Prepare dry collection before tool connection
With electricity disconnected, inspect the main cartridge and textile prefilter and fit the correct dry dust bag. All parts must be sound and dry. Seat the bag collar and head catches properly, then connect the hose and appropriate adapter. Confirm the material produced by the tool is permitted for this household vacuum; a fitting that happens to connect is not a dust-hazard assessment.
The UK table in the matched manual permits a connected tool between 100 W and 1,800 W. Other regions have different figures. Check the actual unit’s socket marking and supplied manual before connecting, and do not add a multiway strip or treat the outlet as a general workshop power source. Keep both vacuum and tool switched off during connection and prepare the tool so accidental operation cannot cause injury.
Understand automatic start and the air inlet
Select the automatic start/stop position only for the approved connected-tool task. Starting the tool starts extraction; stopping it ends extraction after the designed run-on. Do not mistake that brief continued suction for a fault, and do not open the tank while it runs. Unplug the vacuum before filter changes, adjustments, emptying or maintenance.
For tools with low air admission through the hose, the manual calls for opening the adapter’s false-air inlet fully. That deliberate air opening is different from an accidental hose leak. It helps the specified tool arrangement breathe; sealing every opening with tape can defeat the intended setup. Stop if the adapter will not stay secure or the tool’s dust is outside the vacuum’s permitted use.
Switch completely to liquid pickup
Turn off, disconnect the plug and remove the head. Take out both the dust bag and the textile prefilter, empty the tank and clean the main cartridge. Keep the cartridge installed. Fit the rubber-lip insert in the floor nozzle, refit the head and use ordinary suction mode for the liquid task rather than leaving an unrelated power tool connected.
Work upright with dry electrical connections kept clear of the spill. This is not a water pump, and the manual does not authorize continuous extraction duty. When the float reduces suction, stop immediately and empty. If foam or water escapes, switch off immediately even if you expected more remaining capacity. Never disable the float to make a longer uninterrupted run possible.
Drain without making a second spill
Switch off and unplug before using the liquid drainage opening. Position a suitable receiving container or permitted disposal point first, keep the machine stable and control the release. Decide how the collected liquid should be disposed of based on what it contains. An ordinary drain is not a disposal route for solvents, contaminated liquids or unknown chemicals.
After emptying, make sure the closure is correctly refitted before the next task. Remove the head and allow it and the main filter to dry thoroughly after wet use. The drain saves one lifting step, but it does not clean or dry the filter, eliminate residue in the tank, or make the next dry bag moisture-proof.
Keep troubleshooting outside the electrical head
Manufacturer figures are 1,200 W input, 70 l/s maximum turbine airflow and 260 mbar maximum turbine vacuum. They are separate specifications, not simultaneous nozzle performance. If pickup falls, unplug and inspect the hose, nozzle, tube joints, bag, filter and head seal before assuming motor failure. Clean the textile prefilter by tapping and the main filter pleats with a soft brush as the manual directs.
Do not collect harmful dust, hot or burning material, explosive dust, petrol, oil, alcohol or solvents. This guide does not authorize cement, flour, asbestos or lead work. A larger tank and antistatic hose do not change those limits. Replace damaged filters; have a damaged power cord, repeated protection trip, leak into the head or unresolved malfunction handled by qualified service. Never bypass the socket protection, float or thermal safeguards.
Models referenced