
Dry car interior cleanup
Three panels show vacuum outside an open door with hose slack, controlled nozzle on a seat away from wiring, and floor mat retainers checked before departure.
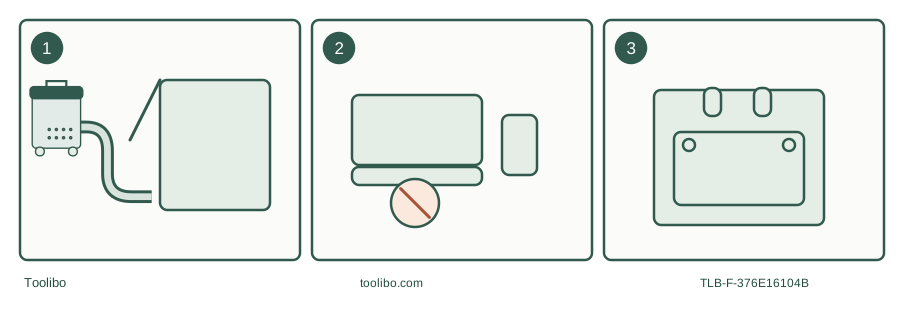
Route
Keep machine outside and cable away from hinges.
Collect
Use a clean suitable nozzle on permitted dry surfaces.
Finish
Secure mats and remove all cables before moving.
Model-specific decision path; isolate power before opening or changing the collection system.
Define a small dry task
This routine is for known ordinary loose cabin debris, such as dry food crumbs and lint, on surfaces that the vehicle manufacturer permits you to vacuum. It excludes fuel residue, battery leakage, suspicious powder, rodent contamination, broken sharp objects and debris from collision or repair work. If the source is uncertain, identify it before switching on rather than treating every item on a floor mat as ordinary dirt.
The documented example is RIDGID HD12000 manual SP7160 (04/24), which lists a car nozzle for interiors and most upholstery cleaning. Check the actual kit: its manual and product listing both warn that accessories vary. Use the vehicle’s surface-care instructions as well; an approved vacuum accessory does not guarantee that every leather finish, screen or stitched detail tolerates the same contact.
Make room for the hose and the operator
Park securely, switch the vehicle off and choose a dry, ventilated work location without fuel vapours. Remove personal objects and loose rubbish by an appropriate method before vacuuming. Set aside coins, keys, small fasteners and objects you want to keep. Remove floor mats only as the vehicle instructions allow, so retaining clips are not damaged.
Place the vacuum outside the cabin on a stable dry surface. Route its cord away from tyres and door hinges, and leave hose slack at the sill. Do not close a door onto the hose or cable. A longer hose is not a reason to pull a heavy tank into the door opening; stop and move the vacuum for the opposite side.
Verify the dry collection system
With the machine switched off and unplugged, inspect the tank history and required dry filter. If the last task was water pickup, finish the complete drying and dry-filter changeover first. Fit a compatible dry bag if the manual calls for it or you choose an approved bag. Ensure the head and any drain cap are seated properly.
The HD12000 manual requires a dry filter for dry material. A damp filter can clog quickly, and a bag cannot correct that condition. Do not omit the filter to improve pickup of pet hair or crumbs. If the vacuum contains an unknown garage residue, do not bring its exhaust into a clean cabin as an experiment.
Swipe or scroll horizontally to see all columns.
| Cabin area | Approach | Stop or change approach when |
|---|---|---|
| Removable mat | Work on a stable appropriate surface | Material or backing starts lifting |
| Seat surface | Use a suitable clean car/upholstery nozzle | Finish marks, loose stitching or snagging |
| Seat rail gap | Reach only accessible loose debris | Wiring, clips or mechanisms obstruct access |
| Screen or delicate trim | Follow vehicle-specific care | Rigid nozzle could scratch the surface |
Work in sections without chasing a stubborn stain
Start with accessible upper surfaces and finish the floor so dislodged ordinary crumbs are collected once. Keep the nozzle moving with light controlled contact. Use an approved crevice accessory only where it can enter without prying a panel or pressing on wiring. Keep hair, loose clothing and fingers away from powered openings and seat mechanisms.
A narrow nozzle that repeatedly seals against upholstery may be the wrong tool or angle. Lift it away and change the approach rather than forcing it into the fabric. Stop if trim shifts or the surface is marked. Embedded dirt and stains are a separate surface-cleaning problem; pouring detergent or water into the seat creates a wet-cleaning task that this routine does not cover.
Keep dry collection separate from extraction
A bucket vacuum’s ability to collect liquid does not establish a controlled wash-and-recovery process for a seat. Upholstery padding, electronic modules and airbag-related areas can have constraints that are not visible from above. Follow the vehicle’s instructions and use an appropriate approved cleaning system if washing is needed. Never use this guide to dry a flooded vehicle or clean chemical contamination.
Finish with both the car and the vacuum ready
Switch off and unplug before changing or clearing tools. Inspect the nozzle for trapped debris that could scratch the next surface, then empty the ordinary contents and care for the filter as instructed. Refit floor mats securely with their correct retainers, ensuring they cannot interfere with pedals. Remove the cord and hose fully before moving the vehicle.
Stop using the vacuum if it exhausts dust, emits liquid, smells burnt or sounds abnormal. Record what was collected if another person uses it. A successful cabin cleanup leaves no loose tools, wet patches, trapped cables or unsecured mats behind.