
Observe an existing edge, hand-test a known sample, document damage
A thin face over a core is inspected without cutting, a flat hand block moves along the surface, and a camera records a lifted layer beside a ruler.
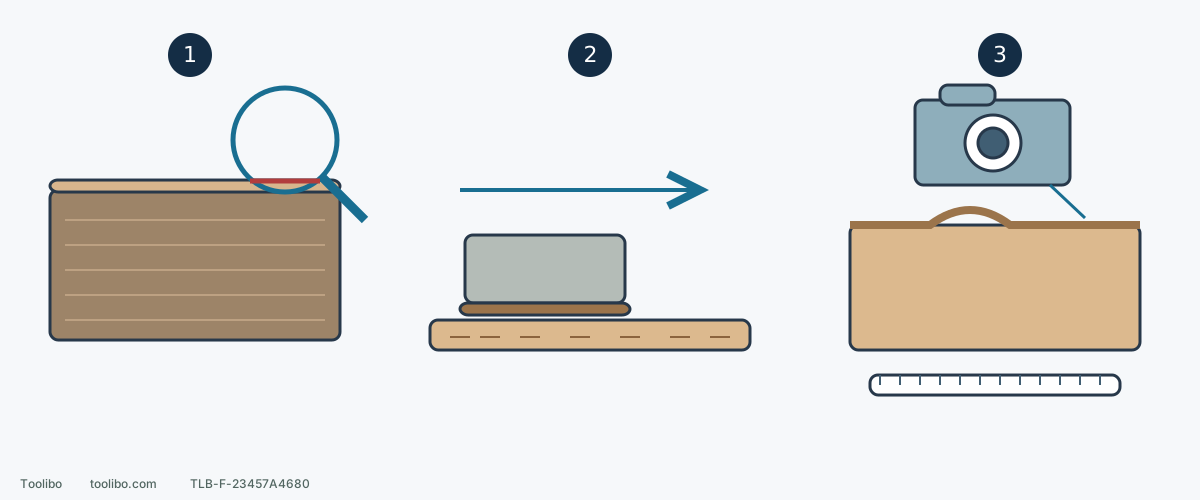
1. Existing exposure is a clue, not proof of thickness
Use records and already visible edges or damage; do not cut, drill or enlarge a defect to identify the face. Backing and core are not removable veneer.
2. Known raw-veneer sample only
With material and finish requirements established, support matching scrap and use a flat block, light pressure and moving with-grain strokes. Do not level dents or chase edges.
3. Unknown old work or lifting: document and stop
Photograph the whole item, existing edges, defects and prior treatment areas. Seek a repair plan when there is no representative sample or the layer is loose; no sanding to blend exposed core.
Layer thickness is exaggerated, not a sanding allowance. The ruler records location and scale, not remaining veneer thickness. The three views are separate decisions, not permission to sand the damaged item.
A wood appearance is not permission to treat it as solid timber
Assess unknown old coatings or suspected hazardous dust first; do not begin a hand sample until the material can be handled safely.
A cabinet face may be solid wood, real veneer over a core or a printed decorative layer. A front photograph cannot reliably establish the material or remaining sandable thickness. With a clear finish, removing coating and reaching the veneer can also be confused.
Find the order, label, model, panel specification or repair record first. Establish raw veneer, finished veneer or another surface. Total panel thickness is not veneer thickness; flexible veneer thickness including a backer is not removable wood allowance. FormWood’s backing-dependent sheet dimensions illustrate that distinction.
Identify without making new damage
- Photograph the whole item. Record face, back, edges, location and existing damage. Do not scrape, wet or sand a corner to “see better.”
- Inspect existing exposed edges. At a visible cut edge, existing hole or damaged spot, look for a thin face over a distinct core. Do not make a new hole or enlarge damage. Edge banding may conceal construction; a wood-looking edge does not establish a solid board.
- Treat grain as a clue. Continuity between face and edge, repeating patterns or layer boundaries help describe the item to a supplier. Joined veneers can also repeat, and photographs do not measure remaining thickness.
- Identify the next finish. Match supplier, product, factory final sanding and proposed coating. Without that information, do not select a grit or treat a hidden corner as disposable.
The result may be “confirmed raw veneer” or “still uncertain.” Uncertainty is a reason to stop identification by abrasion.
Once raw veneer is confirmed, start with a hand sample
For known FormWood raw veneer, establish the factory’s final grit and the next finish’s requirements. Do not automatically repeat every stage just because a general guide lists 150, 180 and 220. Different delivered products can start differently. No universal restoration grit or number of seconds is supplied here.
With matching batch and surface-condition scrap, support it securely and use a flat rubber or cork block with appropriate paper. Apply light, moving strokes with the grain. Do not wrap paper around fingertips to chase a spot or press back and forth over a sharp edge. Smooth minor roughness for the next operation; do not try to level dents, glue lines or deep scratches.
After a small section, stop and remove dust as allowed by the material/finish system. Inspect in direct and grazing light for continuous grain, even scratches and edge discoloration or signs of thinning. Compare with the untreated area and record paper and surface condition. Only expand the work after a repeatable suitable result; a successful sample is not permission for unlimited sanding elsewhere.
A factory-coated panel may need no sanding
Columbia FirstStep Ready-To-Paint uses a clear UV layer that the manufacturer says requires no sanding, on veneer- or MDF-faced panels. It is not raw veneer; continue according to that product and the intended compatible coating. The manufacturer presents this clear UV option for solvent-based coating workflows; no sanding does not mean unrestricted compatibility with water-based paint.
Traditional FirstStep is a different white-primed option requiring light 320-grit sanding before water-based paint. Similar names, different preparation. Identify the product before buying a coarse-to-fine sequence. Neither “no sanding” nor “320” applies to every precoated panel.
Old furniture without matching scrap
Do not use the back of a valuable piece to infer how much its front can tolerate. The back may have different veneer, coating or repair history, and hidden damage can still matter. Photograph the whole item, scratches under grazing light, existing exposed edges, bubbles and old repairs. A ruler beside the area provides location and scale, not a thickness measurement.
Record whether the goal is roughness, old coating, uneven color or a dent. List previous cleaning products, any sanding, abrasive identification and treated areas. Give the records to the supplier or a veneer-restoration specialist. Ask whether the existing layer can be preserved, whether repair rather than removal is needed and how to verify finish compatibility. Decide on work only after obtaining a defined plan.
Stop at these changes
Disappearing grain, exposed different core material, an unnatural pale edge patch, lifting or failed bonding means stop, not sand the surroundings to blend the color. Sanding cannot replace missing veneer. Loose areas, bubbles, cracks and deep dents need a repair decision before more material is removed.
Assess unknown coatings and suspected hazardous dust first; hand sanding still produces dust. Keep a final record of treated and untouched areas, stopping points and reasons. Preserving a thin surface sometimes means stopping while repair remains possible.