
Separate grades, used stock and product labels
Three flat-disc compartments marked P80, P120 and P180, a separate used-disc compartment and a retained package label.
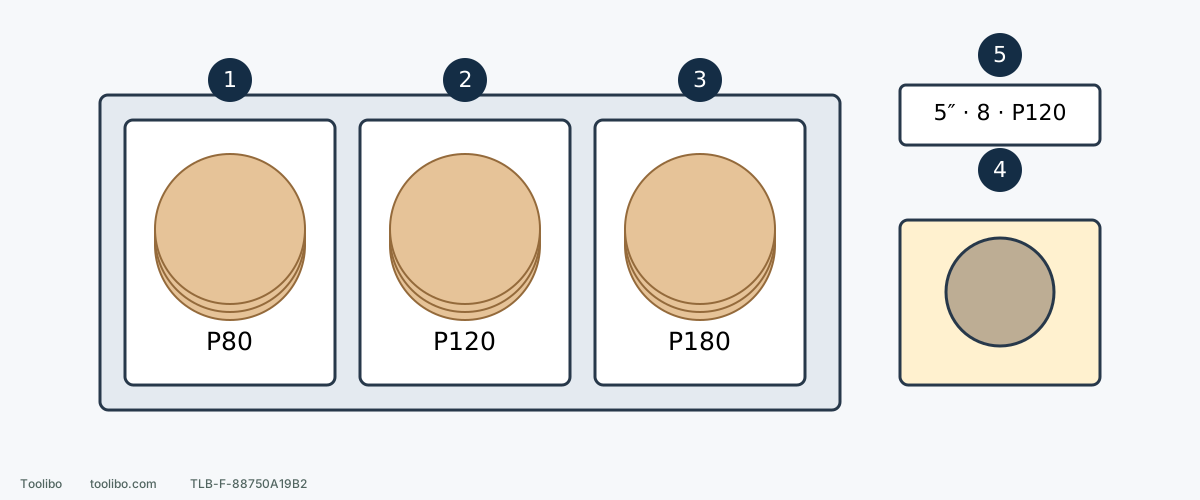
1–3. Identified unused stock
Keep each grade flat in its own compartment; retain the full grade prefix and product range.
4. Used discs stay separate
Label the previous material and condition, for example P120 / bare pine / inspect before reuse. Do not return unknown contamination to usable stock.
5. Keep the package information
Copy product code, size, hole pattern, backing and exact grade when splitting a bulk pack.
This is a storage layout, not a recommended grit sequence. Keep product series and backing separate as well as grade.
Sort into three groups
Separate unused discs, used discs worth inspecting for reuse and rejected discs. Keep unused stock in its packaging. Do not slide a used disc between clean new ones. Torn, delaminated, badly loaded or unidentified contaminated abrasives leave the usable stock and need disposal appropriate to the material involved. Visible grit alone does not establish that a disc is serviceable.
If the grade is unreadable, do not assign the disc a place in a controlled finishing sequence or guess P120 by touch.
Set up the compartments
Separate backing and shape first, then product range and exact grade. Hook-and-loop rounds, PSA rounds and shaped detail sheets do not belong in one stack merely because their numbers match. Choose compartments large enough for flat discs without folded edges. Keep batteries, clamps and loose screws off them.
A useful label reads: product range / 5 inch / eight holes / hook-and-loop / P120 / unused. A separate used-stock label might add: previously used on bare pine / inspect before reuse. Pine is an example of what to record, not permission to reuse every abrasive. Preserve different grading-system prefixes rather than merging everything marked 120.
Keep the product code and material suitability from the original pack. When splitting a bulk pack, copy that information to each smaller container.
End-of-job routine
- Switch off, wait for the tool to stop and disconnect its supply before removing paper.
- Inspect for creases, tears, loose backing and contamination. Do not improvise with solvent or a heat gun just to save a used disc.
- Mark the previous material and condition on reusable stock. Keep abrasives used on coatings separate from bare-wood stock; exclude unknown contamination.
- Protect the PSA liner or loop backing as the product requires, then return the disc to its compartment. Do not substitute a dirty scrap for a missing protective liner.
- Close the container and store it away from damp cleaning supplies, direct sun and hot tools. Retain the specific storage directions on its original packaging.
Remove PSA before storage when required
The Milwaukee 2648-20 PSA arrangement should not be stored with its adhesive disc attached: the bond can become difficult to release. This is not a universal removal method for every backing. If a disc has stuck firmly, stop and check the permitted removal procedure rather than heating or soaking the pad.
Inspect on the next job
Check curling, unknown dust or oil, backing separation, failing hooks or adhesive, and a readable grade. Pressing a creased disc under a weight does not prove it is repaired. Finally compare its size, holes and attachment with the pad now installed. Protected storage cannot make an incompatible disc fit a replacement pad. The aim is reliable identified stock, not the largest possible collection of old paper.
Models referenced