
Separate glass care, screen care and drainage
Window pane with soft cloth, separately supported screen with brush, and downward sill drainage arrows.
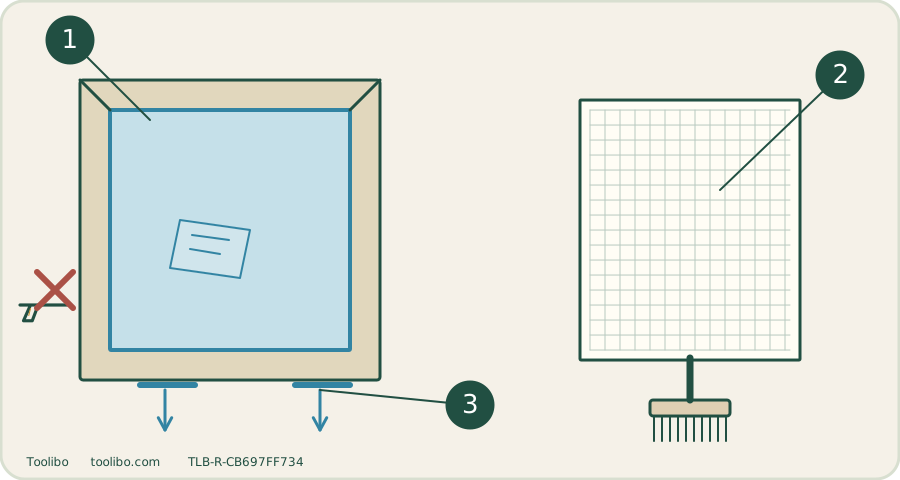
Glass
Identify coating and use a clean soft cloth.
Screen
Use only its permitted removal and brush/rinse method.
Drainage
Keep designed openings clear without forcing tools inside.
A closed sash or temporary cover does not permit a pressure jet into seals.
Andersen explicitly excludes power washers and pressurized cleaning tools for the glass and frame surfaces covered by its care article. A gentler nozzle does not override that boundary.
Identify the parts before choosing cleaner
Find the window’s product identification and glass marking from an accessible position. Andersen’s general glass-and-frame cleaning article specifically excludes HeatLock glass from its ordinary cleaner list; that coating requires mild soapy water. Finished interior wood also needs its own frame-care instructions. Do not transfer a glass cleaner to every surrounding finish.
Inspect from ground level for cracked glass, loose trim, failed-looking seals or persistent interior water marks. Those observations call for assessment, not a stronger jet. If the exterior cannot be reached safely from the ground, arrange suitable professional access rather than balancing on a ladder with a washer.
Separate adjacent paving from the window job
Before washing a nearby path, identify where rebound spray and detergent could reach the window. Redirect the task or use a gentler method near vulnerable areas. A closed sash is not evidence that a pressurized jet may be directed into its seals. Do not use a temporary cover as permission to blast the frame.
Keep the pressure washer shut down for the window-cleaning stage. Set out clean soft cloths, an appropriate squeegee and the approved cleaning solution. Use separate cloths for gritty frame edges and glass so you do not carry particles back across the pane.
A gentle glass-and-frame sequence
- With the glass type and finish identified, remove accessible loose dust with a soft cloth as permitted by the care instructions. Do not grind embedded grit into the surface.
- Clean using the permitted product and a fresh soft cloth. For the HeatLock exception, stay with mild soapy water rather than borrowing the general approved-cleaner list.
- Remove liquid from the glass with a suitable squeegee or clean soft cloth; dry the frame separately. Keep the working section manageable so cleaner does not dry into streaks.
- Inspect the dry glass from another angle. If haze remains, identify residue or coating issues before repeating. Do not switch to metal blades or abrasive pads to chase a mark.
Treat the screen as a separate object
Confirm the screen’s type and removal instructions; do not force retaining clips. For Andersen screens covered by its mesh-and-frame article, a soft-bristle brush and mild soapy water are followed by a thorough clean-water rinse and drying of the frame. This is not blanket permission for all retractable, coated or specialist screens.
Support a removable screen so brushing does not bow the frame. Check for torn mesh or bent corners before reinstalling. A pressure jet is not a shortcut for blocked mesh; it can turn a cleaning job into replacement work. If the frame will not refit easily, stop rather than forcing the retainers.
Finish with drainage and a dry check
Some window systems intentionally discharge water through exterior sill openings. Do not plug them to keep wash water out. Check accessible openings for debris using the exact product care instructions; do not drive a jet or wire into hidden channels.
Persistent pooling, new interior dampness, loose seals or cracks need manufacturer or installer advice. Record where the symptom occurs. A clean pane with a drainage problem is not a completed maintenance job.