
Pressure-wash a car carefully
Numbered schematic explaining Pressure-wash a car carefully.
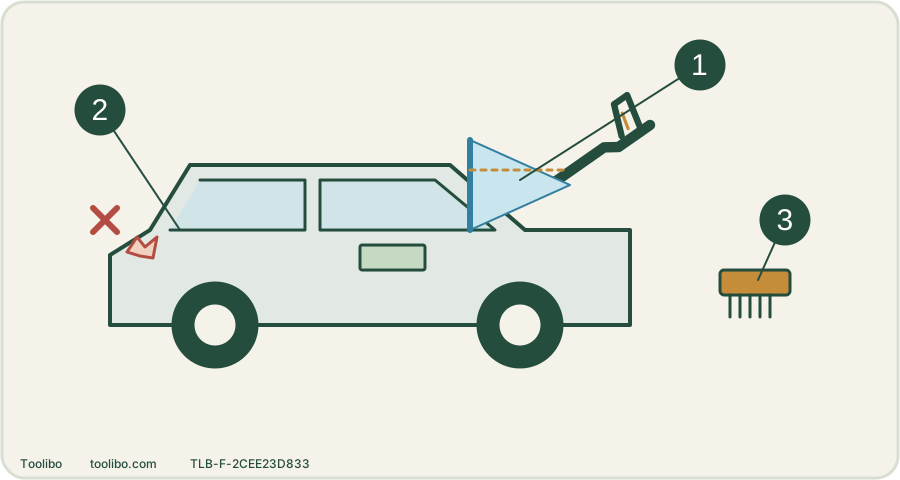
Broad moving fan
Keep the approved fan moving and respect the stricter vehicle and washer limits.
Vulnerable details
Avoid concentrated jets at chipped paint, trim edges, valves, seals and openings.
Separate cleaning tools
Keep wheel brushes and dirty wheel residue away from body-washing materials.
Use a vehicle-approved fan jet, respect the stricter vehicle and washer limits, and remove stubborn contamination with a suitable cleaner rather than a closer jet. Conceptual schematic, not a product image or scale drawing.
Decide whether pressure washing is appropriate
Inspect for loose paint, stone chips, lifted film, damaged seals and recently repaired areas. Follow the vehicle’s care instructions for cameras, sensors, charging or fuel openings and aftermarket coatings. A car-care product advertised as safe does not override a surface manufacturer’s restrictions. If the condition is uncertain, use gentler hand cleaning or a professional detailer.
Work on a cool vehicle in shade where possible, with legal drainage for dirty wash water. Close windows and openings. Keep the machine and electrical connection away from spray and standing water. Remove jewellery or anything that could scratch paint while handling the hose.
Choose the attachment before approaching the car
Use a suitable flat/fan jet; Bosch specifically rules out rotary and pencil jets on motor vehicles. Do not use the nozzle that removed moss from paving. Check the washer and vehicle instructions for minimum distance and permitted settings. If the two give different limits, use the more protective requirement. For a concrete example, the UK Kärcher K 3 Power Control 1.676-107.0 manual requires at least 30 cm from painted surfaces and at least 30 cm from tyres and valves, and excludes the dirt blaster from tyres, paint and sensitive surfaces. This is a minimum for that documented setup, not a guarantee for damaged paint or permission to ignore a stricter vehicle requirement.
Start farther away within the permitted working method and test a sound inconspicuous area. Keep the lance moving. Do not concentrate the jet on paint chips, trim edges, badges, tyre valves or rubber seals, and do not aim into openings to force hidden dirt out.
Clean wheels separately
Allow brakes and wheels to cool. Use a cleaner suitable for the wheel finish and follow its dilution and dwell time; do not let it dry. Use a separate wheel brush and cleaning cloth so brake dust is not transferred to paintwork. Rinse with the permitted fan setting, observing tyre and valve restrictions. Do not put fingers into the jet or chase embedded contamination with a point nozzle.
Work through the body in manageable sections
- Rinse loose dirt with clean water, avoiding vulnerable edges and openings.
- Apply the approved car detergent through a compatible applicator or by the method on its label. Foam thickness is not proof of correct dilution.
- Let the product work only for its stated time. If contact washing is needed, use clean wash media and do not grind remaining grit into the paint.
- Rinse thoroughly from higher panels downward, keeping runoff moving off already cleaned areas.
- Check gaps and trim with the machine stopped. Remove remaining residue gently rather than concentrating pressure into a seam.
Work in smaller sections if the surface or weather makes detergent dry quickly. A hose snag is a reason to stop and reposition, not pull the hose across the vehicle.
Finish with an inspection, not another aggressive pass
Dry using clean suitable material and inspect the result. Tar, sap, bonded contamination and damaged clear coat need different treatments; another close pass can make them worse. If a seal lifts or paint begins to come away, stop immediately. Flush detergent equipment as directed and complete the washer’s shutdown and depressurizing procedure before packing away.