
Three joint systems require different decisions
Three paving cross-sections show loose fill, bound jointing and mortar, with a lowered fill line and a moving-unit warning.
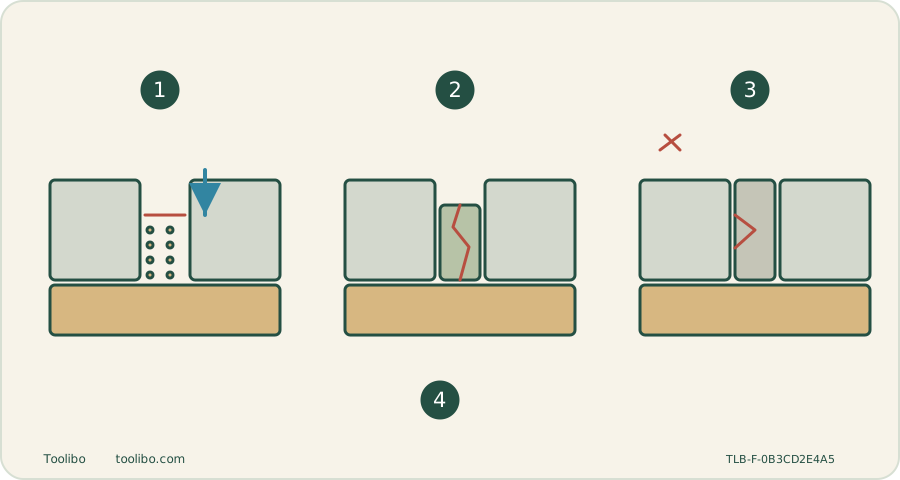
Identify
Find the original paving and joint specification.
Inspect
Look for lost fill, cracking and unit movement.
Match
Choose the exact product’s maintenance route.
Recheck
Respect curing and inspect before normal use.
Identify the installed system before choosing a refill or repair method.
Identify what is between the paving units
Look at the installation record, product packaging or installer’s specification. Determine whether the joints use loose jointing sand, a bound or polymeric product, or mortar. Colour alone is not enough: dirt and weathering can make different systems look alike.
Marshalls’ maintenance guidance calls for checking joint condition and notes that sand-jointed paving may require refilling. That observation does not authorize tipping any available sand into every gap. The paving type, joint product and installation method determine the applicable maintenance route.
Do not mistake a drainage gap or movement joint for failed fill. Photograph the whole area and a close view before disturbing it, especially if only one region looks different.
Compare before and after the surface dries
Check the cleaned trial against an untouched section once visibility is clear. Look for lowered fill, washed-out channels, cracking, loose fragments and movement under normal access. Do not pry a unit up or probe aggressively to “test” the bedding.
Loose sand on the surface can have several origins. It may be existing debris, displaced joint material or material coming from a damaged paving face. Track where it collects and inspect the adjacent units before deciding what to replace.
If slabs rock, edges have sunk or a joint repeatedly opens, stop treating the issue as cosmetic. Keep unsafe areas out of normal use and obtain installation advice. Adding a thin surface layer will not necessarily correct bedding or support problems.
Choose the next action by joint type
Swipe or scroll horizontally to see all columns.
| Identified condition | Next action |
|---|---|
| Loose-sand joints have lost fill, units remain stable | Obtain the specified jointing sand and follow the paving system’s refill conditions. |
| Bound joint material is cracked or missing | Use that product’s repair method; do not conceal it under loose sand. |
| Mortar joint has broken out | Seek a compatible mortar repair plan and assess why it failed. |
| Joint identity or unit stability is uncertain | Pause cleaning and ask the installer or product supplier. |
The important distinction is not “hard versus soft sand.” It is how the installed system is intended to function. A product requiring particular moisture, depth or curing conditions cannot be replaced by a generic sweep-and-wet routine.
Plan a small, product-specific repair
- Record the paving product and jointing material, with photographs of the affected area.
- Confirm whether maintenance is an owner task or needs an installer. Obtain the exact product’s surface preparation, moisture and weather requirements.
- Clean only as required by that repair method, without deliberately scouring out sound neighbouring joints.
- Follow the specified fill depth, consolidation and residue-removal method. Do not invent a universal depth or assume all products cure after the same interval.
- Observe any reopening restriction, then inspect the repaired area under the manufacturer’s conditions.
This is a planning sequence, not a mixing recipe. It intentionally does not prescribe a sand quantity, water dose or compaction machine for unidentified paving.
Adjust future cleaning rather than repeating damage
If a test pass visibly removes joint material, stop and review the permitted cleaning method before widening the area. Directing a jet along a joint can concentrate the effect; a surface-cleaner attachment is not automatic protection against joint loss.
For example, a patio may have original mortar joints and a later patch with a different compound. Treating the whole patio as one refill system hides that distinction. Mark the two areas and obtain the correct repair instruction for each.
Keep a photograph and product record after repair. On the next cleaning day, check those joints first. The finished job means clean paving with a serviceable joint system—not just pale paving faces and empty gaps.