
Clean paving and protect joints
Numbered schematic explaining Clean paving and protect joints.
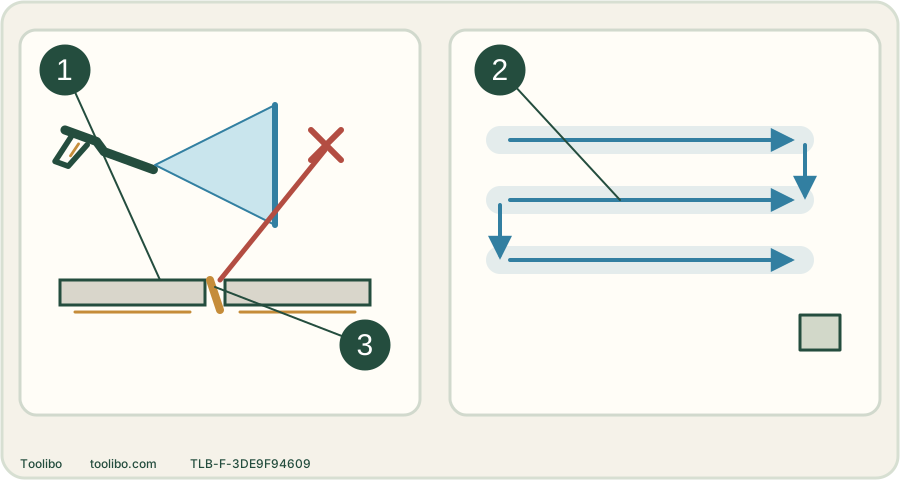
Slab and joint
Inspect both the slab face and the joint after the test strip.
Moving lanes
Work in overlapping lanes toward an appropriate runoff route.
Joint erosion
Sand or mortar moving under the jet is a stop signal, not successful cleaning.
Identify the slab and joint material, test first, and stop if the jet removes sand, mortar or the surface itself. Conceptual schematic, not a product image or scale drawing.
Inspect before choosing a nozzle
Identify whether the surface is concrete paving, natural stone, a coated slab or another material. Check its supplier’s cleaning instructions. Look for loose slabs, broken mortar, sandy joints, flaking coatings and drainage problems. High-pressure washing is not a repair for those defects. If a surface is soft, damaged or unknown, begin with sweeping and a suitable brush-and-water method instead.
Photograph existing cracks and compare an inconspicuous test patch after it dries. Wet stone can disguise both staining and damage. A powerful dirt blaster being suitable for one sound concrete surface does not establish that it is suitable for sandstone or a sealer nearby.
Prepare the area and runoff route
Move pots and furniture, sweep away grit and loose debris, and remove objects that could be thrown by the jet. Protect nearby sensitive surfaces without blocking the drainage route. Keep people away from splash and flying debris. Deal with large weeds or loose material separately rather than blasting them through the joints.
Work toward an appropriate collection or drainage point, observing local rules for dirty water and cleaning chemicals. Oil and chemical residues should not be pushed into soil or a surface-water drain. Do not mix household chemicals to make a stronger patio treatment.
Test a controlled strip
Choose a compatible fan nozzle or matched surface cleaner. Begin with the least aggressive permitted setup. Clean a short strip with a steady moving pass, release the trigger and inspect the slab face and the joint, not just the colour of the stone. Stop for fresh grooves, exposed aggregate, washed-out sand or moving joint material.
Where a cleaner is permitted, follow its dilution, dwell and rinsing instructions; a suitable brush can loosen a mark without increasing pressure. Do not let chemicals dry because you have started too large an area.
Clean in sections rather than drawing stripes
Divide the patio into lanes and work systematically so dirt is not constantly sent over completed areas. Keep a consistent working distance with a lance; do not hold the concentrated part of the jet on a joint. A compatible surface cleaner helps maintain a regular working pattern on suitable flat paving, but its housing does not make it safe for every surface.
Overlap passes enough to avoid leaving untreated bands, checking progress rather than scrubbing one spot indefinitely. At steps and edges, stop the attachment and choose a method specifically permitted there. Keep an operating surface-cleaner head on its approved surface, never tilted up toward feet.
Inspect dry, then decide on joint work
Rinse away loosened residue by a suitable gentle method and inspect when the surface is sufficiently dry. Missing joint sand needs the paving system’s specified repair procedure and dry conditions; do not automatically refill with any bag of sand. Persistent stains may need a material-specific treatment. If the first trial altered the slab texture, do not repeat it across the entire patio in an attempt to make the damage uniform.
Clean the test strip across a representative joint as well as a slab face. If the slab cleans well but the joint moves, that method has still failed the test; change the method before expanding.