
Inspect the two hose circuits separately
A washer schematic separates the tap inlet from the high-pressure gun hose and enlarges a damaged hose section and disconnected sealing-ring seat.
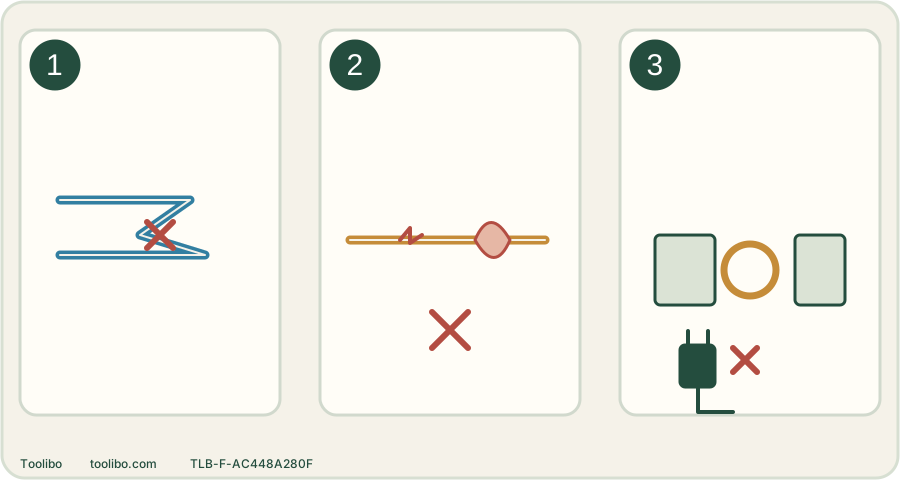
Supply hose
Check the full route for kinks and crushing that restrict flow.
Pressure hose
Cuts, bulges or exposed reinforcement mean replacement.
Disconnected coupling
Inspect the original seal and its clean seat, without tape or glue.
A supply restriction and damaged pressure hose need different responses. All close inspection and connector work happens after isolation and pressure release. Conceptual schematic, not a product image or scale drawing.
Identify the two circuits
Follow the water from the tap to the machine: this is the supply hose and low-pressure inlet connection. Then follow the machine outlet to the gun: this is the high-pressure hose. Labels and connectors are not substitutes for the exact replacement specification. A garden-hose repair kit does not turn a damaged pressure hose into a safe assembly.
Before inspection, complete the model’s shutdown and pressure-release process, unplug and disconnect the water source. Let warm fittings cool. Lay the hoses out without dragging the gun or machine, and wipe away dirt so that damage is visible.
Inspect the whole length, not only the ends
Work slowly from one end to the other. Look for cuts, bulges, flattened sections, severe kinks, exposed reinforcement, abrasion at corners and heat damage. Check especially where a hose has been trapped under a wheel or pulled around a sharp edge. Do not bend a suspicious spot aggressively to “see if it opens.”
On the supply hose, a kink or blocked connector can explain poor flow. On the pressure hose, a cut, bulge or damaged structure means stop and replace the approved hose assembly. The Bosch instructions require immediate replacement of a damaged high-pressure hose and warn against vehicle loads and sharp edges.
Check connectors while disconnected
- Inspect the coupling body for cracks and the thread for cross-threading or distortion.
- Look for the original sealing ring in its proper groove. A ring that is cut, flattened or missing cannot be fixed by extra tightening.
- Remove loose grit with a soft cloth and clean water where permitted. Do not scrape a seal seat with a metal tool.
- Operate the locking sleeve or latch without pressure. It should return and engage as designed; do not file or modify it to accept another accessory.
- Reconnect the matched parts and check retention by hand as instructed, with the outlet pointing away. Do not pull the hose to move the machine.
Replace user-replaceable seals only with the specified parts and method. If the manual does not treat a seal or coupling as user-serviceable, obtain the correct assembled replacement or service support. Thread tape, glue and improvised clamps are not a remedy for a high-pressure connection.
Verify without touching a pressurized leak
Reconnect the supply and check the low-pressure joint first. Prepare the machine for normal use and briefly observe the pressure-side connections from a safe operating position. Keep hands away from any suspected leak. A fine spray, escaping jet, hose bulge or coupling movement means stop immediately and repeat the full isolation procedure before inspection.
If a sound coupling still leaks with a correct seated seal, record the location and replace or service the appropriate assembly. Do not keep tightening until a plastic connector splits. Water from inside the machine body is a different issue from a wet external union and needs separate assessment.
Store to prevent the next fault
Use broad loops without tight bends, protect the hose from sharp shelving edges and keep the gun where it cannot fall and pull on the connection. Never store heavy objects on the hose. Avoid pulling a tangled coil straight by its connector; unwind the loops first. These habits do not repair existing damage, but they reduce the repeated bending and abrasion that made it appear.
Before ordering a replacement, photograph the machine rating plate and both hose ends while disconnected. Record whether the hose attaches directly to the machine or a reel, because a similar-looking gun connector does not identify the machine-end fitting. Ask for compatibility with the complete assembly rather than choosing by advertised length alone.