
Clean timber decking gently
Numbered schematic explaining Clean timber decking gently.
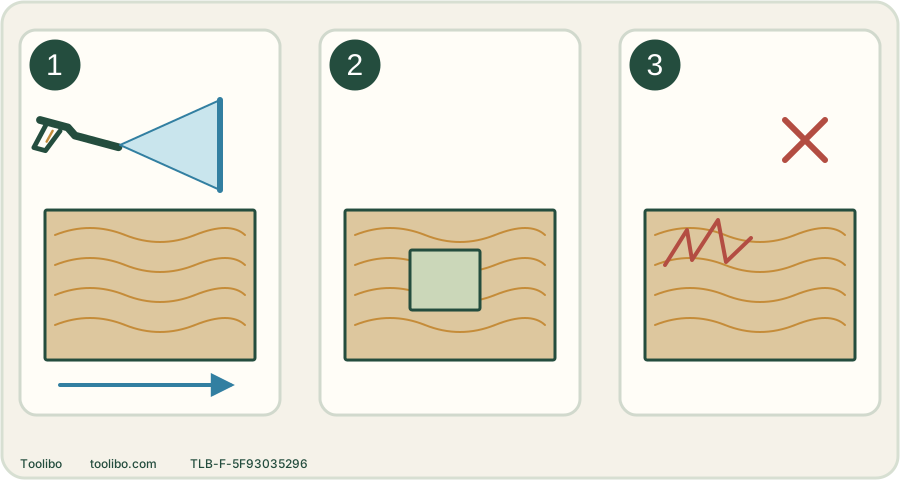
Along the grain
Move the approved flat jet or brush along the board grain, not across it.
Test patch
Let an inconspicuous sound patch become dry enough to judge before expanding.
Raised fibres
Fuzz, grooves or lifting coating mean stop and change the method.
Check the decking maker first; if pressure washing is permitted, use the least aggressive suitable flat jet and keep passes along the grain. Conceptual schematic, not a product image or scale drawing.
Separate timber from composite decking
Confirm whether the boards are solid timber, treated timber, coated timber or a composite product. Their cleaning instructions are not interchangeable. Check for splinters, rot, loose fixings and lifting coatings. These are repair issues, not dirt to blast away. If the supplier forbids pressure washing or the board is unsound, use the specified brush-and-water method.
Move furniture and sweep the deck before wetting it. Clear debris from gaps gently without driving it under the boards. Protect adjacent walls and plants as the cleaning product requires, and plan where dirty water will go. Avoid cleaning so large an area that the detergent dries before you can rinse it.
Choose a genuinely gentle attachment
Kärcher’s timber-decking guidance uses a flat jet for rinsing and excludes point jets and dirt blasters. The circular footprint of a rotary nozzle does not make it safe for wood. Select an approved low-aggression setting and observe the board and tool makers’ working distance; their instructions take priority over a generic pressure chart.
A suitable power scrubber or brush may loosen dirt with less concentrated jet action. Check that the exact accessory is approved for the washer and the surface. A patio-cleaner label alone is not a promise that it is suitable for timber.
Test on one representative board
Pick an inconspicuous sound area with the same finish as the main deck. Follow the permitted cleaning method on a short length, then stop and inspect. Raised fibres, furrows, a sharp light stripe or loosened coating mean the method is too aggressive or unsuitable. Do not correct this by washing the neighbouring boards equally hard.
A wet surface can hide roughness and colour differences. Allow the patch to dry enough for a meaningful check before committing to the whole deck. If the result is uncertain, return to brushing rather than reducing the distance.
Work along the grain
Apply a compatible wood cleaner at its labelled dilution and dwell time, if the deck instructions allow one. Scrub in the direction of the grain with an appropriate brush. Rinse with the approved fan method, moving along a board rather than cutting across its width.
Keep the lance at a consistent angle and distance and keep it moving. Release the trigger before stopping to reposition. Work in manageable sections so runoff leaves the cleaned area and detergent does not dry. Do not use the jet to excavate soft material around screws or strip a finish that needs a separate removal process.
Let the deck dry before further treatment
After rinsing, inspect for residue, raised grain and loose coating. Do not immediately oil, seal or paint a wet deck; use the treatment maker’s moisture and drying requirements. Cleaning does not replace repairs to loose boards or fasteners. If sanding is required later, select a suitable sander and abrasive for the actual finish and board condition rather than trying to erase deep jet damage blindly.
Inspect the test area from more than one viewing angle. A narrow groove can be easier to see across the grain than looking straight down; compare it with an untreated adjacent board.