
Control the opening, reflected spray and drain path
A bin cutaway shows a supported body, a lance entering above the opening, an offset operator, a brush reaching the corner and contained drainage.
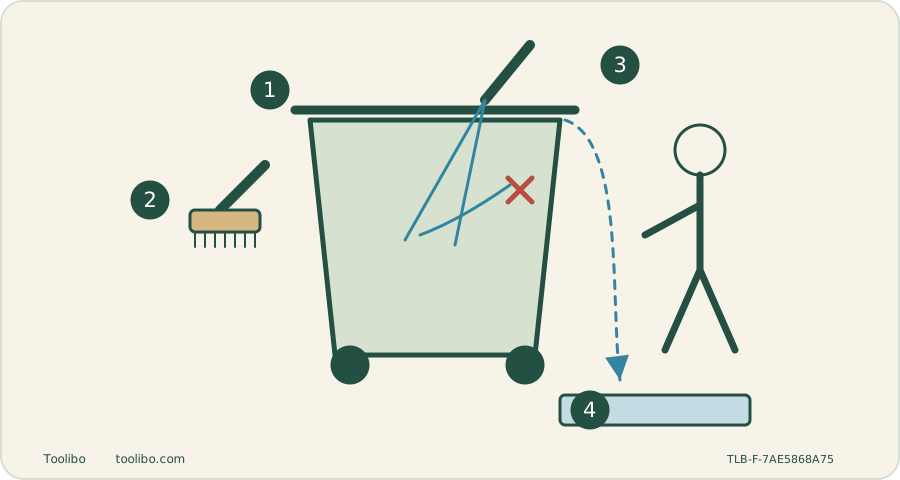
Prepare
Remove waste and confirm a stable cleaning position.
Loosen
Reach corners with a suitable brush.
Rinse
Use permitted gentle flow without uncontrolled rebound.
Dry
Dispose of water correctly and ventilate the bin.
Keep the operator outside the reflected spray path and reposition only after safe shutdown.
Decide whether this is an ordinary cleaning job
Empty the bin through its normal collection route before washing. Inspect from outside for sharp objects, unknown chemicals, batteries or hazardous waste. Do not reach blindly into the base, crush unknown items or spray a suspicious residue to disperse it. Use the relevant waste-handling route instead.
Wear suitable splash protection and footwear, and keep children and pets away. Check that the plastic body, lid and wheels are sound. A cracked bin or unstable wheel changes the task: obtain repair or replacement advice rather than attempting to hold it steady with one foot while spraying.
Prepare somewhere the bin can remain stable and the dirty water can be contained or directed to an authorized disposal route. A street grate is not automatically a sanitary drain. Do not wash debris into a flowerbed, road or storm drain.
Choose the least forceful useful method
For ordinary food residue, a garden hose, suitable cleaner and long-handled brush may be sufficient. Kärcher’s bin guidance includes gentle and reduced-pressure approaches; it does not establish one safe pressure for every bin. This guide does not reuse a particular appliance’s maximum rating as a universal plastic limit.
A narrow jet can bounce off the opposite wall, and a rotating jet can be unnecessarily aggressive. Confirm the bin’s care permission and the machine’s appropriate low-pressure mode before choosing pressure. If you cannot keep spray away from yourself and others, return to the brush method.
Set the bin in a supported orientation that allows controlled access and emptying. Do not put your head over its opening or aim through its wall from outside. Shut down and release pressure by the machine’s procedure before repositioning or changing an attachment.
Work from loose waste to a controlled rinse
- Remove accessible loose waste with suitable tools and dispose of it correctly. Do not wash solid litter into a drain.
- Apply a compatible cleaner as its label directs, if needed. Do not mix cleaners or add bleach to an unknown residue. Keep any required contact time within the label and prevent unintended drying.
- Brush the accessible interior, especially corners and the lid underside. Reach with the tool rather than leaning into a deep container.
- Rinse from the upper interior toward the base using the controlled method. Stand outside the direct reflection path and stop if the bin shifts or splash cannot be contained.
- Manage collected dirty water through the approved route, then rinse residual soil and cleaner. Empty safely without lifting a dangerously heavy water-filled bin.
Cleaning is not a claim of disinfection. If disinfection is actually required, it needs an appropriate product, application and contact time for that purpose; ordinary foam or a strong-smelling home mixture does not prove it.
Use observations to decide the next step
Swipe or scroll horizontally to see all columns.
| Observation | Next action |
|---|---|
| Loose soil collects at the bottom | Remove it by the planned waste route before the next rinse. |
| Residue remains in a corner | Use the long-handled brush rather than moving the nozzle closer. |
| Spray rebounds toward face or clothing | Stop and change access or use the gentler method. |
| Odour persists after visible dirt is gone | Inspect lid recesses, seams and drying conditions; do not automatically increase chemical strength. |
Avoid scrubbing a label or identification area away if it is needed for collection service. Clean the outside separately so dirty exterior runoff does not recontaminate the completed interior.
Finish with drying, not another bag
Allow the bin to drain and dry in a stable, ventilated arrangement permitted by its design. Do not balance a large bin where wind or a passer-by can knock it over. Check the bottom and lid recesses, not only the dry rim, before fitting a new bag.
A useful routine is to wash after collection when the bin is genuinely empty and has time to dry. A clean wet bin sealed immediately with a bag leaves the moisture problem unresolved. The finished result should be visibly clean, safely emptied and dry enough for normal use.