
Keep bit retention separate from motor control
Two separate conceptual control zones are identified around a driver, with a retained bit check beside a supported furniture fitting.
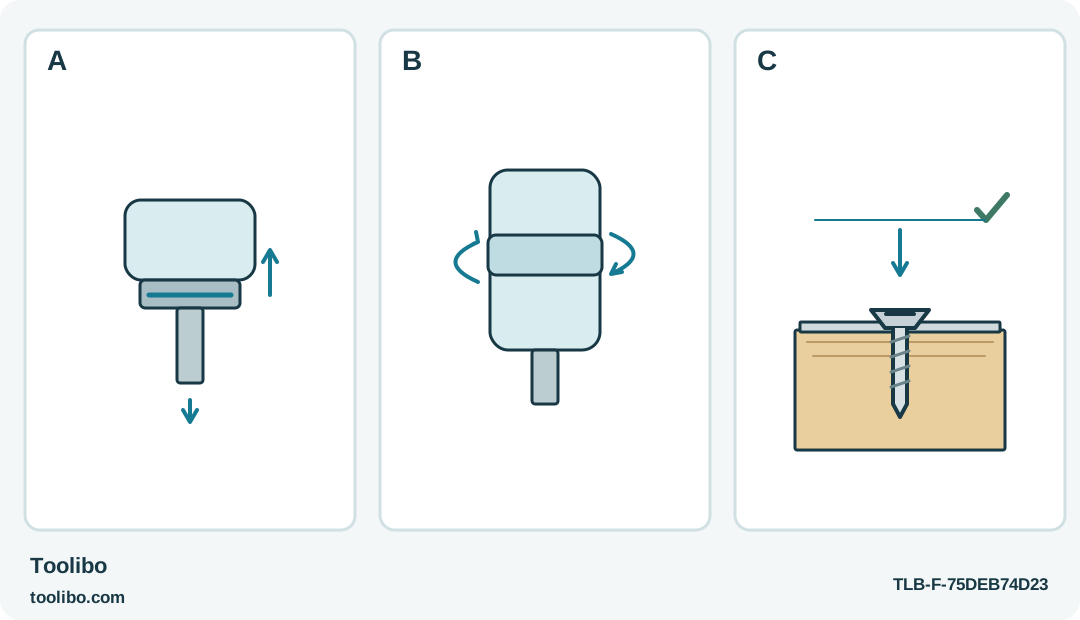
A · Retention sleeve
The retaining sleeve secures the bit; keep the motor-starting control untouched while checking retention.
B · Start and direction collar
The separate forward/reverse collar starts rotation when operated and stops it when released.
C · Check the seated fitting
Support an admitted softwood fitting and inspect seating after short controlled driving stages.
The SD561201 retaining sleeve and motor-starting selector do different jobs. This is an explanatory control distinction, not a measured tool drawing.
Separate the two controls before the first screw
On the SD561201, the forward/reverse collar is also the motor switch. That is convenient once familiar, but easy to forget when a hand is wrapped around the front of the tool. The bit-retention sleeve has a different job. Learn which is which on the stopped tool before fitting a bit or approaching a finished furniture surface.
Wear suitable eye protection and keep bystanders away before beginning powered fastening. Keep loose clothing, hair and fingers clear of the rotating bit.
Use an accessible softwood furniture fitting with self-tapping screws no larger than ST3.5, and only where the furniture maker permits powered assembly. This is the softwood screw range listed for the SD561201; do not extend it to powered driving of particleboard fasteners, cam connectors or other unlisted screws. For screws outside its listed applications, the tool instructions specify manual, non-powered use. Set the work on a stable surface, identify the correct screws in the furniture instructions and protect the finish. Do not begin on electrical sockets, appliances or a wall fitting with unknown concealed services. The tool’s Circuit Sensor feature does not turn a household furniture procedure into permission to work on potentially live equipment.
Check the tool for damaged or missing parts. A loose housing, damaged charging connection or unreliable control needs attention before work begins. Small size does not make a damaged tool harmless.
Fit and check the bit without starting the motor
Remove the charging cable. Keep your hand off the forward/reverse collar while operating the black retaining sleeve. Move the sleeve backwards as shown in the tool instructions, insert the correct quarter-inch hex bit, release the sleeve and check that the bit is firmly retained. Do this with the tool away from the workpiece.
Now check the tip against the actual screw head with the motor stopped. The shape and size must match the recess, not merely the screw’s overall diameter. A tip that rocks noticeably or rests on the top edges of the recess is not ready for powered driving.
If the bit cannot be retained correctly, do not hold it in place with a finger or add tape. Remove it with the control untouched and investigate the bit/holder match. A bit falling out during a fastening is a failed setup, not a minor inconvenience to work around.
Rehearse starting and stopping away from the finish
Hold the tool securely and identify the direction positions from the markings and illustrated instructions. On this design, turning the selector starts rotation and releasing it stops the motor. Avoid memorizing a clock direction from an unfamiliar viewing angle; confirm the tool’s markings while holding it in the normal working position.
Briefly check the required rotation with the bit clear of the work and people. Release the collar and let the tool stop. You should be able to reach and release the control without moving your grip onto the bit or squeezing the furniture fitting between your hand and the driver.
The worklights improve visibility around the tip, but they do not replace room lighting or an unobstructed view of the joint. If a dark recess hides the fastener’s final position, change the lighting and access before trying to judge the result by motor sound.
Assemble in short, observable stages
- Support both parts of the joint so that they remain aligned before the screw tightens. Follow the furniture maker’s order of assembly.
- Start the specified screw carefully by hand when appropriate for the fitting. If it will not enter the intended hole normally, stop and check the parts.
- Place the bit fully in the recess and align the tool with the screw axis. Keep the free hand clear of the bit and the screw’s possible exit path.
- Operate the collar for a short drive, then release it and inspect the joint. Repeat cautiously as the head approaches its intended seat.
- Stop once the fitting is seated as specified. Use any required hand-finishing method rather than continuing to power the screw simply because it still turns.
There is no useful universal run time for a furniture screw. Hole condition, screw length, material and fitting shape all affect the result. A screw that spins without drawing the fitting down may have lost its grip; a screw that suddenly becomes hard to turn may be wrong or misaligned. Neither symptom should be answered with a longer uninterrupted run.
Finish with a joint check, not an electrical experiment
Inspect the completed fitting for even seating, trapped material and damage around the screw head. Check its intended movement or position according to the furniture instructions. Put leftover fasteners back in labeled bags so a future adjustment does not begin with a guess about screw length.
Keep this task separate from the Circuit Sensor. Never insert the bit or another part of the tool into an outlet, and never touch potentially live circuitry with it. This article does not use the sensor to establish that any circuit is safe.
For storage, release the control and keep the tool away from loose metal items that could cause damage at its charging connection. Clean only as the tool instructions permit and use the specified compatible charging arrangement. If the selector does not stop the tool reliably when released, discontinue use and have it serviced; do not compensate by changing grip or trying to work faster.
Models referenced