
Battery engagement and clutch choice are separate checks
A conceptual battery connection uses an insert-then-turn arrow, beside separate gear and clutch symbols and a supported small-fastener sample.
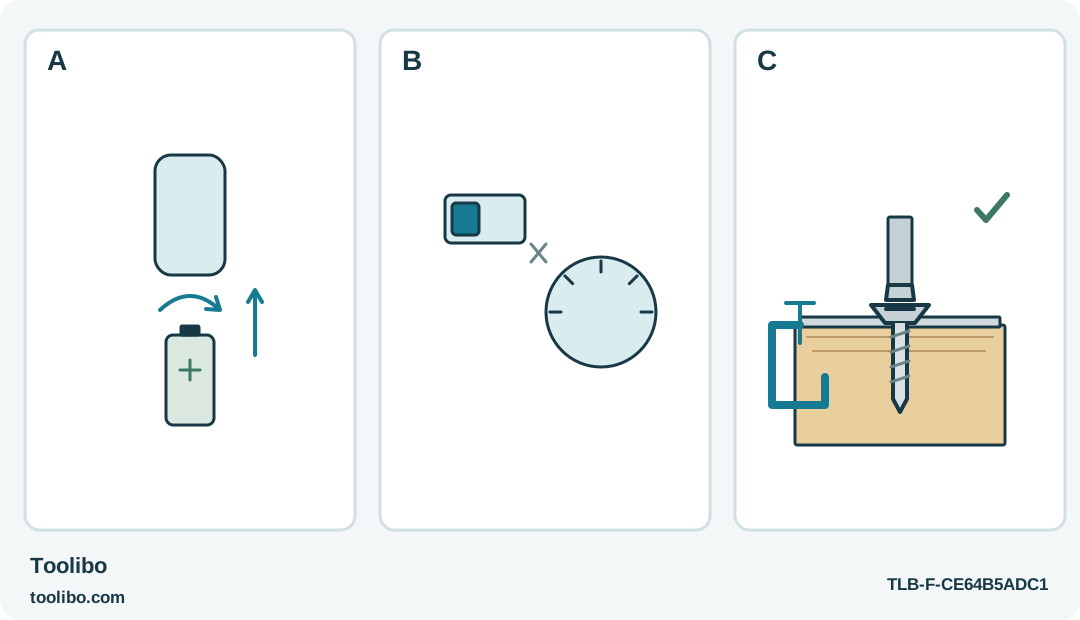
A · Lock the M4 battery
Use the correct M4 pack and follow its documented insert-and-turn engagement, with the tool locked.
B · Check gear and clutch
Choose low speed for this procedure and keep gear selection separate from the numbered clutch.
C · Inspect a sample joint
Use a matching supported joint within the tool’s documented application limit and inspect the seat.
The M4 battery lock does not set fastening torque. High-gear clutch restrictions and the actual joint must be checked separately; shapes are schematic.
Start with the fastener, not the battery platform
A small powered screwdriver can save wrist effort on repeated screws, but the fastening still belongs to the object being assembled. Check the fitting instructions, screw identity and intended seat before setting up the Milwaukee 2101-20. For this guide, use accessible, non-structural furniture fasteners, not seized bolts or safety-critical joints. For wood screws, the manual recommends a number-six wood screw with a full pilot hole as the practical limit. Do not confuse that wood-screw size with a machine-thread designation or extend it to larger fasteners.
Wear suitable eye protection and keep bystanders away before beginning powered fastening. Keep loose clothing, hair and fingers clear of the rotating bit.
Separate the screws supplied with the job. A nearly identical fastener may differ in thread or length, and extra motor force cannot make it suitable. Lay the work on a stable surface and support the joint so that the tool is not also holding the parts together.
Plan how you will inspect the completed fastening. You need to see whether the head sits correctly, whether the fitting remains flat and whether the surrounding material is undamaged. If a recess hides all of those conditions, improve access before starting.
Prepare accessories before locking in the battery
Set the lock switch to lock and remove the battery before changing the driver bit or preparing the tool. Use a correctly fitting, sound accessory and verify that it is secure in the holder. Check the tip against the actual screw recess while the tool is unpowered. If it rocks or rests on the recess edges, choose the correct bit rather than compensating with hand pressure.
The 2101-20 uses the M4 system. An M12 battery is not an alternative just because both carry the same brand name. Use the specified battery and charger, and inspect them externally before use. Do not adapt connectors or attempt to repair a battery pack.
When installation is appropriate, insert and rotate the M4 battery into its locked position as instructed. A battery that is not fully locked can leave the tool unable to run. Check the engagement before diagnosing a silent tool as a motor failure, but do not force a damaged or incorrect pack into place.
Separate the speed choice from the clutch choice
The gear selector and the numbered clutch are different controls. Select low speed for the driving procedure, with the motor stopped while changing the selector. The clutch helps limit fastening, but its numbers are not a universal torque scale for every screw, material or tool.
There is a particular restriction worth remembering on this model: in high gear, use clutch position ten or below because automatic shutoff may not operate at higher settings. Do not carry a high numbered low-gear setting into high gear and assume the same stop behavior. If the task needs a different combination, stop and choose a documented arrangement rather than experimenting on the finished surface.
Begin a new fastening arrangement with a cautious trial in matching scrap. The sample should use the same screw, relevant hole preparation and fitting as the real job. An offcut that is much harder or softer than the finished part is not a reliable rehearsal.
Drive one sample and read the result
- Start the screw correctly and keep the joint supported. Check that the parts are aligned before powered driving begins.
- Seat the bit fully, align the driver with the screw and keep the free hand out of the screw path.
- Drive in a controlled manner, watching the head approach the fitting. Release the switch when the clutch stops the motor or the intended seat is reached.
- Inspect the sample before altering a setting. Look for a proud head, a crushed seat, a damaged recess or a screw that turns without tightening.
- Change only the relevant variable, then repeat on a sound sample location. Do not change the screw, gear and clutch simultaneously and call the resulting number a tested setting.
A screw that stops early is not automatically asking for more power. It may be the wrong length, entering at an angle or meeting an unsuitable hole. Conversely, a screw that continues turning may already have damaged its grip. Both cases require inspection of the fastening, not repeated triggering.
Repeat only while the conditions remain the same
Once the sample gives the intended result, use the setup on the first real fastening and inspect it again. Keep the same screw type and material relationship in view as the work continues. A setting established for a small bracket does not transfer automatically to a drawer pull or a different panel.
Avoid treating automatic shutoff as a substitute for attention. Stop immediately if the bit slips, the fitting moves or the tool behaves unexpectedly. Remove the battery before changing accessories or investigating an obstructed joint. A damaged control, battery lock or housing belongs with an appropriate service provider, not a workaround involving tape or extra pressure.
When the job is finished, set the lock switch to lock, remove the battery for storage and keep loose metal objects away from its contacts. Record the successful fastening arrangement if there are matching fittings to assemble later. The useful record includes the joint and screw as well as the controls; that is what makes a repeatable small-fastener job, rather than simply owning a tool with many clutch numbers.
Models referenced