
Keep the lead, stand and paper apart
A mains-heated glue gun sits on its stand beside a supported paper layout; its cable routes behind the bench rather than crossing the placement area.
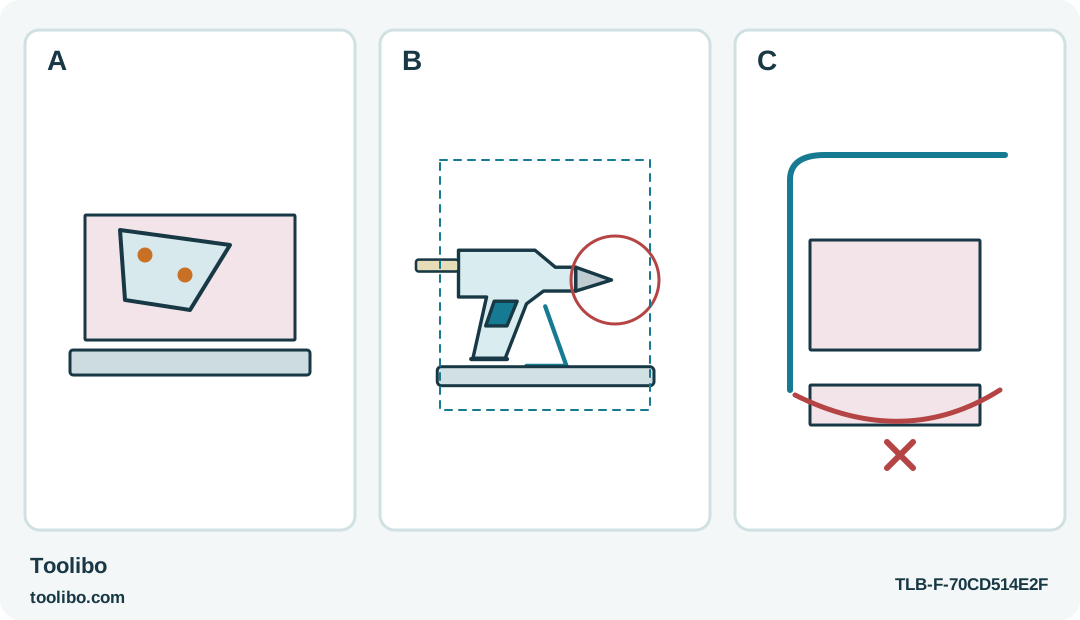
A · Supported paper
The joint lies flat on a protected surface instead of being held behind the hot glue.
B · Clear stand
Keep a stable parking space available throughout the task.
C · Lead route
The mains lead stays outside the hand and project placement area.
Conceptual EG Point workstation, not a drawing of its connector. Stored-heat use is not battery runtime; no body-connector manipulation is illustrated.
Understand what cordless means here
The UK Rapid EG Point, article 40302915, is described as cordless, but it is not a battery-heated pen. It heats from the mains and can offer a limited period of use from retained heat. That distinction matters when planning a craft station: there is still a supply cable and a hot tool that needs a stable resting place.
This guide uses the gun as a small indoor paper-craft tool on a protected bench. It does not explain disconnecting a connector at the body; that model-specific manipulation must follow the exact instructions supplied with the unit. Nor does the advertised off-cord period guarantee that a particular adhesive will remain suitable for a whole project.
Choose a light paper or card assembly that the specified adhesive permits. A small display label or layered card shape is a more suitable starting point than a heavy hanging decoration. The finished item is for ordinary dry display, not a food container, candle accessory or structural repair.
Give every item its own space
Place the cold gun on its integrated stand and check that the surface is level and stable. Leave a protected zone around the nozzle rather than positioning it at the edge of the bench. The purpose is to make the safe resting position the easiest place to return the tool, not something hidden behind the project.
Arrange the paper to one side of that zone, flat and fully supported. Put the completed work somewhere separate, so a fresh item cannot be mistaken for a cool one. A third small area for offcuts helps prevent loose paper from moving under the hot gun or obscuring the working joint.
Route the mains lead without a loop across the area where your hands place the pieces. It should not pull on the gun as the project is moved. If the layout cannot keep the cable, nozzle and paper clear of one another, use a different bench arrangement rather than assuming a cordless phase will solve the problem.
Rehearse the paper joint and test the adhesive
Dry-position the pieces and identify the smallest attachment area that will serve the design. Do not plan a large hidden glue reservoir to hold a raised shape in place. Its bulk can telegraph through the front and its heat can affect a much larger area than intended.
Select the recommended 7 mm stick for the EG Point and the materials. “Mini” on a packet is not a dimensional or temperature specification. Keep the labelled packet nearby, especially if several different glue products are stored in the same drawer. Do not insert a loose stick whose identity you cannot establish.
Test matching offcuts on the protected work surface. Thin paper must not be held in a hand behind the application point: adhesive can pass through and the material does not reliably insulate against heat. Once the trial is cool, inspect the visible face, flatness and the kind of light handling the decoration will receive.
Work at the speed of the joint, not the clock
Heat the gun safely on its stand in accordance with its exact instructions. Expect a normal controlled feed before starting the finished piece. If adhesive is reluctant to move, do not force the trigger or push an improvised rod into the feed opening.
Apply a modest amount to the prepared location, put the gun back on the stand and place the second piece promptly. Use the dry-fit reference so that the movement is simple and repeatable. Keep the joint supported while it cools. If it slides out of line, stop and assess it after cooling rather than trying to rescue the shape with a finger near hot glue.
For a task that would need off-cord use, first decide whether the joint is close and accessible enough to complete comfortably under the gun’s own instructions. Do not take an advertised maximum duration as a guaranteed working interval. As stored heat falls, increasing trigger force is not a substitute for the prescribed heating process. A short return to a well-arranged station is better than pursuing a longer reach with poor glue flow.
End with the stand still doing its job
Unplug the tool when it is no longer in use and before maintenance, then leave it safely supported until fully cool. Removing electrical power does not instantly remove heat from the nozzle or adhesive. Keep the cooling zone clear until the tool can be put away safely.
Do not pull the inserted stick out, lubricate the feed path or clean the gun with solvents, oil or grease. A damaged cable is a service problem, not a household splice repair. Once the finished paper work has cooled, check for visible lumps, lifting edges and restricted folds, then store it flat if the design requires that. Keep a successful scrap sample with the adhesive packet as a practical reference for the next craft session.
Models referenced