
Shorten the route from application to contact
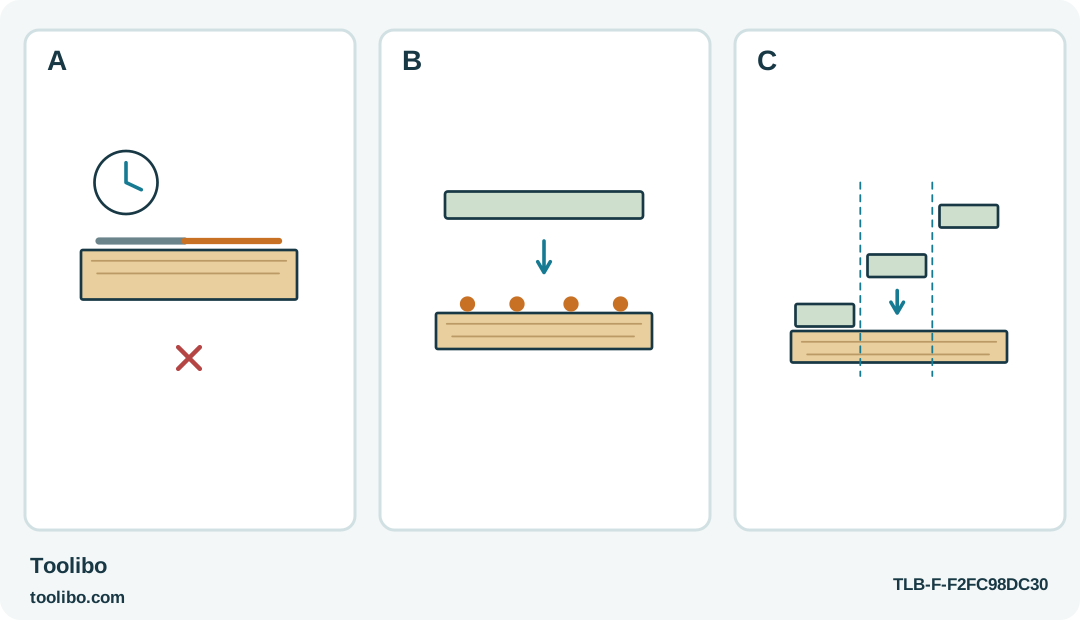
A long bead with a cooled early section, dots beneath one rigid placement and separate independently placed pieces distinguish timing options.
A
A long continuous application may cool at its start before the pieces meet. Do not rescue it with more force or nozzle reheating.
B
For a broad rigid piece, a modest trialled dot pattern may permit prompt single placement; no spacing here is a load calculation.
C
Use staged sections only when each is independent and the next does not lift or stress an earlier attachment.
Prompt contact can come from a compact dot layout or genuinely independent pieces, not from rushing a long cooling bead.
Find where the sequence becomes too long
A long craft joint often fails at the beginning rather than the end. By the time you finish dispensing adhesive, put down the gun and bring the second piece into position, the first deposit may already have cooled too much to make useful contact. More glue along the same slow sequence does not solve that timing problem.
Use the UK Bosch PKP 18 E, article number 0603264542, only with its manufacturer-recommended adhesive suitable for the materials and its approximately 200°C processing temperature. The specified stick diameter is 11 mm. This example concerns a supported, lightweight indoor decoration, not a load-bearing seam, structural repair or waterproof joint.
Before warming the gun, rehearse the entire movement without adhesive. Place the parts, reach for the tool, simulate the application, return it to its support and bring the faces together. Notice where you need an extra hand or where a long flexible piece sags. Solve those problems in the setup rather than discovering them beside fresh glue.
Divide only where the pieces allow it
Mark manageable attachment areas on the concealed face. A section is useful only if it can be brought into contact without peeling up an earlier section or bending a rigid part. Do not force a stiff strip into a staged procedure that requires lifting its already attached end.
For a long, broad contact area, the PKP 18 E guidance recommends adhesive dots. That can reduce the time spent covering an unnecessary continuous field. The number and spacing still depend on the particular nonstructural piece; this article supplies no universal pattern or strength calculation. Test the proposed arrangement on matching scraps first.
Where a rigid piece must meet the backing all at once, plan a modest dot application that you can join promptly as one operation, or choose a more suitable attachment method. Sections are an organizational tool, not permission to create a row of stressed joints. Reject a design that depends on reheating or levering earlier attachments to reach the next area.
Prepare support and alignment before heat
Keep the backing flat and arrange stops or simple supports that establish the intended position without sitting in the glue path. If a holder is used, it must not squeeze hot adhesive toward your hand or damage the material. The pieces should fit naturally; use preparation, not adhesive, to correct poor cutting or bowing.
Clean and dry the contact surfaces appropriately for the materials. Do not use flammable solvents. Exclude incompatible materials such as PE, PP, PTFE, Styrofoam and plasticised PVC, and check heat-sensitive finishes on a spare sample. A smooth-looking face can still have a coating that releases from the glue.
Set the cool, unplugged gun on its sound support bracket and check the cable route. The cable must not catch the end of a long workpiece when you move the gun. Warm the tool for approximately seven minutes after connecting it to the correct supply. Test normal moderate feed on a suitable waste surface rather than forcing a cold mechanism.
Complete one planned contact sequence
Apply glue to one side in the pattern established by the sample. Keep the amount manageable and bring the matching face into contact immediately. Hold alignment for approximately ten to thirty seconds while avoiding hot squeeze-out. Return the gun to its support between applications; do not balance it against the project.
For genuinely independent sections, allow the first attachment to become stable before moving the work in a way that could disturb it. Check that the next area can still lie flush without levering the previous one. If the sequence starts to introduce a gap, stop before adding more adhesive and reassess the dry fit.
If the glue has visibly skinned or the pieces fail to meet promptly, do not press harder and call the joint complete. Let the material cool safely, inspect it and plan a fresh compatible attachment. Do not use the hot nozzle as a general reheating iron along the seam, particularly beside a heat-sensitive decorative surface.
Inspect the whole length after cooling
After the assembly has fully cooled, look along the joint under good light. Check for lifted ends, sections that never contacted the backing and a line that has drifted away from the alignment marks. Gentle normal handling should not cause a section to release. A successful short sample does not excuse a visibly incomplete long joint.
A failure at the earliest glue deposits points toward an overlong application-to-contact sequence. Failure everywhere may suggest surface contamination, incompatible material or an unsuitable adhesive instead. Distinguishing those patterns helps avoid repeating the same operation with a larger quantity of glue.
Keep the finished decoration dry and away from heat; moisture and heat can weaken hot-melt attachment. Unplug the gun after the session and leave it supported until completely cool. If the project cannot be assembled promptly and without stressing earlier joints, the correct result is to change the joining method, not to make the sequence longer and more hurried.
Models referenced