
Dry-fit trim before choosing contact points
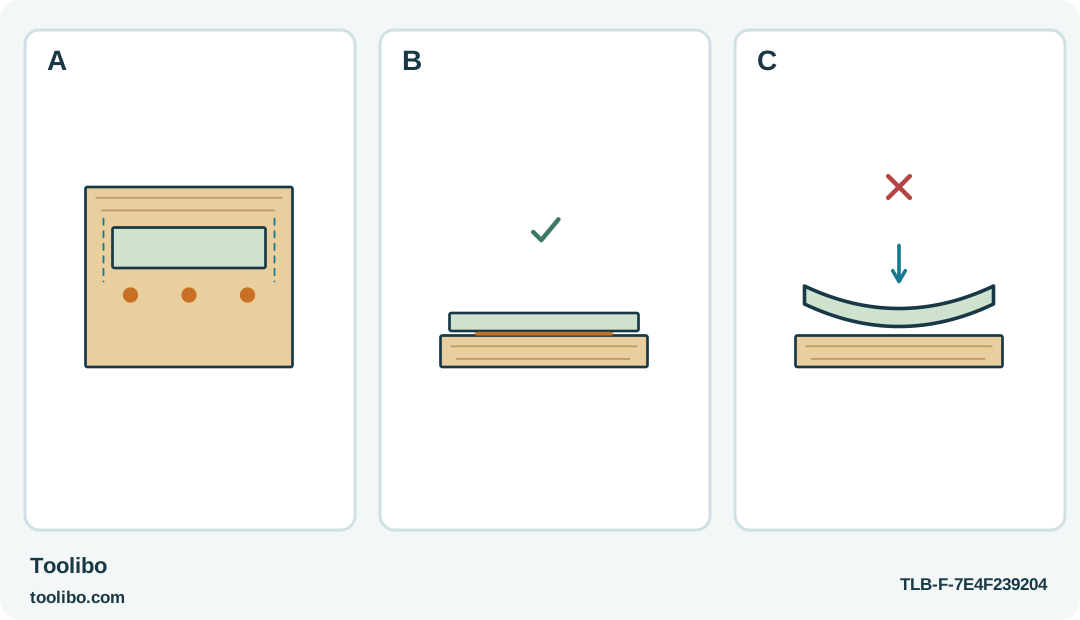
A registered trim plan with separate contact points, a flush section and a bowed strip under a crossed force cue explain fit before fastening.
A
Arrange a short truly decorative strip at visible references and use only compatible identified materials and adhesive.
B
A modest application should retain an already flush supported fit; inspect the cooled edge without forcing it.
C
A bowed strip that needs sustained force is a fit problem. More glue cannot replace sound preparation or restore a structural joint.
Contact points can retain a naturally flush strip, but they cannot remove the spring force in bowed trim.
Keep the trim genuinely decorative
A short strip of trim can tidy the edge of a small display board or desktop decoration. Before using hot melt, confirm that the strip is only ornamental. It must not hold a shelf together, secure a wall fitting, support glass or repair a chair. If removing the strip would make the object unsafe, this is not a decorative attachment task.
This workflow uses the UK Bosch PKP 18 E, article number 0603264542. It is a corded gun operating at approximately 200°C and uses manufacturer-recommended adhesive in the specified 11 mm format. Select a formulation suitable for both the trim and backing. Do not interpret a matching diameter as approval for an unidentified craft stick.
Check the materials before cutting or warming anything. The tool’s listed exclusions include PE, PP, PTFE, Styrofoam and plasticised PVC. A coating can matter as much as the material beneath it. Keep the finished item dry and away from heat because moisture and heat can loosen hot-melt bonds.
Make a fit that does not need force
Place the backing flat on a stable surface and arrange the trim in its final position. Look along the joint for gaps, rocking and bowing. Correct the cut or select a straighter piece before gluing. A strip held down by hand may look flush during assembly but lift as soon as that pressure is removed.
Mark discreet alignment points on the backing and identify a safe place to grip the trim. Your fingers must not sit where adhesive could squeeze out. Prepare matching scraps to test the adhesive and finish, especially if either surface is painted, laminated or heat-sensitive.
The contact faces must be clean, dry and free of grease. Do not use flammable solvents to prepare the joint. Remove loose surface contamination by an appropriate safe method for the material, then ensure nothing damp or loose remains. Do not glue over a peeling finish and expect the adhesive to strengthen the coating beneath it.
Prepare the gun and a sample joint
With the gun unplugged and cool, check the cord, plug, housing and support bracket. A damaged part ends preparation until proper service has resolved it. Set the bracket securely on a heat-resistant, nonflammable work area, and route the cord so it cannot pull the gun over or sweep across the trim.
Load the recommended stick through the normal rear feed. Plug into a supply matching the tool’s rating and allow approximately seven minutes to heat while supported. Do not force the trigger during warm-up. Test moderate feed on the matching scrap rather than beginning on the finished edge.
Apply adhesive to one side of the sample and bring the pieces together immediately. Hold them in position for roughly ten to thirty seconds, keeping skin away from the joint. Let the sample cool before checking appearance and gentle handling. Reject a combination that distorts the finish or releases easily; a bigger bead is not a reliable cure.
Attach the prepared strip
Use a modest, manageable application that allows prompt assembly. For broad contact areas, dots are the model’s recommended approach rather than covering the whole surface with a thick layer. Place them where they will create useful contact without forcing a visible gap beneath the trim.
Align the strip to the marks, press the pieces together promptly and hold the position without sliding back and forth. Make a small alignment correction while the glue is still workable if necessary, but do not pry up a cooling section and expect it to reseat cleanly. Return the gun to its support as soon as the application is finished.
Keep the backing supported while cooling. Do not use the new trim as a handle or stand the display on that edge immediately. The initial holding period is not a load rating, and the short cooling guidance is not proof that the joint will survive rough handling or a warm location.
Inspect the edge and know when to stop
Once fully cool, look along the trim again. It should remain aligned without your hand holding it flat. Check for lifted ends, visible gaps or an adhesive deposit that failed to contact one surface. Handle the display normally and gently; do not perform a destructive pull test on a valuable finished item.
A lifted end may indicate bowing, a poor surface or joining too late. Stop and reconsider the joint rather than injecting more hot glue into a gap beside your fingers. For hardened accessible excess, the manufacturer’s cleaning approach allows a blunt object; do not use solvents or scrape toward the decorative face with a blade.
Unplug the PKP 18 E after use and leave it on its support until completely cool before storage. This article does not cover nozzle replacement: do not borrow a cold-change routine from another gun or attempt internal repair. A sound decorative result comes from good fit, compatible materials and timely contact, not from modifying the tool or forcing a difficult strip into place.
Models referenced