
A backing-side dot still transfers heat to film
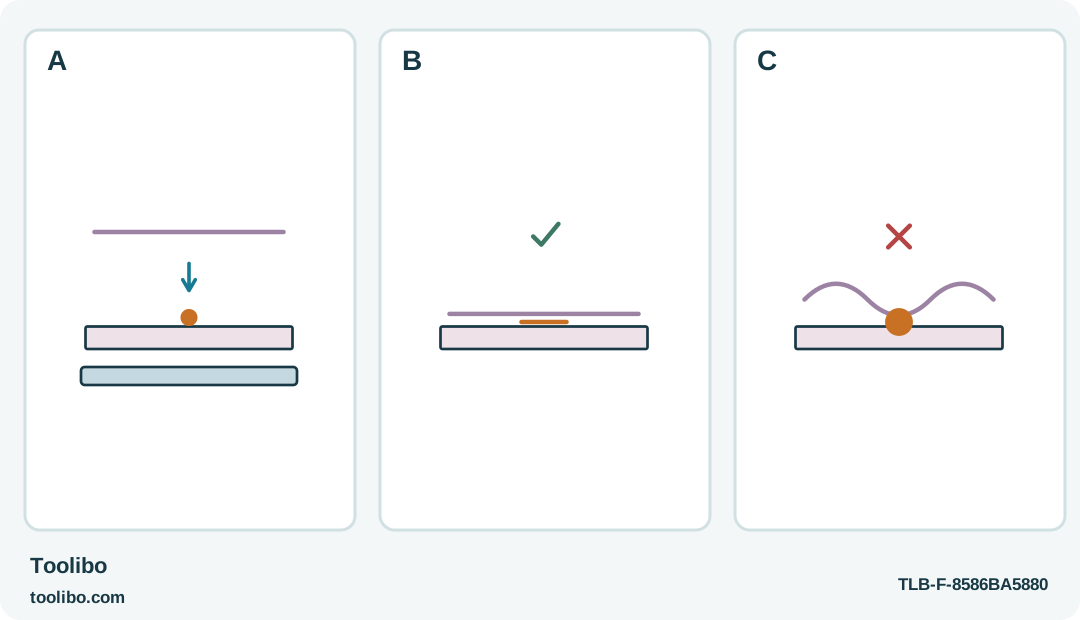
A thin film above a backing-side dot, a flat bonded film and a wavy distorted film illustrate heat-sensitive acceptance.
A
Use a small backing-side trial with identified dedicated LT adhesive; keep the nozzle off the delicate film and hands away from beneath it.
B
Only transfer a pattern whose cooled film remains flat and attached under ordinary gentle handling.
C
Puckering, shrinkage, a halo or an obvious mound is failure; do not flood the surface or stretch it flat.
Even a small backing-side deposit can pucker film, making the cold sample—not the LT label—the acceptance check.
Decide what the film must do
A thin decorative film can look flat on the table yet wrinkle as soon as warm adhesive touches it. The useful question is not whether a gun is advertised for delicate materials. It is whether this particular film, its coating and its backing can survive a small decorative attachment without changing shape. Start with an offcut from the same sheet and a spare piece of the intended backing.
This workflow uses the German-market STEINEL GlueMatic 1007-LT and its dedicated original 85°C adhesive sticks. It is not a procedure for the ordinary 170°C GlueMatic 1007, even though both use 7 mm sticks. Keep the LT sticks in their identified packaging. A loose stick that fits the opening does not establish that it melts or bonds correctly in this system.
Limit the project to a small, dry indoor decoration that carries no load. Do not use this approach for protective window film, food wrapping, waterproofing, electrical insulation or an item that must meet a safety requirement. If the film’s identity or coating is unknown, treat the trial as an acceptance test, not as permission to assume compatibility.
Support the film before heating anything
Arrange the backing flat on a heat-resistant work surface. Set the film over it without glue and establish its final position. Mark alignment on the backing where it will remain hidden, rather than drawing on an easily marked decorative face. Decide where a small attachment will be concealed and where the film must remain free to lie naturally.
The film should not have to be stretched into position. Tension can hide a poor fit while the joint is held and then pull the decoration out of shape after release. Cut or reposition the decorative piece before beginning if it cannot lie acceptably in its dry fit.
Prepare a heat-resistant silicone mat beneath the trial and keep fingers away from the possible glue path. Thin or perforated material can transmit heat or let glue emerge through it. Do not hold the film over your palm while applying adhesive. Put a clear resting area beside the work for the gun’s support, with its cord routed away from the loose film.
Test a small attachment on matching scraps
Warm the 1007-LT on its support using the specified LT adhesive. Allow the normal heat-up period, approximately eight minutes, rather than trying to force a cold stick through the feed. Make a small trial deposit on the spare backing, then place the film into that deposit promptly using the alignment practiced earlier.
Applying to the backing keeps the nozzle away from the delicate film; it does not remove the heat that the adhesive transfers into it. Keep the first attachment modest so that its effect can be seen. Avoid spreading glue with the hot nozzle across the film or repeatedly reheating an area that has already distorted.
Let the sample cool undisturbed. Examine it from the front and at a shallow angle. Look for puckering, shrinkage, a cloudy halo, an obvious glue mound, colour change or an edge pulled upward. Then handle the cooled sample gently to see whether the attachment releases cleanly from either surface. Good appearance alone does not show that a useful bond formed.
Transfer only a successful pattern
If the trial remains flat and attached during ordinary gentle handling, repeat that same small attachment pattern on the finished decoration. Do not turn a successful dot into a broad flood of adhesive: a larger hot deposit changes both heat exposure and visibility. Keep the film supported in its final position while the attachment cools.
For several attachment points, plan the order so that each can be reached without lifting or stretching a cooling joint. Work on one manageable area at a time. Check alignment before the adhesive sets rather than pulling at the film after it has become fixed. Return the gun to its support between applications, never onto the film itself.
Stop if the actual piece reacts differently from the sample. More pressure will not flatten a heat-shrunken coating, and more glue will not correct a surface that rejects the adhesive. A different attachment method or different material is preferable to accumulating warm layers on a failing trial.
Judge the finished decoration and store the system
After complete cooling, inspect the visible face again and gently lift the backing as it will normally be handled. The decoration should remain in place without an attachment peeling away or a film edge curling under its own tension. This is a practical appearance and handling check, not a rated strength test.
Keep the finished piece away from heat and moisture. If the film later lifts, remove the item from use rather than assuming another hot deposit will be harmless. Preserve a labelled offcut and the adhesive packaging if you expect to repeat the project; matching those materials is more useful than remembering only the gun’s temperature.
Unplug the gun and leave it supported until fully cool. Store its identified 85°C sticks separately from ordinary 1007 stock. That simple separation prevents the next delicate-film project from starting with an apparently identical but unsuitable adhesive.
Models referenced