
Apply to the supported backing, then place the foam
Backing-side dots below suspended foam, a flat cooled stack and a visibly collapsed foam section separate the application from acceptance.
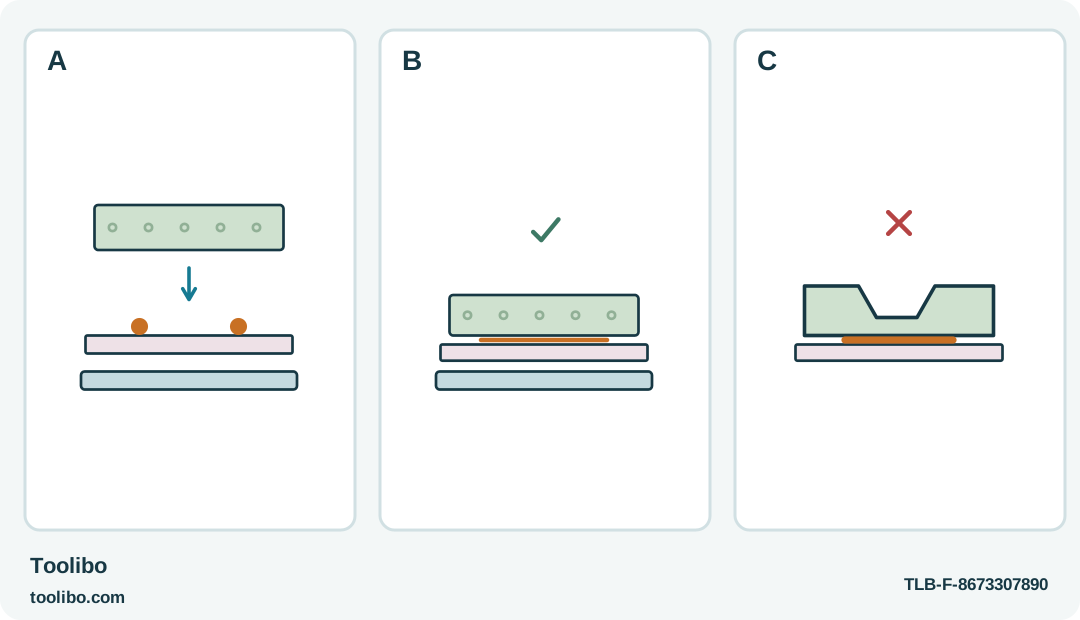
A
Use the dedicated 1007-LT system and apply a modest trial to supported backing—not directly to foam held in a hand.
B
Place the matching foam promptly and inspect the cold sample for flat contact and undistorted materials.
C
Collapsed foam, curled card or a large hard lump rejects the combination even if it seems attached. Lower temperature is not damage immunity.
Depositing glue on the backing keeps the nozzle off the foam; the cooled foam must still remain undistorted.
Choose a decorative shape, not a loaded support
A light foam shape can add depth to a card display without needing a heavy backing. Keep the design small enough to sit on a supported work surface and simple enough to position in one movement. The foam should decorate the card, not hold a shelf, support a handle or provide a safety-critical fastening.
Use the exact GlueMatic 1007-LT with its dedicated original 85°C adhesive sticks. The similar-looking ordinary 1007 is a different temperature system. A shared 7 mm diameter does not make its sticks interchangeable, and the LT has no hidden setting that turns standard high-temperature adhesive into low-temperature stock.
Identify the foam and the backing before beginning. This guide is not permission to experiment on unknown insulation, packaging contaminated by chemicals or materials with a critical protective function. Use clean craft materials suitable for the intended adhesive, and keep an identical offcut for the trial.
Dry-fit the display at its finished size
Prepare the shapes with suitable separate cutting methods before bringing the glue gun into use. Arrange them on the card and check how the display will stand or hang using its independently suitable support. Do not rely on the new foam joint to carry anything beyond the lightweight decoration itself.
Keep the adhesive contact broad enough to support alignment but away from a visible edge where squeeze-out would spoil the result. Mark reference positions lightly. If a shape rocks or bridges a curved surface, change the shape or backing instead of planning to fill the whole gap with a mound of hot glue.
Place the work flat on a protected, heat-resistant surface. Thin card is not a reliable barrier between hot glue and skin, so keep the supporting hand away from the application point. Rehearse where the gun will rest after application and how the shape will be placed without reaching across the nozzle.
Test the exact material stack
Put the gun on its support, route the lead safely and match the supply to its rating. Load the proper dedicated low-temperature stick and allow the normal warm-up period before using gentle feed. Do not interpret resistance as a reason to squeeze harder or substitute another stick that happens to fit.
Make a small trial on the backing scrap and bring the foam sample into position promptly. Apply to the supported backing rather than holding the foam in a bare hand beneath the nozzle. Keep fingers away from squeeze-out and leave the sample undisturbed while it cools.
Inspect both materials after cooling. Look for a dented or collapsed foam surface, curled card, a hard raised lump or a joint that peels apart under ordinary light handling. A lower tool temperature is not proof against burns or heat damage. Reject a combination that fails the sample rather than trying it on the finished shape more quickly.
Assemble in a controlled sequence
Use the modest amount that worked in the trial. Place adhesive on the prepared backing at the planned contact points, park the gun on its support and position the foam using the reference marks. Avoid repeated sideways adjustments through partly cooling glue; they can disturb the shape and leave an uneven bond.
Keep the piece aligned with a suitable cool support, not fingers pressed into the glue line. Work on one manageable shape at a time. Allow it to settle before adding another nearby part that could push it out of position. A display with several layers should be planned so that a later layer does not require force on an earlier joint.
If the shape moves or the adhesive cools before contact is made, stop and let the failed attempt cool. Do not aim another heat source at the assembly to rescue it. A fresh matching sample or a revised layout is a better way to solve a timing problem.
Inspect the completed decoration before display
Check that the card remains flat enough for its intended display and that each foam piece stays attached during normal careful handling. Keep the piece indoors, dry and away from heat. Do not infer a temperature rating, waterproof bond or child-safe toy construction from a successful craft trial.
Unplug the gun at the end of the session and let it cool fully on its support. Leave the inserted stick in place and keep the dedicated LT stock clearly labelled, separate from the ordinary 1007 supply. That separation matters next time even when the two bags contain sticks of the same diameter.
Models referenced