
Flat contact, wedge gaps and spring pressure differ
Three cold side sections distinguish flat natural contact from a wedge opening and a bowed piece needing sustained force.
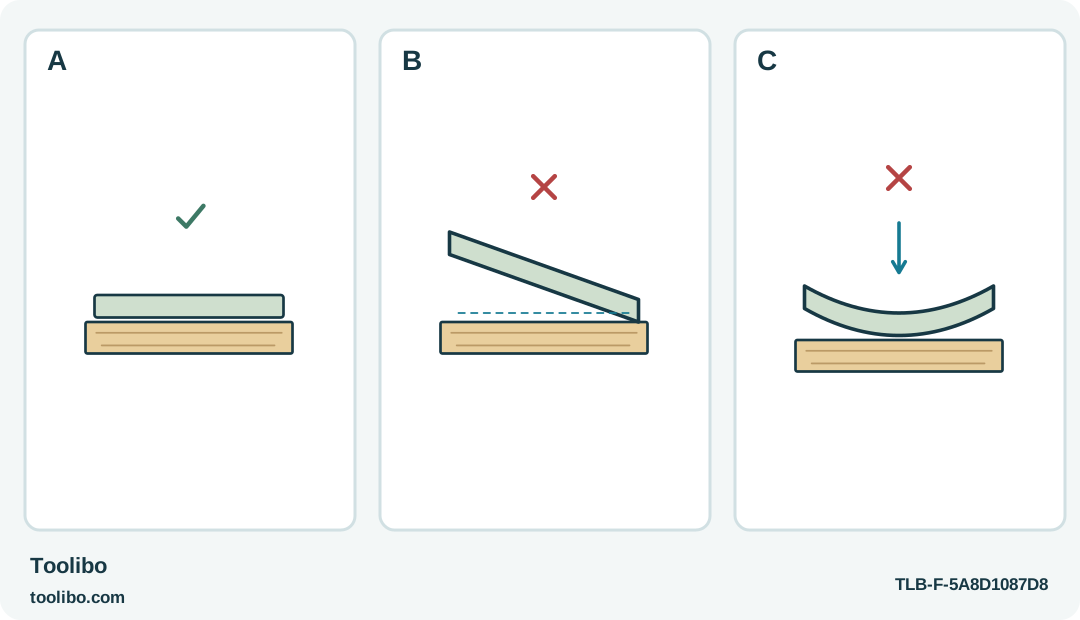
A
A useful dry fit meets naturally without rocking before adhesive is introduced.
B
A wedge-shaped gap means the faces do not meet; filling the opening does not repair the geometry.
C
A bent part held down by continuous force stores stress in the attachment. Correct the fit or change the method rather than add glue.
A joint that rests flat cold is fundamentally different from one that needs a gap filled or a curve held down.
Treat a dry fit as the first working step
Hot glue can hide a gap without making the pieces fit. Before using a Bosch PKP 18 E or Worx WX045L on a small decorative assembly, put the parts together cold and without adhesive. The joint should meet in the intended position without continuous force, rocking or a visible wedge-shaped opening. If it does not, fix the layout or choose another attachment method before heating the gun.
Use an already sound object such as a removable display panel or a small desk organizer. The glue in this workflow retains decoration; it does not repair a broken load-bearing corner or support a handle. A thick glue fillet is not a substitute for a correctly designed structural joint, and this guide does not assign a safe load to any gap-filled bond.
Lay the receiving object on a stable protected bench. Place the decoration where it will go, then release your grip. Watch whether it stays flat or springs away. A strip held flat only by your hand may continue pulling against the adhesive after cooling. That stored force is a fit problem, not a request for more glue.
Find the obstruction before changing the adhesive
Look along the contact area from more than one angle. A protruding old bead, uneven cut, raised coating or piece of trapped debris can prevent contact. Deal only with straightforward preparation on known materials. Do not sand an unidentified coating, carve a valuable object or use the hot nozzle to flatten a warped plastic part.
For a decorative cardboard facing, check that the panel is not larger than the available recess. For a light wood embellishment, check that it does not bridge a curved surface with only its ends touching. For a flexible strip, check its relaxed length instead of stretching it to reach a mark. Each situation asks for a different adjustment, and none is solved simply by choosing a wider glue stick.
The PKP 18 E and WX045L both use their specified 11 mm systems, but their power arrangements differ. That shared nominal diameter does not establish interchangeable formulas or identical handling. Select an adhesive recommended for the exact gun and actual materials after the fit is acceptable, not as a way to avoid the fit check.
Rehearse the complete assembly movement
- Position both cold pieces and identify the final alignment marks.
- Lift the decoration away using the same grip you will use during assembly, keeping the intended glue area clear of your fingers.
- Rehearse dispensing to the chosen contact points without power or adhesive.
- Move the imagined hot gun directly to its safe resting position, not across the supporting hand.
- Bring the second piece into place promptly without a long sideways slide, then hold through cool accessible areas.
If the rehearsal requires an extra hand, a hurried turn or a search for a missing part, improve the setup now. A simple external support can help keep a removable panel level, provided it does not place fingers under the hot area or become glued into the work. Do not rely on picking up the whole object immediately after application to find a better angle.
Divide a large cosmetic layout into smaller independent attachments when possible. The purpose is to complete each joint while the adhesive is workable, not to create a rigid schedule measured in universal seconds. Material temperature, quantity and formula all affect the practical working interval.
Test contact after cooling, not while it is soft
Make a supported trial on equivalent scraps with the selected gun’s normal heating sequence. Use a modest amount on one side and join promptly. Let the parts cool without repeatedly rocking them to see whether the glue is setting. A soft joint can shift during that inspection and leave poor contact concealed beneath the decoration.
After cooling, look for a level surface and a continuous meeting of the intended parts, not a large visible mound. Gently check ordinary decorative handling. If an edge lifts, the piece rocks or the glue releases cleanly from one surface, stop and reassess fit and compatibility. More adhesive around the outside may make the problem harder to see without correcting it.
On the real object, use the same successful fit and sequence. Stop if the bead cools before assembly or if the part moves out of alignment; let the attempt cool rather than sliding it back and forth through partly set glue. A remake may be possible only if cold residue can be removed without harming the surface.
Finish by unplugging the PKP 18 E or switching off the WX045L as directed, then allow complete cooling before storage and battery handling. Keep the finished object in its intended dry, cool decorative use. The best evidence of a useful fit is a calm assembly with minimal adhesive and no hidden spring pressure—not the size of the bead left around the edge.
Models referenced