
Keep glue points outside a paper fold
A paper decoration has small glue points away from its fold; a cross-section contrasts a small attachment with a large glue lump that bows the paper, and a pressing aid keeps hands away during cooling.
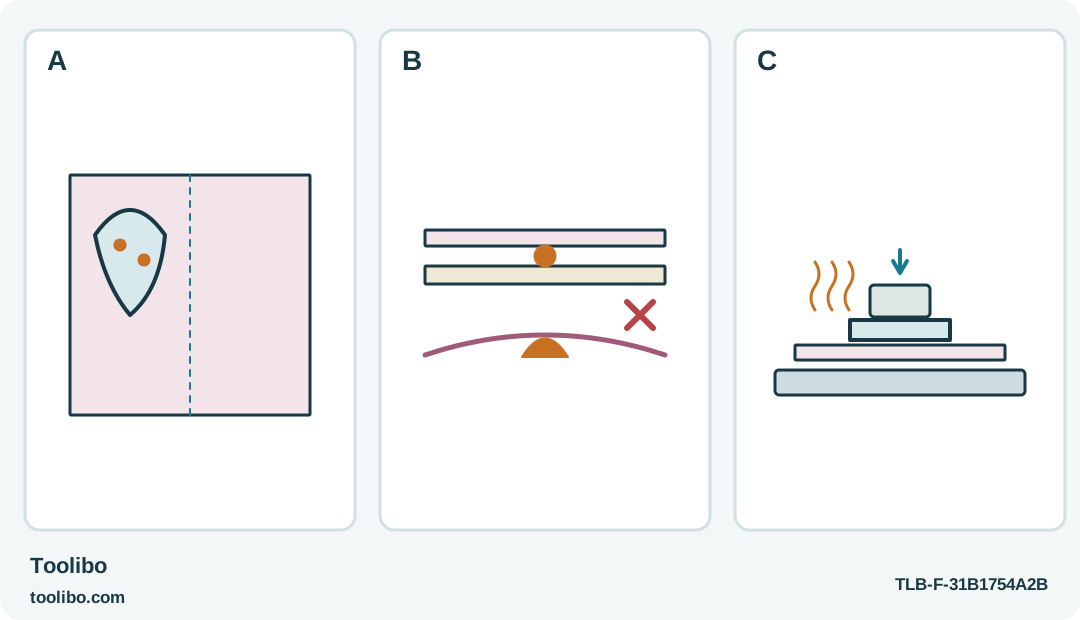
A · Plan the fold
Keep adhesive away from the part of the card that must bend.
B · Test the face
A cooled matching-paper sample reveals a visible lump or strike-through.
C · Support while cooling
The decoration stays flat on the protected surface, not in a hand behind the glue.
Original positioning diagram for a low-temperature paper trial. Adhesive and gun settings must match; the drawing does not establish paper compatibility.
Treat this as an existing-tool project
A raised paper shape can look simple until a thick glue blob shows through the front or fixes it in the wrong place. The useful first step is not squeezing the trigger: it is deciding which edges need attachment and which parts should stay free. This project makes a light paper decoration for an indoor display, not packaging strength, a food topper, a child’s wearable or anything placed near a flame.
It is written for an existing European Dremel 930 matching the applicable instructions. The general product listing marks this model retired; that does not make a sound existing unit unusable, but it is not evidence of current shop availability. Inspect the body, stand and lead before use, and do not proceed with a damaged or doubtful tool.
The 930 has two heat settings. That is useful only when paired with the correct glue. Its 7 mm diameter does not mean every 7 mm stick belongs on either setting. For this low-temperature project, use identified compatible low-temperature stock, such as the appropriate GG02 multipurpose stick. Colour or glitter sticks have their own decorative purpose and matching low-setting requirements; an unlabelled leftover is not a substitute.
Lay out the decoration while everything is cold
Place the paper base flat on a protected bench and arrange the cut-out pieces without adhesive. Keep glue points away from a fold that must bend, from a writing area and from any window through which a lump would be visible. Check the front and back of the arrangement before committing to it.
A small overlap is easier to position than a long loose edge. Use a lightly marked reference or a separate paper positioning guide so that you do not have to hover with one hand over hot adhesive while deciding where a shape belongs. Keep those guides clear of the glue locations; accidentally bonding the guide is not a positioning method.
If a shape needs a springy curve or a heavily raised edge, first ask whether paper folding alone provides the form. Do not use a large bead as a spacer. A change of construction is often cleaner than trying to hide excess glue behind a delicate surface.
Make a strike-through sample
Use offcuts from the actual paper and card. Colour, coating and thickness can change the visible result, so an unrelated cardboard box is a poor stand-in for the final materials. Work on a heat-resistant surface and keep fingers out from behind the point where the glue is applied. Thin material can pass heat and adhesive through to skin.
Set the 930 to the low position appropriate to the selected adhesive. On this model, plugging it into the correctly rated supply starts heating; the temperature selector is not an off switch. Let it reach operating condition on its stand before testing the trigger. A cold feed mechanism should never be persuaded with extra force.
Try one small attachment point, bring the scraps together promptly and leave them supported until cool. Then inspect the front under the light in which the decoration will be displayed. Look for a wet-looking mark, gloss, a ridge, curling or a visible shadow. If the sample is untidy, change the amount or the paper construction and repeat the test before using the finished cut-out.
Glue a short, manageable section
Move unnecessary pieces away so they cannot catch the lead or brush the hot nozzle. Rehearse the order: apply, park the gun, place the shape, support it, wait. That sequence is easier to control than holding a delicate cut-out in the same hand that is trying to manage the tool’s cable.
Place only the attachment points that the sample has shown to work. A modest quantity is easier to conceal and less likely to squeeze beyond the edge. Position the shape once, using the cold reference marks. If the adhesive has already skinned over or the alignment is clearly wrong, do not drag the shape back and forth through it; stop and prepare a fresh trial piece.
Use the tool’s stand whenever you pause. Do not lay the heated body or nozzle on paper scraps. Keep the work supported while it cools, without touching warm glue or pressing through thin paper with bare fingertips. Allow one small section to settle before adding the next, rather than trying to complete a whole sheet against the cooling clock.
Finish cleanly and disconnect the 930
Once cool, inspect the decoration from its intended viewing side and gently handle it as it will normally be handled. Check that the paper still folds or sits flat where required. Do not pull the glued shapes as though they were handles; this project establishes appearance and light display attachment, not an engineered joint.
Unplug the 930 to switch it off, and let it cool completely on a safe surface before storage. Do not borrow the 940’s detachable-cord or nozzle-changing procedures: those describe a different model. Leave inserted glue in place and avoid solvents or pointed objects in the gun. Keep the stick packaging with the remaining stock, because knowing the right heat setting next time matters more than remembering that the stick looked clear.
Models referenced