
Shared cover, different fastening branches
Original branching diagram separates BO4556 clamped sheet from the BO4555-only hook-and-loop section, then shows a flat sheet and detached punch.
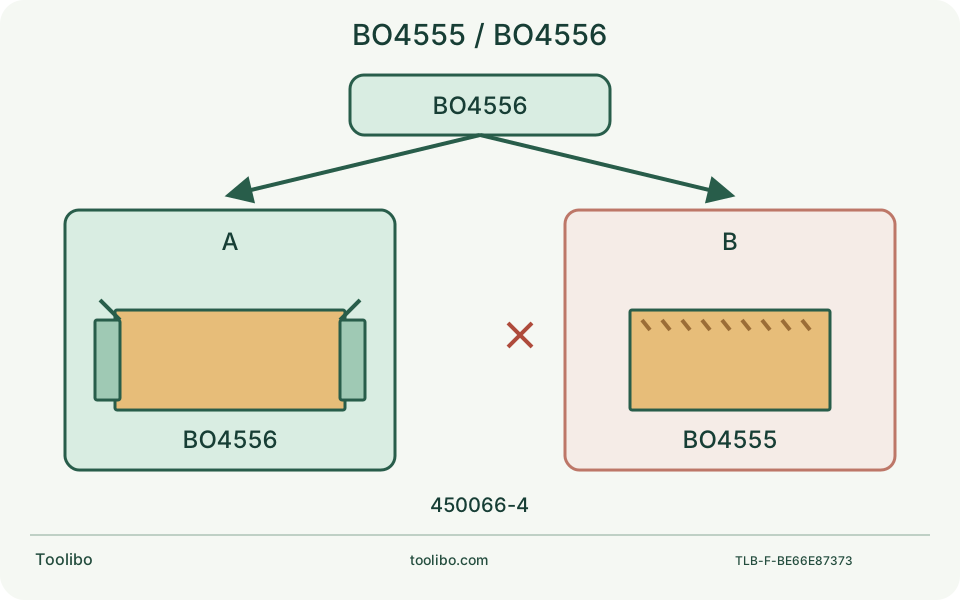
Select
Read the BO4556 clamp branch.
Tension
Hold both ends squarely with power disconnected.
Remove
Take the punch plate away before operating.
The drawing is a reading and fitting checklist, not a replacement-parts measurement or permission to convert the base.
Match the manual branch, not just its cover
BO4555 and BO4556 share the linked instruction book. Both names on the cover establish family coverage, but not identical consumable attachment. The later hook-and-loop section explicitly applies to BO4555 only. For BO4556, use the clamp-paper instructions and identify the levers on the actual machine before purchasing sheets. Do not add adhesive or a conversion pad merely to follow the other model’s page.
The US product identifies a 2 A corded quarter-sheet finishing sander running at 14,000 OPM without a variable-speed dial. Its job is controlled surface preparation, not rapid leveling of a badly uneven assembly. A more aggressive abrasive can increase damage as well as removal. Choose the task first, then decide whether this finishing format is appropriate.
Resolve a specification conflict without guessing
The product page lists a 4-1/2 × 4-inch pad, while the linked manual prints 112 mm (4-3/8 inches) × 102 mm (4 inches). These are not numerically identical descriptions. Do not average them or claim a replacement base fits from either rounded listing. Match service parts by the complete tool identity and manufacturer confirmation.
For purchasing ordinary clamp paper, the US listing separately specifies 4-1/2 × 5-1/2 inches. The extra length folds into the clamps; pad dimensions are not cutting dimensions. A short sheet can cover the working face yet fail to reach both gripping areas. Keep the paper package and full dimensions, rather than keeping only a photograph of the installed surface.
Check the clamp system with the tool unplugged
Set the switch off and disconnect power. Inspect the base, both clamp areas and the abrasive for damage. Following the matched illustrations, release one lever, place the sheet end squarely and close it; tension the paper over the base and secure the other end. The sheet should remain flat and securely held rather than sagging or bunching at a corner. Do not bend a damaged lever back while testing on a live tool.
For dust collection, the matching punch plate perforates the already fitted sheet. Align its guides and remove it after punching; it is a fitting aid, not part of the operating stack. A plate from another quarter-sheet machine may make the wrong pattern even when its outline seems similar. Resolve uncertain punch or paper identity before running.
Plan a small flat-surface trial
For an uncoated solid-wood shelf, remove hardware from the work area, secure the board and leave room for the base, bag and cord throughout the pass. Determine the finish system’s preparation requirements. Start on comparable scrap with suitable paper, collection and personal protection, rather than trying a coarse sheet on the finished front edge.
The manual’s operating sequence starts the tool before gently placing its base flat on the work. Use light, moving passes and inspect frequently. Do not tip the base to reach a narrow groove or hold the tool stationary on a small mark. Rectangular corners help with access, but the vibrating paper still needs clearance from a neighbouring finished surface.
Diagnose paper movement before blaming the motor
Swipe or scroll horizontally to see all columns.
| Symptom after switching off and unplugging | Check or boundary |
|---|---|
| Paper shifts along the base | Confirm full sheet length, square seating and both clamps |
| A corner tears repeatedly | Inspect folded paper, clamp contact and workpiece interference |
| Dust gathers despite a fitted bag | Check sheet holes, bag attachment and filling level |
| Correct paper still cannot be retained | Stop and have the clamp/base assessed |
The dust bag’s inlet hole should engage the locating protrusion on the tool outlet. Empty the bag around half full as directed, then reconnect it securely. This reduces avoidable restriction; it does not certify containment of hazardous dust or make an unsuitable material safe.
Know what belongs with service
Never run without paper, wet the surface for dust suppression or collect an unknown hazardous coating by trial. Stop for a damaged lead, unreliable switch, cracked base, new severe vibration or recurring paper failure after correct fitting. Brush inspection and replacement belong to authorised service in this manual.
Record the body model, paper dimensions and grade, punch identity and the stage at which trouble began. Send photographs taken with power disconnected. A short description such as “paper slips from the rear clamp after correct refitting” gives support a specific problem without another risky demonstration.
Models referenced