
Bosch GSB 12V-35 UK: keep gear, clutch and hammer mode separate decision map
Three separate control circles distinguish material mode, gear and trigger; axial impacts of 26,250/min are drawn separately from 1750 rpm rotation.
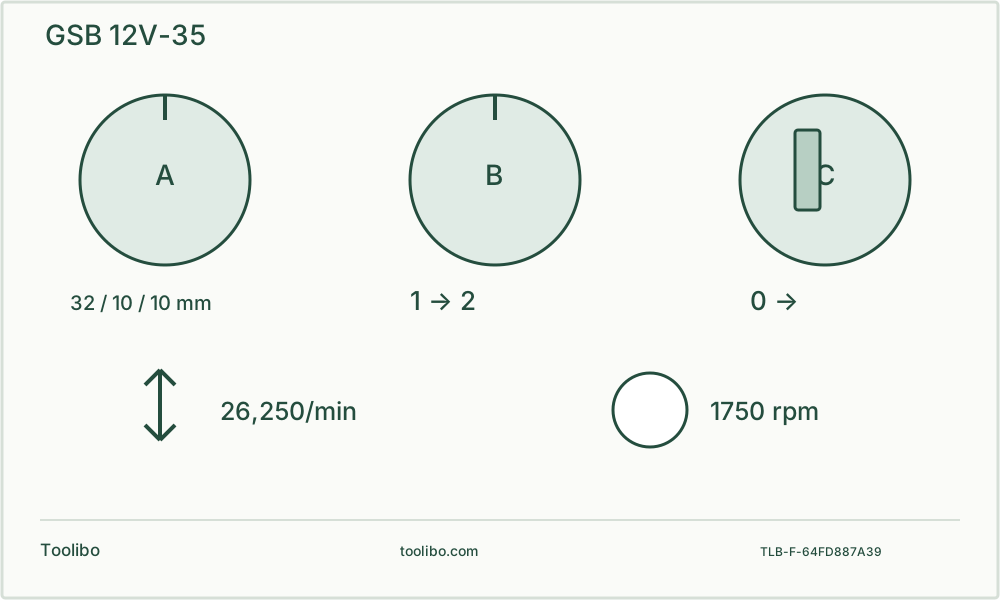
Mode
Match screwdriving, rotary drilling or permitted hammer drilling to the task.
Gear
Move the stopped selector fully into position.
Numbers
Do not confuse impact count with rotary speed.
Three separate concentric controls are drawn as independent decisions: material mode, gear and trigger. A rotary arrow is separated from axial impact arrows, with 1750 rpm and 26250/min on distinct scales.
Match the GSB column, not a similar name
UK order 06019J9070 identifies a GSB 12V-35 package; the tool number shown by Bosch is 3601JJ9000. The manual 1 609 92A 9UK dated 18.11.2024 also covers GSR 12V-35 and GSR 12V-35 HX. Only the GSB column includes hammer drilling. The HX hex holder and the GSR’s lack of hammering are not alternative operating instructions for this machine.
Check the box contents rather than assuming every package has the same batteries and charger. A photograph of a case is not a packing list. Record the tool number for service and the order number for purchasing. This distinction is especially useful when comparing an imported bare tool with a locally supplied kit.
Read three different numbers correctly
Swipe or scroll horizontally to see all columns.
| Field | Documented value | What it does not mean |
|---|---|---|
| Chuck range | 0.8–10 mm | Every 10 mm shank accessory is approved |
| No-load gears | 0–460 / 0–1750 rpm | A required cutting speed for every material |
| Maximum impact rate | 26,250 per minute | 26,250 rotary revolutions per minute |
| Capacity: wood / steel / masonry | 32 / 10 / 10 mm | Guaranteed progress in every substrate or condition |
The tool’s 35/20 Nm hard/soft figures are separate test categories, not a knob to set for a furniture screw. In particular, do not copy a page’s shorthand impact unit into a drilling-speed plan. The manual’s impact-rate and no-load-speed rows describe different motions. Keep accessory speed restrictions and the actual material in the decision.
Prepare a controlled screwdriving test
For a removable wooden cabinet component, secure representative scrap and arrange eye protection and dust controls. Check that the screw length will not enter a hidden space and that the bit matches the screw recess. Remove the battery to fit the bit and inspect the chuck. Set the screwdriving function and begin with a low clutch position on the trial material.
Choose the mechanical gear while the tool is stopped and move the selector fully into position. Use the trigger for a gentle start. If the clutch interrupts before the screw is seated, stop and check pilot size, alignment and resistance before increasing the setting. If the screw crushes the surface or its recess is damaged, a higher setting is the wrong response. Test the correction on scrap before the visible face.
Change from a screw to a drill deliberately
Stop and remove the battery before changing the accessory. Select rotary drilling for a suitable ordinary wood or metal bit; do not leave the tool in hammer mode after an earlier job. Clutch control used for screws does not provide the same limiting action in drilling. Restrain the work and leave room for the complete bit to emerge without striking the bench or a clamp.
Start with the point controlled and the drill aligned, then use appropriate speed and axial feed. Slow markedly at breakthrough rather than allowing the drill to plunge. If progress becomes poor, inspect the accessory and chip clearance after isolation. Pressing harder on a dull or bound bit can turn a minor setup problem into loss of control.
Treat masonry as a separate job assessment
The GSB offers a hammer-drilling mode and lists a 10 mm masonry capacity. That does not identify the material in a wall, find services, approve an anchor or establish a dust-control method. Resolve those matters before considering the tool. A cavity, reinforced substrate, unknown coating or suspected hazardous material needs a different assessment, not a higher clutch number.
For a permitted, identified material, match the masonry bit and exact operating instructions. Keep firm control and stop if the bit binds, hits unexpected material or fails to progress normally. A small combi drill is not automatically interchangeable with an SDS rotary hammer. This article does not supply structural fixing design or permission to drill an uninvestigated wall.
Stop, inspect and document recurring faults
A protection stop is a reason to identify the load, temperature and battery condition, not to keep pulling the trigger. The manual describes a chasing three-light pattern during temperature-related overload protection. Allow normal recovery without forced cooling or opening the tool. A stable, undamaged battery can be handled as instructed; a smoking, leaking or dangerously hot pack must not be handled as routine troubleshooting.
After isolation, check externally for a loose bit, blocked ventilation, damaged casing or an incompletely positioned selector. Persistent abnormalities require service. Record which mode, accessory, material and battery were in use and whether the symptom recurs under a suitable light load. That is more useful than saying the drill is weak because its advertised torque did not match an unrelated job.
Models referenced