
Find the collar, not just the fabric
The rigid collar at the bag entrance mates with the dust port. The fabric contains dust; it is not a handle for applying fitting torque. Switch off, wait for the pad to stop and unplug. Support the body and operate the collar. Never feel around the joint for leakage while sanding.
This guide concerns the DWE6423’s matching bag arrangement. Other models, modified fittings and vacuum adapters do not automatically use the same locking action. The tool is not for drywall sanding; attaching a bag does not change that restriction.
Three fitting actions
- Check the port and collar for cracks, distortion or trapped debris. Replace a damaged compatible bag assembly rather than taping a tear and continuing.
- Support the sander and fit the collar over the port with the mating faces aligned. Do not force it at an angle.
- Turn the collar clockwise to lock. Check gently that the assembly does not disengage unexpectedly and the fabric is not trapped in the joint. Do not assume a full turn, a particular click or extra leverage from pliers is required.
Still unplugged, move the tool through the intended area and check that the bag clears clamps and frames. Pad access does not prove rear-bag clearance. Rearrange the work or clamps if the return stroke hits the bag instead of repeatedly squeezing it past an obstruction.
Empty and loosen retained dust
Choose a suitable receptacle and handling location for the dust, away from bystanders and ignition sources. Unknown coating dust is not ordinary sawdust. If its hazards are unresolved, pause the sanding and ordinary cleaning approach until appropriate handling is established.
After switching off, waiting and unplugging, hold the sander and turn the collar counterclockwise to unlock, then remove the bag. Hold its opening near the receptacle and gently shake or tap the dust out. Do not whip the fabric around. Some dust can remain attached inside; that is not proof of a motor fault, but it reduces collection efficiency.
To release retained dust, depress the spring inside the bag while emptying and gently tap the bag against the side of the dust receptacle. Do not distort the spring or dismantle seams that do not need opening. Do not substitute improvised washing, solvent soaking or compressed-air blasting for this cleaning method.
Check the reassembled result
Inspect intact fabric, a clean collar and the visible port for obstruction. Refit and lock clockwise, then perform the gentle disconnected fit and travel checks. Confirm O before plugging in for a short trial on safe matching material. Maintain suitable collection and protection; visible dust alone is not an exposure assessment.
Persistent dust at the collar calls for stopping and unplugging to check seating, cracks and trapped debris. A local plume through the fabric calls for checking a tear. Poor collection with an intact bag calls for checking retained dust, the passage and abrasive-hole alignment. Do not label every symptom insufficient suction.
If cleaning or locking fails
Replace the correct assembly or obtain service if normal cleaning leaves a blockage, the fabric is damaged or the collar will not stay secure. Do not remove the bag to finish the last passes. Recheck clearance after replacing the bag, reclamping or changing direction. Emptying frequency varies with material and abrasive; do not wait for complete blockage, and do not treat one dust-free-looking trial as lasting proof of performance.
Lock the collar and release retained dust
A collar fits the port; a cutaway bag symbol shows an internal spring pressed while the bag is tapped against a receptacle.
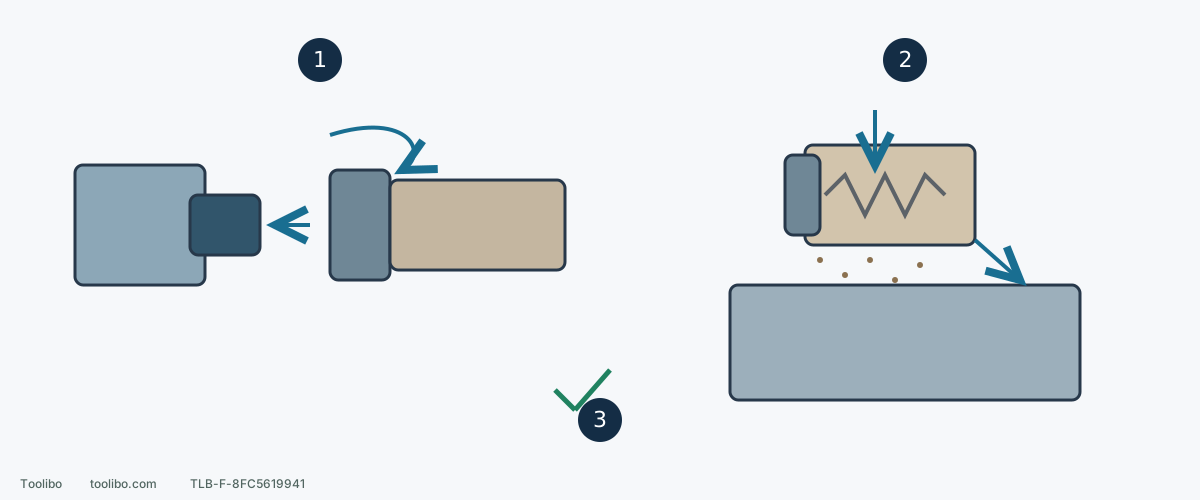
1. Fit and lock the collar
Align the collar with the port and turn clockwise to lock; counterclockwise releases it.
2. Empty gently
Press the internal spring and gently tap the bag against the receptacle side to release attached dust.
3. Refit and inspect
Check intact fabric, secure collar and full-travel clearance before the next powered trial.
Symbolic cutaway, not instructions to cut or dismantle the bag. Unplug before fitting or emptying.
Models referenced