
A proud head can conceal different problems
A visible gap under a proud head, a screw meeting a marked obstruction, and separate clutch and battery checks show why a stop has no single diagnosis.
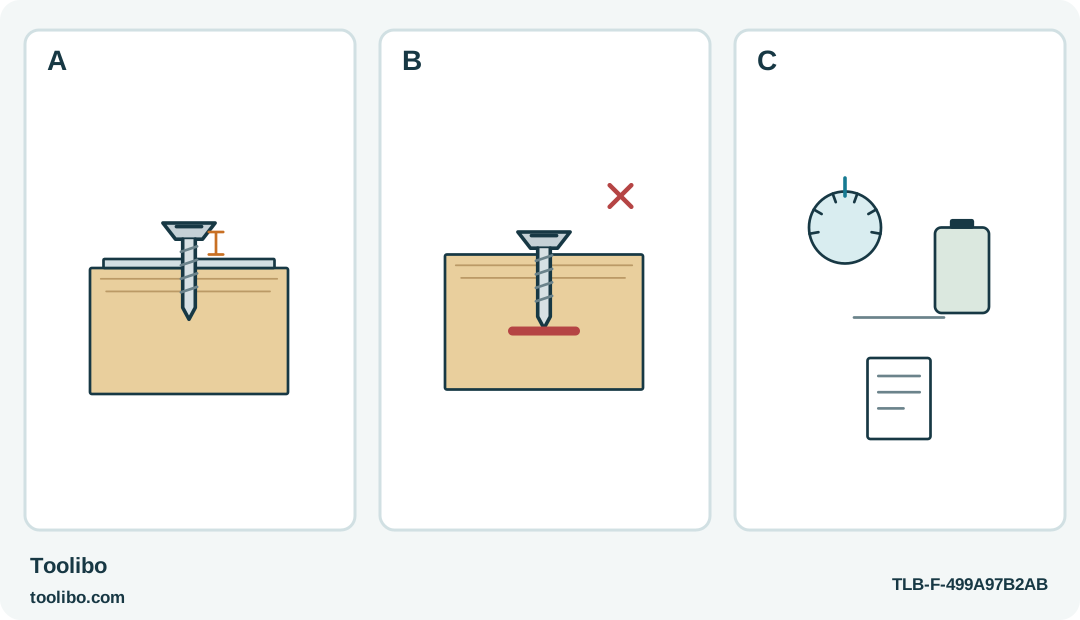
A
Leave the stopped screw in place and inspect the gap, fitting alignment and material before changing settings.
B
A bottomed or obstructed screw can remain proud; more power is not a repair.
C
Consider the model’s torque and battery behavior only after inspecting the joint; repeated unexplained stops end the trial.
A visible gap can result from several causes; inspect the joint before deciding whether any tool setting should change.
Leave the stopped screw where it is
When the motor stops with the screw head still proud, it is tempting to turn the torque control up immediately. That skips the most useful evidence: how far the screw travelled, whether the fitting moved and what changed just before the stop. Release the control and let the tool settle before deciding what the event means.
The Bosch PushDrive and Panasonic EY7410 both have torque-related stopping behavior, but their controls and battery arrangements differ. This guide concerns an accessible ordinary household fastening within the tool’s intended scope. It does not diagnose an internal electrical fault or supply a tightening specification for an engineered joint.
Inspect the joint before the driver
Look for a fitting pulled out of alignment, a screw entering at an angle or a head bearing on the wrong surface. Check the supplied screw against the furniture instructions, including its length and type. A screw that bottoms in a closed hole or meets an obstruction can stop the tool without ever seating the fitting properly.
Do not use more power to draw badly aligned parts together. Support and realign the assembly by the furniture maker’s method. If the material is split, the screw spins without gripping or the intended hole cannot be identified, stop the fastening task. A torque setting cannot restore damaged material or turn an unsuitable screw into the correct one.
Read the model’s behavior without guessing
PushDrive starts under axial pressure and stops when pressure is removed. Its selected torque stage can also stop the application tool. After a stop, remove pressure and use middle-lock before examining the bit or changing setup. Do not keep leaning on the tool while deciding whether it has stopped because of the joint or the setting.
The EY7410 has a separate switch, gears and clutch settings. Its high-speed use has a clutch-setting boundary, and low battery power can affect automatic shutoff at high settings. A flashing low-battery indication calls for the specified recharge procedure, not a higher clutch number. Keep the switch locked and remove the battery for accessory changes or inspection.
Separate a sound early stop from a faulty trial
A potentially useful early stop leaves the screw and material sound, with a clear reason to believe the selected limit was reached before the desired seat. Even then, test any adjustment on matching spare material first where possible. Reproduce the screw, fitting contact and hole preparation rather than trying a random fastener in an unrelated scrap.
An unsuitable trial looks different: the bit has slipped, the screw is crooked, the fitting is trapped or the material has begun to crush. Do not treat those signs as successful evidence that the tool needs more torque. Correct the joint or abandon the powered method. For the Panasonic, keep a conservative low-speed setup for the trial and do not assume a high setting will automatically stop in every condition.
Make the next attempt observable
Secure the sample or corrected assembly, wear eye protection and keep hands out of the bit and screw paths. Select a suitable setting while the tool is stopped. Engage the bit fully before activation, and drive only while you can see the fastener’s progress and the fitting’s position.
Stop at the intended seat even if the tool has not reached its limit. If it stops again, release the control and inspect rather than immediately repeating the start. A sequence of repeated bursts against an unexplained obstruction is not a controlled fastening method. If the tool becomes unusually hot or cuts out repeatedly, end the task and follow the applicable cooling or service guidance.
Keep the result tied to this joint
Record the successful tool setup together with the screw and material, not as a universal setting for all furniture. The next hole may be damaged or the next fitting may bear on a different surface. Watch the first fastening on the finished piece even after a useful sample trial.
If no external explanation accounts for repeated stops, or the tool’s behavior differs from its normal controls and indicators, use the manufacturer’s service route. Do not bypass protection, open an integrated battery or substitute an unknown charger to continue the job. A good outcome may be identifying that the driver is unsuitable for this fastening; leaving the screw unfinished is better than concealing a damaged joint beneath a seated head.
Models referenced