
Verify the hole before following it
A blind hole with its instructions, an opposite-face bulge marked as damage, and a supported straight approach show the checks before powered travel.
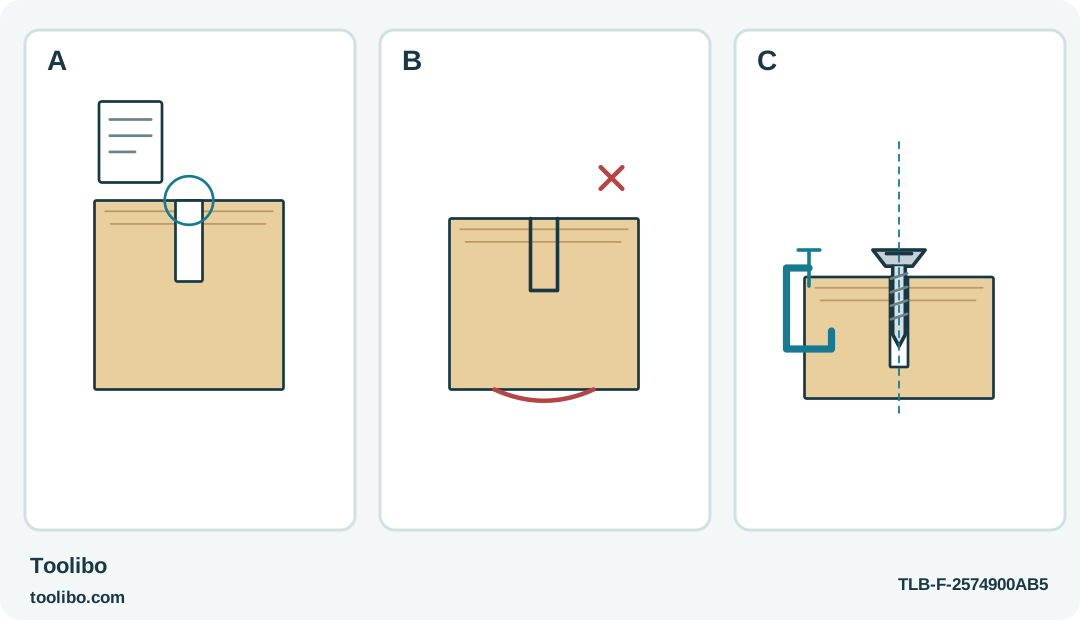
A
Identify the hole’s intended purpose and supplied fastener from the furniture instructions; it may not be a pilot hole.
B
Inspect both faces for splitting, enlarged entry or a previous exit bulge. Do not drive deeper to discover the available depth.
C
Only a sound specified setup permits a straight supported trial. M4’s #6 full-pilot wood limit is not a universal furniture approval.
An existing opening is not automatically the right pilot hole; its intended purpose and the opposite face must be checked first.
Decide whether the hole belongs to this screw
An existing hole in a furniture panel may be a pilot hole, a clearance hole, a connector socket or damage left by an earlier fastening. Its presence does not tell you which screw belongs there. Start with the furniture instructions and identify the exact panel, fitting and fastener before setting up a driver.
This guide concerns ordinary, accessible household components whose assembly method is known. It does not cover drilling a new pilot, repairing a stripped hole or fastening into a wall. Keep safety-critical items out of an informal trial. If the hole’s purpose or the panel’s internal structure is uncertain, stop and resolve the identity rather than probing it with a rotating bit.
Inspect the hole and both panel faces
Support the component and examine the entry for splitting, crushed edges, debris or an off-center position relative to the fitting. Check the opposite face where accessible. A previous screw may have emerged through the finish or left a bulge that is easy to miss when looking only from the assembly side.
Compare the supplied screw’s length and type with the instructions. Do not assume a similar-looking replacement is acceptable, and do not use a screw as a depth gauge by forcing it into the hole. If the specified screw or fitting is missing, get the correct part. A deeper powered drive is not a way to discover whether the screw is too long.
Keep tool capacity separate from hole condition
For the Milwaukee M4 2101-20, the documented practical wood-driving limit is a #6 wood screw with a full pilot hole. That is not a universal rating for every wood, panel or fitting, and it does not prove that an existing partial hole is adequate. Do not extend the tool’s scope by assuming that any small-looking screw meets this condition.
The Makita DF012D offers a different clutch and gear arrangement, but it also cannot judge the hole. For a controlled screwdriving trial, use gear 1, low speed, and a suitable numbered clutch setting rather than the drill symbol. A stronger tool or higher setting is not a repair for damaged material. Follow the actual fastening requirements before deciding that either driver is suitable.
Start with an unpowered alignment check
Before bit changes or setup adjustments, switch off, engage the tool’s lock (B on the Makita) and remove the battery. Fit a sound compatible bit, then set the fitting in position on the supported component. Check that the screw can approach on the intended axis without the tool body forcing it sideways. Keep fingers out of the possible screw exit path.
Where the furniture method permits, start the screw carefully by hand. Immediate resistance, sideways entry or a screw that will not stay aligned is a reason to stop. Do not use the motor to pull the fitting toward a mislocated hole or to make an unfamiliar connector accept an ordinary wood screw. Correct positioning must exist before tightening begins.
Use power only on a sound, specified setup
Wear eye protection and restore the correct battery only after the accessory and workpiece setup is complete. On the Milwaukee, use the low-speed driving arrangement and an appropriate trial setting; the M4 pack must be properly locked into place. On the Makita, retain the defined low-gear, numbered-clutch setup.
Drive cautiously while watching the fitting. Release the control before an unexpected rise in resistance becomes a stall, and stop at the required seat rather than waiting for the surface to crush. If the screw spins without drawing the fitting down, or if the material begins to split, end the powered attempt. Do not add torque to compensate for lost grip.
Record damage instead of hiding it
After fastening, inspect the panel and fitting according to the furniture instructions. A seated head is not enough if the hole has enlarged or the back face is damaged. Keep a failed sample or a clear note of the defect when requesting replacement hardware or a repair method.
Do not fill, enlarge or relocate the hole as an unplanned extension of this procedure. Those choices change the joint and may require a specific repair. An existing pilot hole is useful only when it belongs to the intended fastening and remains sound. The driver should follow that verified arrangement, not decide it by resistance alone.
Models referenced