
Divide an L-shaped floor without overlap
An L-shaped floor is split into two coloured rectangles by one shared dividing line.
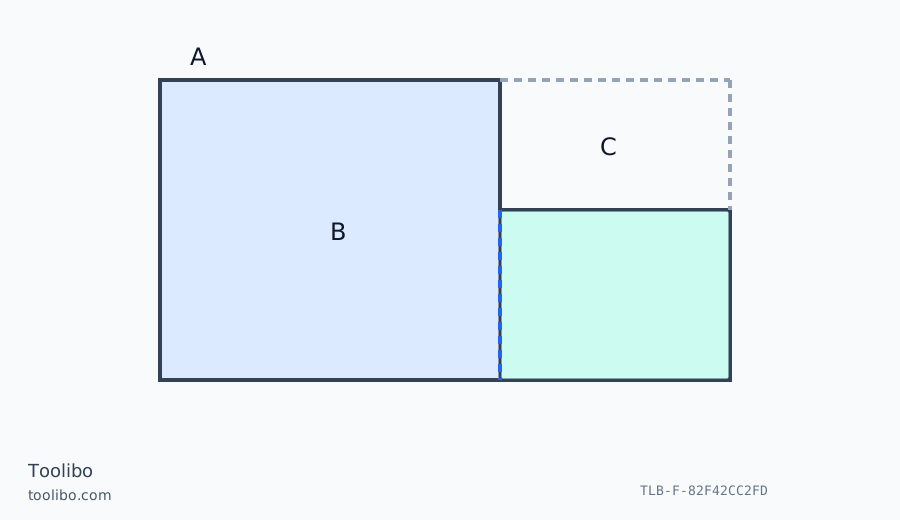
A
Draw the actual installation boundary.
B
Separate the outline into non-overlapping rectangles.
C
Keep the missing corner out of the total.
Add each non-overlapping region once; the empty corner is not part of the floor estimate.
Start with a rectangle you can describe
This article concerns the LD030P sold through Makita Mexico. Its controls include On/Measure, Area/Units and Clear/Off. The shared Area/Units control makes it important to check whether the display is asking for another dimension or showing a different unit. It covers distance, continuous measurement and area work. It is not a reason to borrow functions from the LD050P. For a small room, the useful first result is a labelled pair of dimensions, not merely the square-metre total.
Draw the floor outline and decide whether it is genuinely rectangular. Measure a clear length and a perpendicular width at a consistent height. Keep the beam on opaque, reasonably even surfaces and check that an open doorway does not expose a farther wall. Never point it at a person holding a target; secure the target before taking the reading.
Keep area and purchase quantity separate
For an illustrative 4 m by 3 m rectangle, the geometric area is 12 square metres. This arithmetic example is not a measured room or a recommended order quantity. Flooring waste, board direction, pack coverage and recesses belong in a separate purchase calculation. Keeping the two original distances lets you check a mistaken input without measuring everything again.
For an L-shaped room, divide the outline into non-overlapping rectangles. Mark the dividing line on the sketch, calculate each part and add them once. A single maximum length multiplied by maximum width would include the missing corner. Do not average widths across a recess to make the result look simpler.
Check the awkward boundaries
Skirtings, fitted cupboards and door thresholds can change the boundary you actually need. Note whether the material will run beneath removable trim or stop at its face. Measure short details directly where the laser cannot establish a clean target within the instrument’s permitted range.
Let a meter brought from a hot vehicle settle before important work. Store it clean and dry and follow its own battery instructions. Keep laser light away from eyes and optical instruments. This is a household quantity-planning method, not a proof of load capacity or safe structural clearance.
Plan flooring around the actual outline
Imagine a bedroom with a shallow doorway recess and a built-in wardrobe. Start by deciding what the flooring installer considers part of the covered area. The visible floor may not match the installation boundary if trim will be removed or flooring will continue into a cupboard. Draw the agreed boundary before doing arithmetic; a precise measurement of the wrong boundary is still the wrong quantity.
Divide an irregular outline into rectangles that share edges without overlapping. Label every rectangle on the sketch, and use the same labels in your calculation. If you subtract the wardrobe footprint from a large enclosing rectangle, do not also exclude that footprint in a second subdivision. Two mathematically valid methods can produce a wrong total when they are mixed.
Keep the original lengths in one unit. If the material is sold by square feet and your meter is set to metres, complete the geometric calculation consistently before making a deliberate conversion. Do not round each short measurement aggressively and then expect the total to retain its original precision. Record the final purchase allowance separately so it is clear which part is measured and which part is an ordering decision.
Before placing an order, check the product’s pack coverage, cutting pattern and recommended allowance with the supplier or installer. A narrow room with a diagonal laying pattern can create a different offcut problem from a similar-sized rectangular layout. This is not something the area mode can predict. Save the room sketch and the calculation together, so a change in product width or installation direction does not force you to guess how the original quantity was obtained.
Models referenced