
Cut a decorative oval through supported stages · Diagram
An oval inside a rectangular blank has several approach lines and a support under the retained centre.
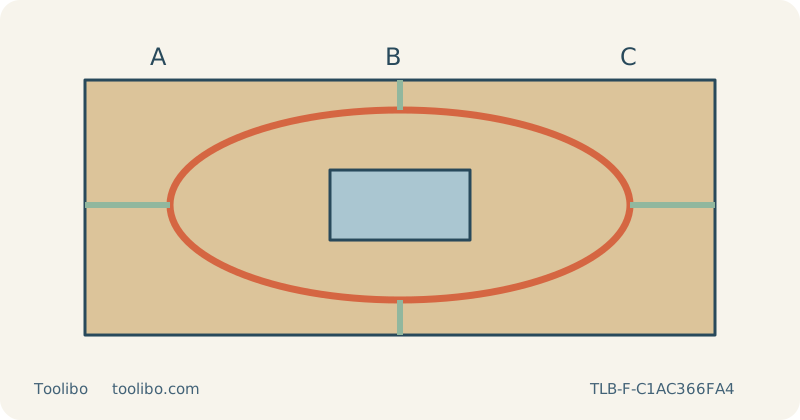
A
Test the narrow ends
B
Divide comfortable approaches
C
Support the retained oval
An oval inside a rectangular blank has several approach lines and a support under the retained centre.
Lay out a sign that the blade can actually follow
This project cuts a decorative oval from a loose, known, uncoated wood blank. It does not establish a hanging system, a load rating or suitability for an unknown painted board. Choose the finished outline to suit the planned lettering or display, then mark the retained oval and the surrounding waste clearly. Keep enough room outside the line to clamp and support the work during the early cuts.
The narrow ends of an oval are the most demanding turns. Copy one end onto matching scrap and test that geometry before committing the blank. A shape that looks smooth on paper can still be too tight for the selected blade in that thickness. Broaden the oval or choose another method if the sample requires twisting the blade, lifting the base or stopping in an unsupported position.
Select a curve blade and a reference face
Switch off and remove the battery, or unplug the corded saw, before fitting or inspecting a blade. Select a compatible curve blade intended for the wood and thickness. Seat it completely, support its back in the guide roller where required and check retention. Keep the guard intact and secure the base at zero bevel. The blade must remain long enough throughout its stroke without striking supports below.
Mark the face that will carry the lettering so the trial can assess surface breakout on the correct side. Leave a small finishing allowance outside the outline. A narrow blade that turns well may still leave a sloping cut face, so judge the top shape and the edge separately. Do not choose a blade solely because it came with the machine or because it made a clean straight cut in a thinner board.
Divide the oval into supported stages
Plan several comfortable approaches rather than assuming you must trace the whole oval without stopping. Clamp the retained area to a stable bench and independently support the waste sections. As pieces of the surrounding rectangle are removed, the remaining support changes. Check that the oval itself will still be supported when the last connection is cut, not only that the waste is prevented from falling.
Keep the full blade stroke clear underneath every stage and all clamps out of the base’s curved route. A hose or cord should follow behind the tool without wrapping around a clamp. If a new clamp position is needed, stop completely, isolate power and reposition the work before restarting. Do not reach under the moving blade or hold a nearly free section with your spare hand to finish a difficult part of the outline.
Follow the curve without using the blade as a lever
Wear eye and hearing protection and suitable respiratory protection, and arrange compatible dust extraction and ventilation. Begin with low or zero orbital action when judging the visible edge, selecting an appropriate speed from the blade and tool guidance. Support the front of the base, start with the blade clear of the wood and establish speed before feeding into the first approach.
Keep the base flat and advance steadily just outside the finished line. Slow the forward feed as needed for the turn without forcing the blade sideways. Stop if the blade resists, the base loses support, the work vibrates or the waste closes against the cut. At a planned stopping point, maintain control until the blade is fully stationary. A short pause in the drawing is preferable to continuing with an increasingly awkward grip.
Finish the retained oval and reassess mounting separately
After switching off, wait for the blade to stop completely before withdrawing it or setting the saw down. Remove the battery or unplug before handling the remaining connections or changing clamps. Once the oval is separated safely, clamp it for hand finishing. Smooth the allowance to the template and remove sharp fibres from both faces without erasing the intended outline unevenly.
Inspect the entire edge for splits and undercutting, especially at the narrow ends. A decorative shape that is complete is not necessarily ready to hang: choose and assess any mounting arrangement separately for the actual location and material. Do not use the sign-cutting procedure as evidence that a screw, adhesive or hanger will support a particular load. Keep the successful end-curve sample and record the blade if making another sign, then recheck support for the new blank’s dimensions.
Models referenced