
Cut a cable notch in a detached desk panel · Diagram
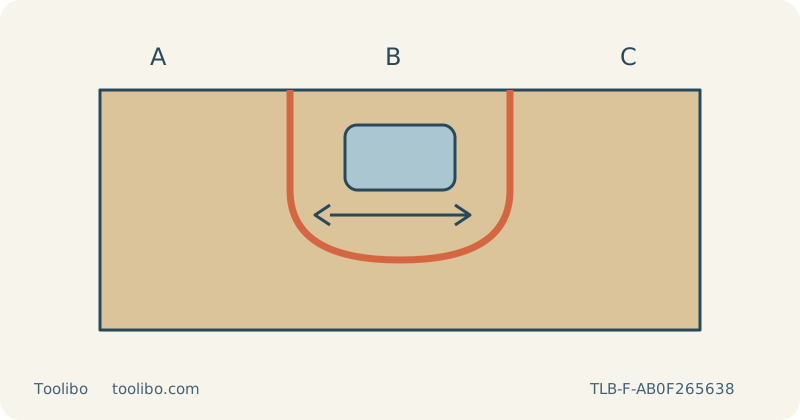
A broad open-edge notch surrounds a connector outline with a clearance arrow across its width.
A
Measure the largest connector
B
Cut the detached cable-free panel
C
Smooth both faces and the edge
A broad open-edge notch surrounds a connector outline with a clearance arrow across its width.
Work on a detached panel, not around live cables
An open-edge cable notch can let a connector pass behind a loose desk panel, but the cutting task starts with the panel removed and all cables elsewhere. This guide does not authorize cutting an assembled desk where electrical wiring, screws or brackets may be hidden. Use known, uncoated wood and inspect both faces and the proposed route before deciding that a jigsaw is appropriate.
Measure the largest connector that must pass through, not merely the cable diameter. Consider its orientation during insertion and the space needed after the edge is smoothed or a separately chosen protective fitting is installed. Mark a broad open-edge notch with a rounded inner end and identify the interior as waste. Avoid removing material from fixing locations or assuming that a particular remaining border guarantees structural strength.
Test the shape and blade before cutting the panel
Copy the rounded end onto matching scrap. Choose a compatible wood blade whose width can follow that turn and whose usable length covers the thickness throughout its stroke. Switch off and remove the battery or unplug the tool before installation. Seat the blade fully through the correct clamp procedure, locate its back in the guide roller where required and check retention. Secure the base at zero bevel.
If the test blade will not turn comfortably, broaden the notch or change the cutting method. Do not recover an undersized design by forcing a connector through the sample or by twisting the running blade to enlarge the corner. Leave a modest hand-finishing allowance inside the waste, and use the actual disconnected connector or a gauge only after the sample has been stopped, isolated and made safe to handle.
Support the notch waste and the whole panel
Clamp the retained panel on a stable bench, with independent support for the waste. Check that the small waste section cannot rotate into the blade as its connection narrows. Keep supports clear of the full moving stroke below the entire route, and keep clamps outside the base’s approach and turning space. Do not support the notch centre with a hand beneath it.
Plan separate entries from the open edge if one continuous turn would make the grip awkward. Each repositioning requires a complete blade stop and power isolation. Make sure the retained panel remains stable after the notch is separated. Route the saw’s own cord or extraction hose behind it, clearly apart from the future cable location; the cable being accommodated must not be present anywhere in the cutting setup.
Cut a broad rounded route with control
Wear eye and hearing protection and suitable respiratory protection. Use compatible dust control and ventilation. Select an appropriate speed, beginning with low or zero orbital action when inspecting a visible edge. With the base supported and the blade clear of the wood, start and establish speed before entering from the edge. Follow the waste side of the line without pushing faster than the blade can cut.
Keep the base flat as the route approaches its rounded end. If the panel vibrates, the blade leans, the waste begins moving or the base meets a clamp, stop immediately. Do not continue by lifting the base over the obstacle or by pulling a running saw backward through a binding kerf. Wait for the blade to stop fully, disconnect power, and improve the setup before deciding how to finish the remaining section.
Remove sharp fibres before checking cable clearance
After full stop and isolation, remove the waste and clamp the panel for hand finishing. Smooth the inner edge and both faces, looking for splinters that could catch a cable jacket. Check the disconnected connector’s passage and the intended cable path without forcing or sharply bending it. A hole that passes the plug can still leave an unsuitable edge where the cable rests.
Choose any protective edging or fitting according to its own dimensions and instructions, then reassess the final clearance. This woodworking guide does not certify electrical safety, strain relief or a minimum cable bend radius. Reinstall the panel only after its original fixing arrangement remains sound and all debris has been removed. If the notch has cut into a fixing point or split the retained wood, resolve that damage before returning the desk to use rather than concealing it behind the cable.
Models referenced