
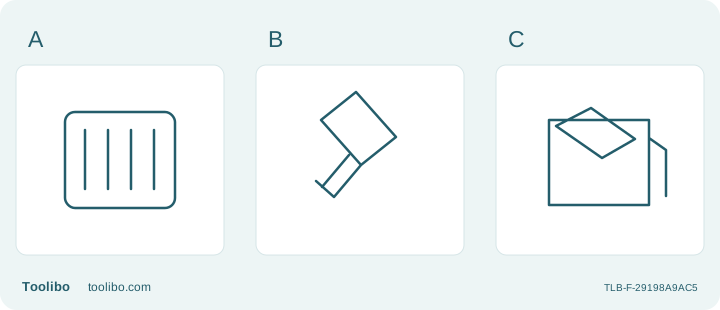
An intake grille, exterior brush and housing cloth
An intake grille, exterior brush and housing cloth.
A
Inspect accessible intake slots with power disconnected.
B
Brush only loose exterior dirt outward with a soft dry brush.
C
Use the permitted damp cloth on housing, not inside openings.
Use a soft dry brush only at accessible intake openings and mild soap on a damp housing cloth; an internal obstruction belongs with service.
Decide whether the tool needs cleaning or service
Routine cleaning of the US Wagner FURNO 300 concerns the outside of the housing and accessible intake openings. It is not a diagnostic repair procedure. Before reaching for a brush, look at the disconnected, fully cooled tool for cracks, melted areas, a damaged lead, loose parts or an obstructed opening. If the problem is physical damage rather than surface dirt, stop using the tool and seek appropriate service.
Keep the reason for cleaning specific. Dust resting at the intake is different from adhesive apparently lodged beyond the grille. A sticky housing is different from a distorted outlet. This first distinction prevents a straightforward maintenance task from expanding into probing the inside of an electrical tool. It also gives a service provider a clearer account if external cleaning cannot resolve the visible problem.
Start with a fully cooled and disconnected gun
Complete the shutdown described in the supplied FURNO 300 instructions and disconnect before cleaning. This model’s lower operating position still produces heated air; do not use it as a supposed cold-air cleaning cycle. Leave the tool in its prescribed stable position until the nozzle and surrounding parts have cooled. Plan cleaning after the work session rather than interrupting a hot process with a damp cloth.
Move the cold tool to a clean, dry work area where removed dirt will not fall into the outlet. Keep the plug away from the cloth and any cleaning supplies. Arrange a soft dry brush, a soft cloth and only the mild soap needed for the permitted housing cleaning. Having the correct materials ready reduces the temptation to substitute a nearby strong household cleaner or a sharp implement.
Brush accessible intake dirt outward
Wagner specifies a soft, dry brush for periodically clearing the intake openings. Work on the accessible exterior without pushing bristles or another object deep into the slots. Remove loose dirt gently and check the openings in good light. The purpose is to clear the path through which air enters, not to scrub an internal component that cannot be reached safely from outside.
If material remains lodged behind an opening, stop at that boundary. Do not remove the housing, insert a wire or use the gun’s own airflow to blast the obstruction out. This guide does not add compressed-air or liquid-flushing methods to the manufacturer’s cleaning instructions. An obstruction that cannot be removed by the permitted external method needs manufacturer guidance before the next use.
Wipe the housing with the permitted cleaner
For the housing, the documented method is mild soap with a damp cloth. Damp does not mean dripping: apply the moisture to the cloth rather than spraying or pouring cleaner over the tool. Work on the external surface without forcing liquid toward switches, seams or air openings. Never immerse any part of the tool, and keep liquid from entering the housing.
Many household cleaners contain ingredients that can damage the plastic. Do not substitute a product merely because it is labeled all-purpose or because it removed a similar mark from another appliance. If ordinary dirt does not lift with the permitted mild method, leave the stubborn mark and ask Wagner about an appropriate next step. The cosmetic benefit of a perfectly clean housing does not justify weakening or contaminating it.
Leave nozzle color out of the cleaning target
The FURNO 300 instructions explain that the nozzle can darken with use. That appearance alone is not a reason to polish it back to bright metal. Focus the cleaning decision on actual dirt, physical damage and obstructed airflow rather than color. Aggressive sanding or solvent treatment can introduce new problems while doing nothing useful for the intended maintenance.
At the same time, do not use normal darkening as an explanation for every change. A bent outlet, cracked component or loose fitting needs its own assessment. Record what you can observe without dismantling the tool. If an unusual mark appeared together with abnormal operation, include that context when seeking service instead of assuming that either cleaning or more heat will make the issue disappear.
Check the result before returning to use or storage
After external cleaning, let the tool dry fully before reconnection. Inspect the intake, housing and lead again in good light. Confirm that the brush has not left loose material near the openings and that the cloth has not snagged on a sharp or damaged area. If liquid may have entered the tool, do not switch it on to dry it; obtain manufacturer guidance instead.
Keep the cleaned gun in a dry place where loose workshop debris will not immediately settle into the intake. Note whether the same obstruction returns unusually quickly, because changing the work area’s cleanliness may be more useful than repeated wiping. A clean exterior does not prove an internal fault has been repaired. If the original concern was abnormal heating, noise or repeated interruption and it remains, stop using the tool and describe the symptom to service rather than opening the housing.
Models referenced